- What Can Be Animated?
- Events
- Motion Presets
- Page Transitions
This chapter is from the book
This chapter is from the book
This chapter is from the book
Motion Presets
As you probably noticed while working through the previous exercises, InDesign includes an extensive assortment of motion presets to get your content moving (Figure 4.11). The presets are the same ones you'll find in Adobe Flash CS5 Professional, and you can also import any custom presets that have been created in Flash Professional. You can create custom motion presets in InDesign, save them for future use, and share them with other InDesign users or Flash designers. There's just no end to the flying, dancing, bouncing fun you can have with motion settings.
)
Figure 4.11 How many motion presets ship with InDesign? Feast your eyes. And restrain yourself—you don't have to use every single one in your project. The motion presets below the dividing line include special effects such as multiple stops or disappearing in smoke.
But maybe that's not enough for you. Maybe you want more.
Motion Paths
If you want to make an object move along a more interesting path than just straight up or left to right, it's surprisingly easy to do: You just have to draw the path you want the object to follow. You can use the Line tool, the Pen tool, or the Pencil tool—anything that creates a Bézier path. The path can be a simple straight line or a complicated curlicue. The stroke attributes of the line aren't important; its appearance is discarded once it's designated as a motion path.
Creating a Custom Motion Preset
In this exercise, you'll work on a child's birthday party invitation, modifying existing presets and saving them as custom presets. You will also be creating several custom motion paths and saving their settings as custom presets.
- Navigate to the Motion Presets folder inside the Ch_4_Exercises folder, and open InviteStart.indd. Resave the file as InviteWorking.indd in the same folder. If you want to see the finished file, open InviteDone.indd and preview it.
- In the Layers panel, make sure the Moon layer is selected and unlocked. Select the Line tool (
 ), and draw a diagonal line from the center of the blue moon to the upper-right corner of the page (Figure 4.12). Leave some room for the moon to grow larger as it rises.
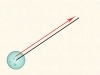
Figure 4.12 Using the Line tool, start at the center of the moon, and drag up to the upper-right corner of the page. Don't go all the way to the corner; leave some room for the moon to grow larger.
Now you'll convert the diagonal line to a motion path. Select both the path and the moon, and click the Convert to Motion Path icon (
 ) at the bottom of the Animation panel. Use the following settings:
- Event: On Page Load
- Duration: 2 seconds
- Speed: Ease Out
- Animate: From Current Appearance
- Animate Scale: 150%
- Visibility: Hide Until Animated
These settings will hide the moon until it begins to rise and grow larger. If necessary, tweak the length and angle of the path—you have to allow for the increase in the diameter of the moon so it isn't cropped by the edge of the page.
- Lock the Moon layer, and click the visibility control by the Once in a Blue Moon layer to make it visible. Select the layer to target it.
- Using either the Pen or the Pencil tool, create a curved path that will bring the "Once in a Blue Moon" text in along a short counterclockwise arc (Figure 4.13). Start below the text, and end the curved path near the center of the text. You'll designate this path as a motion path after you choose the initial motion preset.

Figure 4.13 Create a short, counterclockwise arc to guide the blue text up to the top of the page.
- In the Animation panel, choose the Fade In preset as a start, and use the following settings:
- Event: On Page Load
- Duration: 2.5 seconds
- Speed: From Preset
- Animate: To Current Location
- Animate Scale: 120%
- Visibility: Hide Until Animated
- Select the arc path and the text (which have already been converted to outlines), and click the Convert to Motion Path icon at the bottom of the Animation panel.
- The moon should start rising, followed by the appearance of the text. Use the Timing panel to control when each component plays. Select both animations in the Timing panel, and click the Play Together link at the bottom of the panel (Figure 4.14). (Ignore the existing animation in the Timing panel; it will make its appearance later in the exercise.) Preview the animation, save the file, and keep it open.
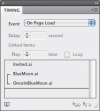
Figure 4.14 Synchronize the moonrise and the blue text so they play together.
- Now you'll create a motion path and save it as a custom preset that you can use for other objects. Hide the Party, Once in a Blue Moon, and Moon layers. Reveal the Balloons layer, and select it to target it. With the Pen or Pencil tool, create an S-shaped path that starts at the center of the green-and-purple balloon and stops short of the top of the page (Figure 4.15). You'll probably want to tweak the path after you test the animation; you want the balloon to float upward, but not off the page. Remember that the stroke attributes of the path aren't important; it becomes invisible once it's designated as a motion path.

Figure 4.15 Create an S-shaped path for the green-and-purple balloon to follow as it floats upward.
- Select the balloon and the path, and click the Convert to Motion Path icon at the bottom of the Animation panel. Use the following settings:
- Event: On Page Load
- Duration: 3 seconds
- Speed: None
- Animate: From Current Appearance
- Animate Scale: 100%
- Opacity: Fade Out
- To save the balloon motion as a motion preset, choose Save from the Animation panel menu. Name the motion preset Balloon Float in the Save Preset dialog (Figure 4.16) and click OK.
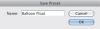
Figure 4.16 Name your new motion preset.
- Now you'll apply the new custom motion preset to the other balloon. Select the purple-and-yellow balloon, and choose the Balloon Float preset in the Animation panel; notice that it's displayed in a separate part of the Preset pull-down menu, near the top. That's where your custom presets will appear. Examine the settings. Everything you specified for the first balloon has been stored in the preset, giving you a big head start on the second balloon. Change one thing: Set the Opacity to None, so the second balloon doesn't fade out.
- Preview the animation. Reposition the purple-and-yellow balloon if it flies off the left side of the page. If you wish to edit the balloon's motion path, select the balloon, then switch to the white arrow and select the motion path. Once it's selected, you can move, add, or delete anchor points to change its travel. Such edits will not alter the custom motion preset you created—the changes will apply just to this balloon's animation.
- It would be nice if the second balloon appeared in front of the text at the top of the invitation. In the Layers panel, turn the visibility of the Once in a Blue Moon layer back on, and unlock the layer. Select the purple-and-yellow balloon in the Balloons layer, and use the small blue target square in the Balloons layer to push the balloon up to the topmost layer (Figure 4.17).
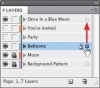
Figure 4.17 Move the purple-and-yellow balloon up to the Once in a Blue Moon layer by pushing the blue target square up to the top layer.
- Reveal the Party layer, and select the "We Have a Party" text. In the Animation panel, choose the Fade In preset and use the following settings:
- Event: On Page Load
- Duration: 3.5 seconds
- Speed: From Preset
- Animate: From Current Appearance
- Animate Scale: 200%
- Opacity: Fade In
- Visibility: Hide Until Animated
- Finally, reveal all layers. The text in the You're Invited layer has already been animated. All you have to do is slightly rearrange the order in the Timing panel and link most of the animations together.
- In the Timing panel, drag the Invited.ai animation to the bottom of the list. Drag balloon.ai and balloon2.ai up in the timing list so they're just below BlueMoon.ai (Figure 4.18). Select all of the animations except Invited.ai, and link them so they start together on page load. They have different durations, so they don't all finish simultaneously. Preview the animation, save the file, and keep it open.
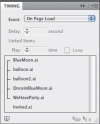
Figure 4.18 Arrange the animations in the Timing panel as shown. Link all the animations except .
)
)
)
)
)
)
)
Exporting and Importing Motion Presets
Motion presets are not document-specific. When you save a preset, it becomes part of InDesign's arsenal for all documents. You should save the Balloon Float preset in case you ever need it again.
- From the Animation panel menu, choose Manage Presets. Select the Balloon Float preset at the top of the list, and then click the Save As button. You can save motion presets anywhere; they're just XML files. Navigate to the Motion Presets folder inside the Ch_4_Exercises folder, name the preset BalloonFloat.xml, and click Save. You have to save presets one at a time, so if you want to store multiple custom presets, you'll have to export them like this, one by one. Keep the Manage Presets dialog open for the next step.
- So you'll know how to import custom motion presets, you'll delete the Balloon Float preset and then re-import it. Select the Balloon Float preset and click the Delete button. InDesign warns you that there is no undo for this move (Figure 4.19); click OK.
Figure 4.19 InDesign warns you that deleting a motion preset in the Manage Presets dialog cannot be undone.
- Back in the Manage Presets dialog, click the Load button, navigate to the folder where you saved the BalloonFloat.xml file, select the file, and click Open. Although you must save presets one at a time, you can load multiple motion presets at once. Preview the file one last time, and tweak anything you'd like to change. You're finished with this exercise; you can close the file.
)
In this exercise, you played with a number of motion presets, learned how to create and use a motion path, and learned how to save and load custom motion presets. You should feel more familiar with the controls in the Animation panel and the wonderful selection of motion presets InDesign gives you. You should also be starting to get a sense of how you can combine durations and animation order in the Timing panel to make things happen when you want. And it's all pretty easy, isn't it?