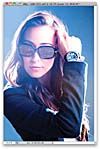
The Post-Processing
This shot makes use of the blown-out, lens-flare look to some extent, but we’re going to enhance that effect quite a bit in Photoshop. We’re also going to add a cool blue tint to the image, and then composite in a reflection of New York City’s skyline in her sunglasses (adding a reflected image in the sunglasses that wasn’t really there is pretty popular these days). Although this might seem like a pretty simple retouch at first, I think you’ll be surprised at how many things we have to deal with along the way to get to the final image.
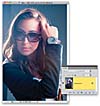
STEP ONE: Here’s the original RAW photo out of the camera open in Camera Raw. While the hair on both sides is pretty well lit, and there’s a nice rim light going down her arm and shoulder, her face is a little dark, and it doesn’t look as “blown out” as we’d like. So, we’ll start working on that in the next step (I just wanted us to take a look at our original starting image first).
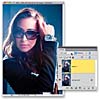
STEP TWO: If an image looks underexposed, you can often get to a pretty good starting place by simply clicking on the Auto link (shown circled here in red) and seeing what it does. If it looks okay (like it does in this case, where her face, and the entire image for that matter, is brighter and more balanced), then you can tweak things from there. If you click on the link and it doesn’t look good, no biggie—just press Command-Z (PC: Ctrl-Z) to Undo it. Even after applying Auto, we’ll still want to bump up the highlights here a little more (even if it clips a tiny bit), so drag the Exposure slider to the right to +0.35.
STEP THREE: To add a cool blue tint to the image, click on the Split Toning icon at the top of the Panel area (it’s the fifth icon from the left). We’re not going to actually add a split tone effect here (where you have one color applied to the highlights and a different color applied to the shadows), we’re just going to adjust the shadows, so it’s more like a duotone effect instead. First, increase the Shadows Saturation to around 43 (so you can see the color appear in the image), then drag the Shadows Hue slider to the right to 240 to give you the nice bluish tint you see here. It’s just applied to the shadow areas, so you can still see some of the original color and skin tones.
STEP FOUR: Go ahead and click the Open Image button at the bottom right of the window to open the photo in Photoshop. Here, you can see the full image and how the blue tint looks overall. Now, there are two things we need to do to enhance the contrast and the blown-out effect (two totally different things that actually work together).
STEP FIVE: To bring some contrast back into the image, press Command-J (PC: Ctrl-J) to duplicate the Background layer, then change the layer’s blend mode from Normal to Soft Light (as shown here). This adds more contrast and snap to the image, but it also made some of the areas in her coat a little dark, as well.
STEP SIX: Now, to help us get that blown-out look, first we’re going to create a merged layer (a layer on top of the layer stack that looks like a flattened version of our image) by pressing Command-Option-Shift-E (PC: Ctrl-Alt-Shift-E). Once the merged layer appears at the top of the layer stack, change its blend mode to Screen. This makes our contrasty image look much brighter, and really gives us that blown-out look. But, because we did the Soft Light move first, the image still has nice contrast, even though it’s very bright.
STEP SEVEN: The large wristwatch our subject is wearing is one of the focal points in our image, so we don’t want the face of it to look all blown out. We’ll do a quick 30-second trick to fix it. Create another merged layer on top of your layer stack and change its blend mode to Multiply to make the entire image much darker.
STEP EIGHT: Of course, we don’t want the entire image to be darker and more contrasty—just the watch. So, press-and-hold the Option (PC: Alt) key and click on the Add Layer Mask icon at the bottom of the Layers panel. This puts a black mask over your Multiply layer (as seen here) and now that dark layer is hidden from view. So, get the Brush tool (B), choose a small, soft-edged brush, set your Foreground color to white, and then begin painting over the face of the watch, and the diamonds around it, to reveal the darker version of the wristwatch (as seen here).
STEP NINE: One of the problems we have to deal with next is that you can see the edge of the seamless paper behind her on the left side. Now, you could try to clone away that edge, but I tried it, and it’s trickier than you might think (and definitely more time consuming than what I’m going to show you). Start by creating another merged layer at the top of the layer stack, and then click on the Create a New Layer icon at the bottom of the Layers panel to create a new blank layer above that (that’s where we’re going to do our painting). We’ll work on the seam on the top left first, so get the Eyedropper tool (I), and click it once just to the left of her hair (as shown here) to make that light blue color your new Foreground color.
STEP 10: Now, switch back to the Brush tool, choose a small, soft-edged brush, and paint over that entire area where the seam is—all the way over to the left corner. There’s going to be an area, though, almost right above her hair, where the lighter blue color you’ve been painting with collides with the darker blue found up there. If you don’t do something to blend the two together, you’re going to see a new seam up there where they clash. The trick to making these blend is to go up to the Options Bar and lower the brush Opacity to 50%. Then, paint over that area, and the lighter blue color will blend nicely with the darker blue, and you won’t see a hard seam where the two overlap.
STEP 11: Next, let’s work on the bottom-left corner. First, click on the merged layer near the top of the layer stack, then get the Quick Selection tool (W) and paint over that area in the bottom left to put a selection around it (as shown here. It takes all of five seconds). Now, switch back to the Brush tool. You’re going to have to sample the light blue color that’s down there, but luckily you can do that without switching tools in the Toolbox. Just press-and-hold the Option (PC: Alt) key and your Brush tool temporarily changes into the Eyedropper tool (for as long as you have the Option key held down). Then, click it on that lighter blue color, let go of the Option key, and you’re back to the Brush tool.
STEP 12: Create another new blank layer, drag it to the top of the layer stack, and then start painting over that darker blue area with your light blue color, until the seam is gone (as shown here). Now, you can Deselect by pressing Command-D (PC: Ctrl-D), but we’re not quite done yet.
STEP 13: While you’re cleaning up the background, get the Clone Stamp tool (S), increase the Hardness setting in the Brush Picker to around 70%, and start cleaning up any stray hairs (as shown here). Option-click (PC: Alt-click) to sample a nearby area and focus on the stuff that sticks way out from her head. Also, while you’re near the face, get the Healing Brush tool (press Shift-J until you have it) and remove any obvious facial blemishes by making your brush size a little larger than the blemish you want to remove, then Option-clicking on a nearby area of clean skin. Make sure All Layers is selected from the Sample pop-up menu in the Options Bar, then move your cursor over the blemish, and click once to remove it.
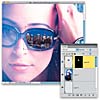
STEP 14: Now, we’ll put an image into the lenses of her sunglasses (after all, you can see my legs, and the studio floor, and well...it looks kinda lame). So, create another merged layer at the top of the layer stack, and then make a selection around one of the lenses with the selection tool of your choice. Here, I used the Magnetic Lasso tool (press Shift-L until you have it). To use it, click once on the edge of one of the lenses, and just move your cursor all the way around the lens, clicking to drop selection points—it senses where the edge is and snaps your selection to it (it’s one of the most underrated selection tools). Once you have a lens fully selected, go under the Select menu, under Modify, and choose Contract. Enter 2 pixels (as shown here) and click OK to shrink the selection in a bit. We do this so that a little area of black shadow remains around the edge of the lens, so when we paste our image in, it looks like it’s inside the frame, rather than stuck on top of the lens.
STEP 15: Open the image you want to put inside the sunglasses (in this case, an image of the Manhattan skyline at dusk, courtesy of iStockphoto.com), press Command-A (PC: Ctrl-A) to select the entire image, then press Command-C (PC: Ctrl-C) to Copy it.
STEP 16: Now, go back to your portrait image, where your lens selection should still be in place. Go under the Edit menu, under Paste Special, and choose Paste Into to paste your copied skyline image into the frame. Once it’s pasted, you’ll see that it’s much more contrasty, it doesn’t have the blue tint, and it’s way too large. So, what do you say we scale it down, tint it blue, and make its contrast match the rest of the image? (Note: If your selection wasn’t entirely perfect, you can switch to the Brush tool and paint with white to add to the selection, or paint with black to remove areas from it.)
STEP 17: Press Command-T (PC: Ctrl-T) to bring up Free Transform around your pasted image. Then, press-and-hold the Shift key, click on one of the corner points (press Command-0 [zero; PC: Ctrl-0] to see the corner points), and drag inward to scale the image down so it fits within the frame. Move your cursor outside the bounding box, and you’ll see it changes into a two-headed arrow cursor. Click-and-drag slightly downward to rotate the skyline to fit the angle of the sunglasses (as shown here). Now, press Return (PC: Enter) to lock in your transformation. Okay, that takes care of the size problem.
STEP 18: We’re going to tackle the other two problems at once (lowering the contrast and adding a blue tint) and we’ll start by bringing back the selection around the lens. So, press-and-hold the Command (PC: Ctrl) key and, in the Layers panel, click directly on the black layer mask attached to your skyline layer. This loads the lens selection. Now, add a new blank layer, then switch to the Eyedropper tool, and click once on the other lens, down near the bottom where the blue tint is, to make that your Foreground color. Press Option-Delete (PC: Alt-Backspace) to fill the blank layer with that blue color and then just lower the Opacity of this layer to around 70%. This puts the blue tint over the city and makes it less contrasty (killing two birds with one stone). Now, you can deselect.
STEP 19: Before we go on, create another merged layer at the top of your layer stack, because we’ll need to make a selection from a flattened version of the image. Now, you’re going to do the same thing to the other lens in the sunglasses: Make a selection around the inside of frame, then contract the selection by 2 pixels. Select and copy the skyline image, then go under the Edit menu, under Paste Special, and choose Paste Into. Then, use Free Transform to scale the pasted image down to size, and rotate it a bit to match the angle of the sunglasses.
STEP 20: Finally, we’ll lower the contrast and add the blue tint the same way we did in Step 18: Load the lens selection, and then add a new blank layer. Your Foreground color should still be the blue tint you used in the first lens, so press Option-Delete to fill the layer, lower the layer’s Opacity, and then deselect.
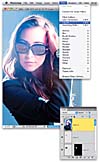
STEP 21: Now, we’re pretty much done, but when I zoomed out on the image, I noticed something we should’ve fixed earlier—there are three folds in her jacket on the underside of her arm. But, we’ll easily use the Liquify filter to get rid of them (this filter lets you move the image like it was a thick liquid.) First, though, create a new merged layer one more time and then, from the Filter menu, choose Liquify.
STEP 22: Choose the top tool in the toolbar on the left (W; the Forward Warp tool) and then set your Brush Size just a tiny bit bigger than the folds you want to remove. Now, just click-and-push them in, so they line up with the rest of the jacket, and push out any areas that dip in. Click OK when you’re done.
You can see the finished image shown full-page size at the beginning of this chapter.


