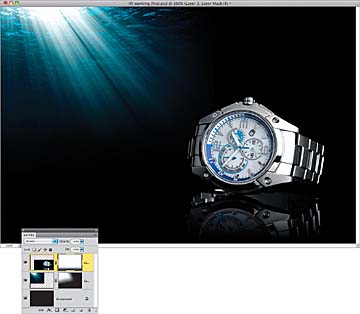
Cool Watch Ad
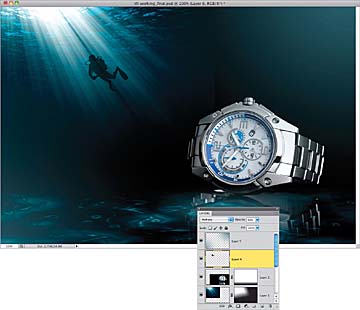
If you’ve ever flipped through some of the high-end fashion magazines, there are always a few of those classy watch ads. I like them because they have a very sleek look to them. Here, I thought we would take a different approach and create a watch ad that gives an underwater perspective.
STEP ONE:
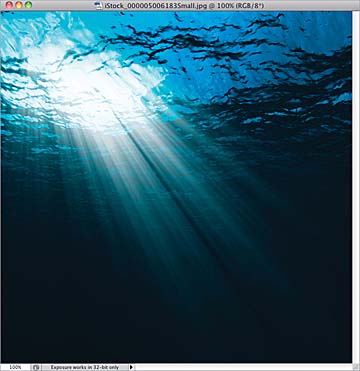
We’ll start with this underwater image I downloaded from iStockphoto (www.istockphoto.com). It seems to fit with what we’re going for here, so we’ll start building the design around this image.
©ISTOCKPHOTO/SEBASTIAN MECKELMANN
STEP TWO:
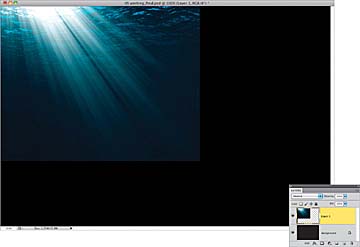
Now press Command-N (PC: Ctrl-N) and create a new blank document measuring 12 inches wide by 8 inches tall at 100 ppi. Press D to set your Foreground color to black, and then press Option-Delete (PC: Alt-Backspace) to fill the Background layer with black. Then, use the Move tool (V) to click-and-drag the underwater image into this new document. Position it so the light beams are just coming in at the top-left edge of the canvas area, like you see here, and use Free Transform (press Command-T [PC: Ctrl-T]) to increase the size of the beams a bit. Press Return (PC: Enter) when you’re done.
STEP THREE:
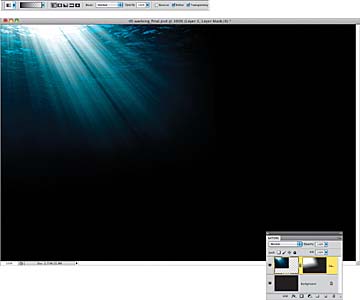
Next, click on the Add Layer Mask icon at the bottom of the Layers panel to add a layer mask. Then, get the Gradient tool (G) from the Toolbox and, in the Options Bar, click on the down-facing arrow to the right of the gradient thumbnail and choose the Foreground to Transparent gradient (the second gradient from the left in the top row). With your Foreground color set to black, click-and-drag from outside the underwater image to just over the edge of it to fade it into the black background on the bottom and right side.
STEP FOUR:
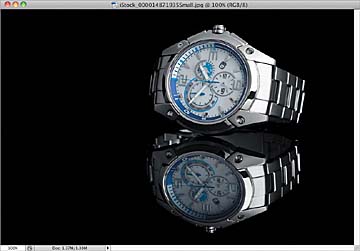
Now, open the image of the watch. Here, we have one that is on a black background and already has a reflection that we can work with. Since the overall composition is going to be mostly black, it will be easy to blend. So, go ahead and click-and-drag or copy-and-paste this image into the working layout.
©ISTOCKPHOTO/MOREPIXELS
STEP FIVE:
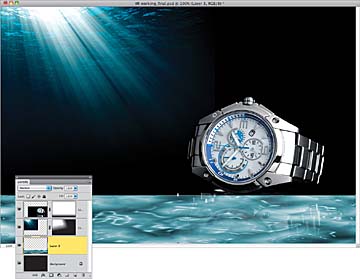
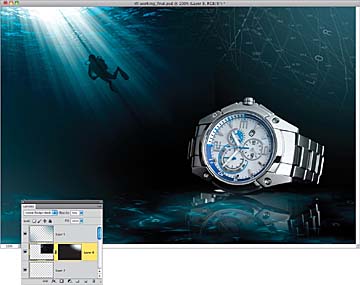
Position the watch in the lower-right area of the composition, like you see here, and use Free Transform to make it a little bigger. Change the layer’s blend mode to Screen to make the watch’s black background blend into the working background. Then, add a layer mask and use the Foreground to Transparent gradient again to fade the reflection a little bit (click at the bottom of the reflection and drag up).
STEP SIX:
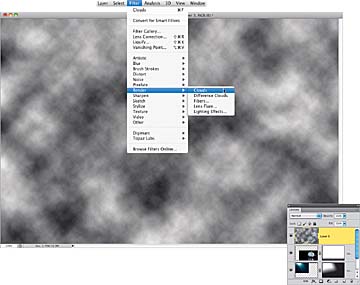
Now, we need to create a more visible surface for the watch to sit on. True, there is a reflection, which helps, but it’s not enough. I really want to see the refracted light reflection on the same surface the watch seems to sit on. For that I am going to use an old trick from years ago that will work great here. Make sure your Foreground and Background colors are the default black and white, and then click on the Create a New Layer icon at the bottom of the Layers panel to create a new blank layer. Next, go under the Filter menu, under Render, and choose Clouds. There’s no dialog for this filter—its results will just reflect in your image window (as shown here).
STEP SEVEN:
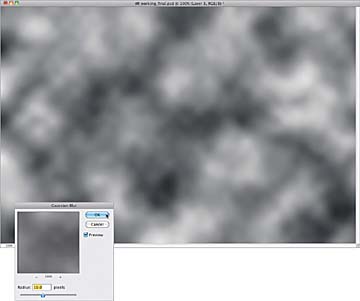
Go under the Filter menu, once again, this time under Blur, and choose Gaussian Blur. Set the Radius to 10 pixels and click OK.
STEP EIGHT:
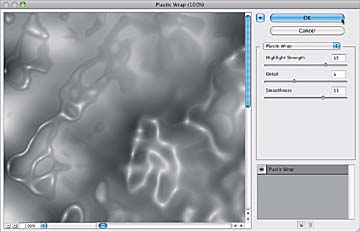
Again, go under the Filter menu, this time under Artistic, and choose Plastic Wrap. Set the Highlight Strength to 15, the Detail to 6, and the Smoothness to 11. You can see the effect starting to take shape at this point. Click OK when you’re done.
STEP NINE:
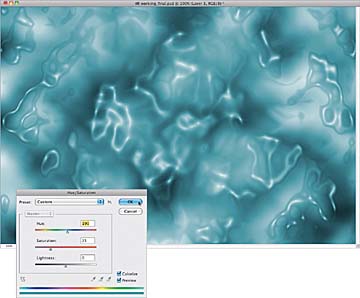
Now, let’s change the color of this texture layer to better match our background image. Press Command-U (PC: Ctrl-U) to open the Hue/Saturation dialog. Turn on the Colorize checkbox and increase the Hue to 190, and then click OK.
STEP 10:
Now, in the Layers panel, click-and-drag this texture layer just above the Background layer. Then, go into Free Transform mode and click-and-drag the top-middle control handle down to the bottom edge of the watch. Press Return (PC: Enter) to lock in your transformation.
STEP 11:
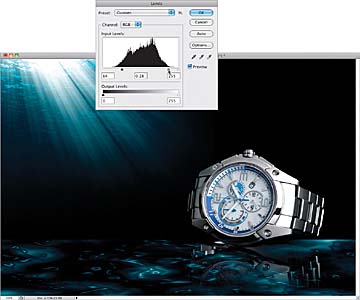
Press Command-L (PC: Ctrl-L) to open the Levels dialog and move the Input Levels shadows (black) and midtones (gray) sliders to the right to boost the contrast, making it look more like light reflecting on the ocean floor. Click OK.
STEP 12:
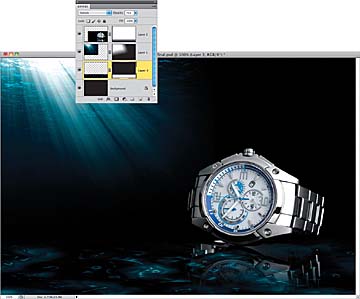
Change the layer’s blend mode to Screen and lower its Opacity to 75%. Then, add a layer mask and blend the hard edge at the top of the texture layer into the background with a Foreground to Transparent gradient (like we did with the watch reflection, but this time, dragging from above the texture layer downward).
STEP 13:
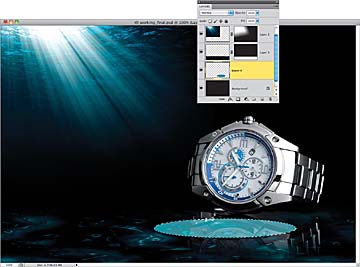
Now, with the floor texture in place, I can see that the area around the base of the watch could use a subtle light enhancement to bring out the reflection a bit more. Command-click (PC: Ctrl-click) on the Create a New Layer icon at the bottom of the Layers panel to place a new layer under the currently active one. Get the Eyedropper tool (I) from the Toolbox and click in the light beam area of the image to sample the teal color, making it your Foreground color. Then, get the Elliptical Marquee tool (press Shift-M until you have it), draw a long oval selection just below the watch, and press Option-Delete (PC: Alt-Backspace) to fill the selection with the sampled Foreground color.
STEP 14:
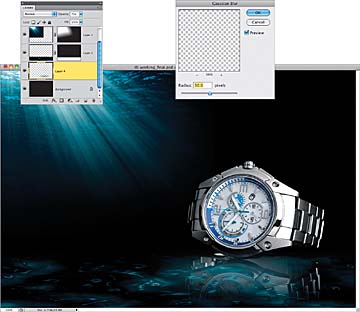
Press Command-D (PC: Ctrl-D) to Deselect. Then, go under the Filter menu, under Blur, and choose Gaussian Blur. Set the Radius to 30 pixels and click OK. Next, just drop the layer’s Opacity down to 75% and, as you can see, we have a nice, subtle light effect that blends with the background quite nicely.
STEP 15:
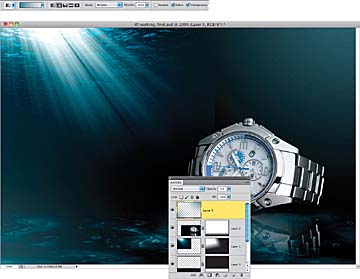
Now let’s add some more of that teal color to the surrounding area to get more of that aquatic underwater feel. Create a new blank layer at the top of the layer stack, then get the Gradient tool with the Foreground to Transparent gradient again, but this time, click on the Radial Gradient icon in the Options Bar (the second icon to the right of the gradient thumbnail). With your Foreground color still set to the same teal color we used a moment ago, click-and-drag a couple of gradients in the upper-right and bottom-left corners. Then, lower the layer’s Opacity to 75%.
STEP 16:
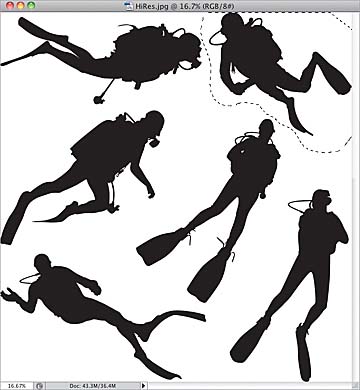
Next, let’s add a diver in the background. Since it will merely be a silhouette, a simple graphic of a diver will do fine. Here, I found a set of diver images at iStockphoto. This way, I have a set I can choose from for future use. Get the Lasso tool (L) from the Toolbox and draw a selection around the diver in the upper-right corner, then press Command-C (PC: Ctrl-C) to Copy the selected graphic.
©ISTOCKPHOTO/TULAY OVER
STEP 17:
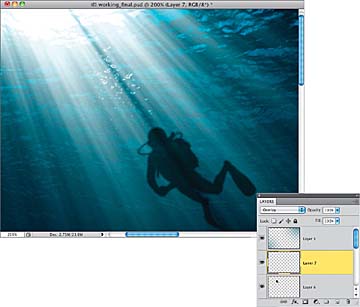
Press Command-V (PC: Ctrl-V) to Paste the diver into your working layout, then go into Free Transform, press-and-hold the Shift key, and decrease the size of the diver (press Command-0 [zero; PC: Ctrl-0] to reach the corner handles). Press Return (PC: Enter) to lock in your transformation. In the Layers panel, position this layer under the gradient layer we just created back in Step 15. Then, use the Move tool to move the diver in the middle of the light beams. To get rid of the white background area, just change the layer’s blend mode to Multiply and drop its Opacity to 60%.
STEP 18:
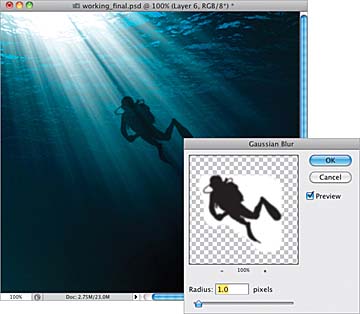
Now, because the diver is underwater and is in the distance, the edge detail would not realistically be as sharp. So, go under the Filter menu, under Blur, and choose Gaussian Blur. Set the Radius to 1 pixel and click OK.
STEP 19:
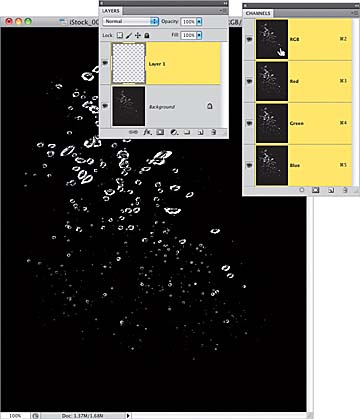
Let’s add a bubble effect to finish off the diver in the water. Here, we have a simple image of bubbles on a white background. To quickly extract them, create a selection by pressing Command-I (PC: Ctrl-I) to Invert the image, then go into the Channels panel (Window>Channels) and Command-click (PC: Ctrl-click) on the RGB channel. Go to the Layers panel and create a new blank layer. Press D, then X to set your Foreground color to white, and press Option-Delete (PC: Alt-Backspace) to fill the selection with white. Press Command-D (PC: Ctrl-D) to Deselect.
©ISTOCKPHOTO/MUTLU KURTBAS
STEP 20:
Next, click-and-drag or copy-and-paste the selected bubble layer into the working layout and place it above the diver layer in the Layers panel. Go into Free Transform mode and scale and position the bubbles just above the diver, like I have them here. Finally, change the layer’s blend mode to Overlay.
STEP 21:
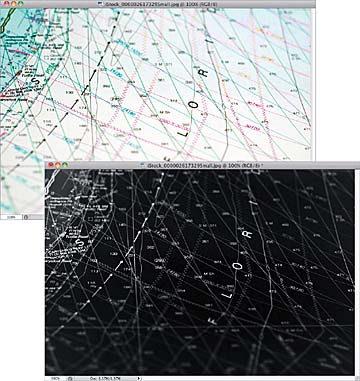
Okay, we are almost done. Looking at the overall layout, I can see that the upper-right corner area could use a little something. To go along with the whole diving theme, we have a cool nautical map to add as another background element. Open the nautical map image and remove the color by pressing Command-Shift-U (PC: Ctrl-Shift-U). Then, invert the image, like we did with the bubbles.
©ISTOCKPHOTO/SAXIFRAG
STEP 22:
Now, go ahead and click-and-drag or copy-and-paste the map image into the working layout, and use the Move tool to position it in the upper-right corner, making sure its layer appears below the teal radial gradient layer in the Layers panel. Then, add a layer mask, get the Gradient tool, with the Foreground to Transparent Linear gradient again, and with your Foreground set to black, fade the edges of the map image. Change the blend mode to Linear Dodge (Add), and then lastly, to soften the effect, drop the layer’s Opacity down to 50%. This will subtly blend the map graphic into the background.
STEP 23:
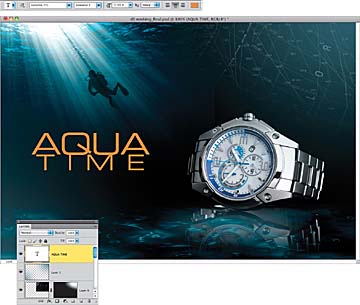
Let’s finish the whole design off with some text. Start by selecting the Horizontal Type tool (T) from the Toolbox and creating a text layer. Click on the color swatch in the Options Bar and enter R: 224, G: 146, B: 47 in the Color Picker. Here, I stacked the words “AQUA TIME” in Eurostile (T1) Extended 2 at almost 73 points for AQUA and at almost 53 points for TIME.
STEP 24:
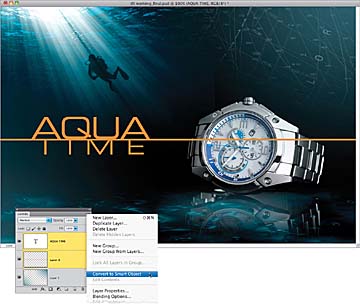
Create a new blank layer below the text layer. Get the Rectangular Marquee tool (M), and draw a thin-line selection across the document, in between the lines of text. Set your Foreground color to the same color used for the text and then press Option-Delete (PC: Alt-Backspace) to fill the line with that color, then deselect. (Note: To get both words to line up with the line you just created, use the Move tool to move the bottom of AQUA onto the line and then select TIME with the Horizontal Type tool, and press Option-Up Arrow key (PC: Alt-Up Arrow key) to bring the top of it up to the line.) Now, Command-click (PC: Ctrl-click) on both the line and text layers so both are selected, and then from the Layers panel’s flyout menu, choose Convert to Smart Object to convert them into a single Smart Object layer.
STEP 25:
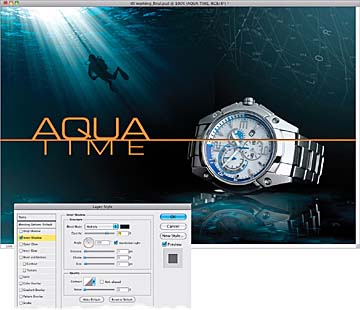
Now, let’s dress up the text with layer styles. With the Smart Object layer active in the Layers panel, click on the Add a Layer Style icon at the bottom of the panel and choose Inner Shadow. Use the settings shown here to add some depth to the text.
STEP 26:
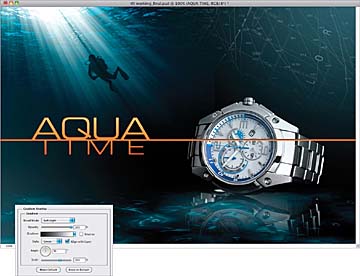
Next, click on Gradient Overlay on the left side of the dialog to turn it on, and just change the Blend Mode to Soft Light.
STEP 27:
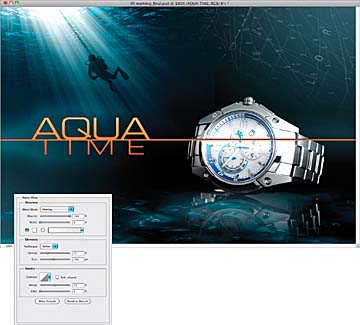
Lastly, click on Outer Glow on the left to turn it on, and set this Blend Mode to Overlay and the Opacity to 100%. Click on the color swatch and change the color to white. Then, down in the Elements section, increase the Spread to 25% and set the Size to around 105 px. This will give the glow a subtle halo effect. Click OK.
STEP 28:
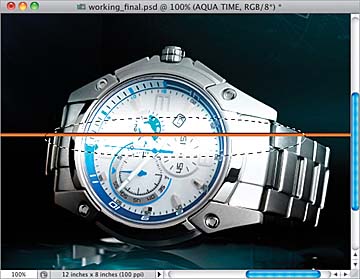
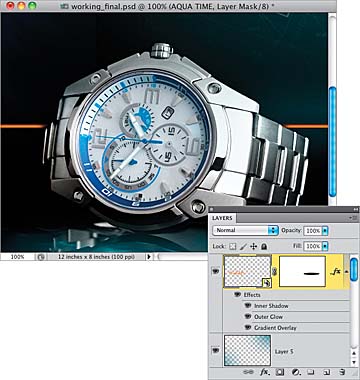
Now we need to mask the line where it goes over the watch. So, get the Elliptical Marquee tool (press Shift-M until you have it) and draw a long oval selection over the line where it goes over the watch.
STEP 29:
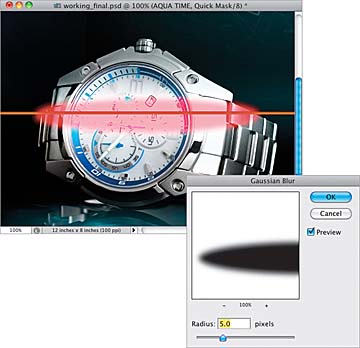
Press Q to put the selection in Quick Mask mode. (Note: If the masked area is in red, rather than the selection, double-click on the Quick Mask icon at the bottom of the Toolbox to open the Quick Mask Options dialog and change Color Indicated to Selected Areas.) Go under the Filter menu, under Blur, and choose Gaussian Blur. Set the Radius to 5 pixels and click OK.
STEP 30:
Press Q again to go back to the marching ants selection, then Option-click (PC: Alt-click) on the Add Layer Mask icon at the bottom of the Layers panel. This will give the illusion that the line goes behind the watch.
STEP 31:
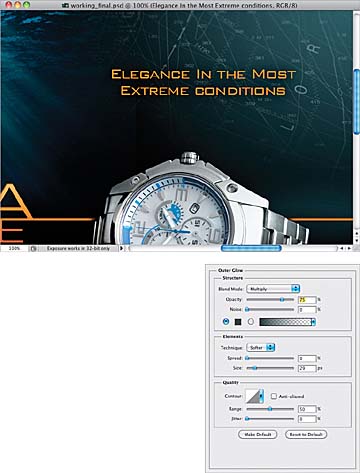
Finish off the image by adding some more text in the top right. Here, I set some in Bank Gothic Light, and then added a black Outer Glow layer style with the settings shown here.
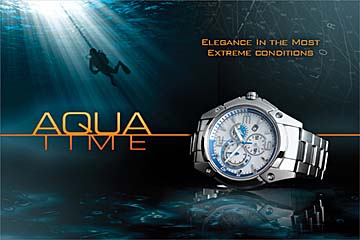
Final Image
