- Animation in ImageReady
- Animation Terms
- Tweening with Opacity
- Selecting, Duplicating, and Reversing Frames
Tweening with Opacity
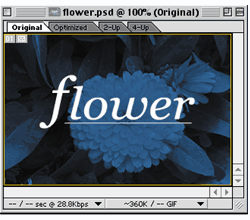
1. Open flower.psd, which you'll find on the CD that comes with Photoshop 5.5/ImageReady 2.0 H•O•T. (Or download flower.psd.)
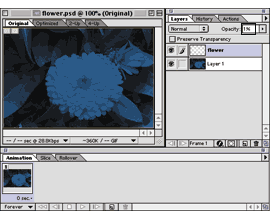
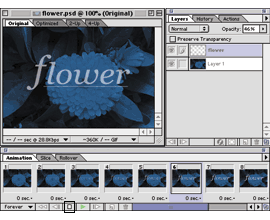
2. Make sure that the flower layer is selected in the Layers palette, then enter Opacity: 1%. The word “flower” should disappear.
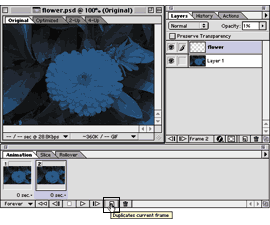
3. Click the New Frame icon at the bottom of the Animation palette.
This will duplicate the exact settings that were in frame 1. To create another Opacity setting, which you need for the Tween, you’ll change the second frame in the next step.
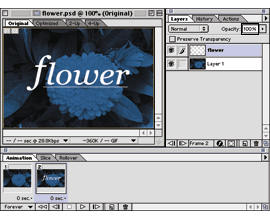
4. The new frame you selected will be highlighted, so any changes you make will apply to it. Select the flower layer in the Layers palette and enter Opacity: 100%. This should make the word “flower” visible in that frame.
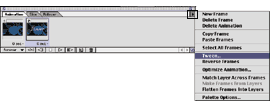
5. Click the upper-right arrow of the Animation palette to select Tween... from the pop-up menu.
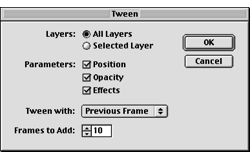
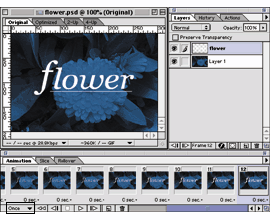
6. When the Tween dialog box appears, enter Frames to Add: 10. Click OK.
7. Click Play to test the animation. You should see the word “flower” fade up over the photographic background. Click Stop.
This particular animation might look best if it only plays once. While this looks one way when you preview it in ImageReady, don’t forget to test this file in the browser. That’s because you’ll always get the best indication of speed in the browser, not in ImageReady. When you preview this animation, you’ll see that you haven’t set any optimization settings yet, and that ImageReady is using the optimization settings from the last image that you worked on. Don’t get too worried about optimizing this image just yet. This exercise was created to familiarize you with Tweening, and a later exercise will cover optimization techniques for animated GIF files.
8. Save and leave the file open for the next exercise.