- Reference 4.1 Understanding a Project
- Reference 4.2 Defining the Primary Storyline
- Reference 4.3 Modifying Clips in the Primary Storyline
- Reference 4.4 Timing the Primary Storyline
- Reference 4.5 Editing Above the Primary Storyline
- Reference 4.6 Creating a Connected Storyline
- Reference 4.7 Editing Below the Primary Storyline
- Reference 4.8 Finessing the Rough Cut
- Reference 4.9 Sharing Your Progress
- Lesson Review
This chapter is from the book
This chapter is from the book
This chapter is from the book
Reference 4.4 Timing the Primary Storyline
Every edit in a project is based upon the primary storyline. Up to this point, the concern has been to place the select sound bites into the project and organize them to reflect the story structure. Now that the structure has been established, the task switches to adjusting the timing and pacing. The sound bites should not be a hailstorm of thoughts spewed at the viewer, but should flow like everyday conversation.
The first technique to pacing the sound bites involves a gap clip, which is an empty clip container in the Timeline. Gap clips may be applied as placeholders until additional material arrives, such as more B-roll content, clips from a hard-to-schedule interview, or a late shipment of second unit content. Gap clips are also used as the spaces, pauses, and breaths that enhance your story flow.
The second technique to pacing the sound bites involves removing segments of a clip or entire clips. The Blade tool segments a clip to remove one or more clip ranges from the project. Each time you blade a clip, you create a through edit.
A through edit marks the clip into segments without breaking the clip into two physical clips. If you blade that clip a second time, you mark it into three segments with two through edits. You can rejoin these segments if you inadvertently blade the wrong frame. The repair is called a join through edit.
When you are ready to delete a segment, you can do so in one of two ways. Simply pressing the Delete key performs a ripple delete. The selected clip segment is removed, and the subsequent clips slide left to occupy the Timeline position of the deleted segment.
Blade to segment unwanted content
Select segment for removal
Press Delete to ripple delete.
The second delete method is a replace with gap. This deletion, performed by pressing Shift-Delete, removes the selected segment and leaves a gap that occupies its former position in the Timeline. As a result, the following clips do not ripple, but remain in place.
Blade to segment unwanted content.
Select segment for removal.
Press Shift-Delete to replace segment with a gap clip.
Exercise 4.4.1 Inserting a Gap Clip
Currently, your project sound bites are sequenced very tightly. This breathless stream of consciousness does not lend itself to clear storytelling. Let's separate some of these clips so the storytelling relaxes a bit.
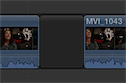
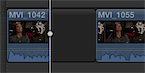
Park the playhead between MVI_1042 and MVI_1055.

Placing a gap clip here allows Mitch to take a breath. Don't worry about the visual break. The B-roll clips you will add later can fill in those pauses.
To insert a gap clip, choose Edit > Insert Generator > Gap, or press Option-W.
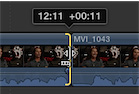
A three-second clip is inserted between the two clips at the playhead location. Those three seconds may be a little too long for this edit. As with any other clip, you may ripple trim a gap clip to adjust its duration.
Place the mouse pointer over the end point of the gap clip. Ensure that the ripple trim's filmstrip is pointing left, and then drag the end point to the left.
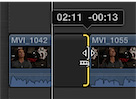
As you drag, the clip's new duration and the delta (the amount you have changed the clip's duration while dragging) appears above the edit.
Trim the gap clip to a new duration of one second, thereby removing two seconds from its length.
Skim to just before the gap clip, and play back to review the edit.
That's not bad. It allows just a moment for your audience to understand the who, what, and where of Mitch's comments. Let's repeat that for the next edit.
Advance the playhead to the next edit by pressing the Down Arrow key.
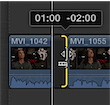
The playhead jumps to the edit between MVI_1055 and MVI_1043.
Mitch is offering more details in MVI_1043, so placing a longer gap before this clip may help transition the audience into this sound bite.
With the playhead cued, press Option-W to insert a three-second gap clip.

Review the edit.
Now that you have silence between the two sound bites, you may discover the "breath" at the end of MVI_1055. As you proceed with your edit, you will probably notice more of these fine details.
If necessary, adjust the end or start points surrounding the gap clips to tidy up the trimmed clips.
You are listening for extra syllables or breaths to remove. For example, you would trim the end point of MVI_1055 to the left a few frames to remove the breath.
These gap clips won't necessarily remain at the durations you just set. They may flex as you continue to build the story...or tear out parts of it.
)
Exercise 4.4.2 Blading and Deleting
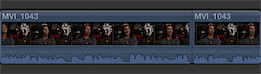
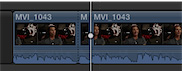
The Blade tool allows you to quickly break a clip into smaller sections to be moved elsewhere or completely removed from your story. In the first instance of MVI_1043, some pauses in Mitch's interview can be removed to tighten the edit.
Play the project, and locate the point at which Mitch says, "And film at the same time, (breath) uhhm," in the first MVI_1043. This occurs about four seconds into the clip.
Cue the playhead after the breath and before the "uhhm."
You will blade the clip here to divide it into two segments. You will then blade the clip again after the "uhhm" to separate this sound from the good content that occurs before and after it.
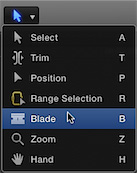
From the Tools pop-up menu, choose the Blade tool, or press B.
With snapping turned on, move the Blade tool over the MVI_1043 clip and toward the playhead until it snaps to the playhead.
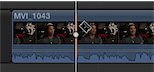
With the Blade tool snapped to the playhead, click to segment the clip at this edit point.
You can choose the Blade tool while still using the Select tool. Let's switch to the Select tool to blade on the other side of the "uhhm."
Press A to choose the Select tool.
Remember, A stands for arrow. Because the Select tool is already located next to the edit you just made, the ripple trim icon may appear.
Press the Right Arrow key—and the Left Arrow key, if necessary—to advance the playhead to after the "uhhm" and just as Mitch is starting the word "you're." Instead of choosing the Blade tool, let's use its keyboard shortcut.
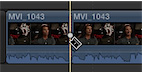
Without moving the mouse, press Command-B to blade the clip at the playhead.
The single clip is now three segments. You need to remove the middle segment.
Remember, there are two types of clip deletion. Let's use both to see the difference between them.
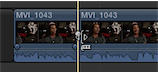
Select the middle clip segment, and press Shift-Delete.
The clip segment is replaced with a gap clip. Called a "replace with gap" edit, this edit type is also known as a lift.
Press Command-Z to undo the previous edit.
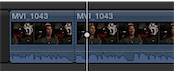
Reselect the "uhhm" clip segment, if necessary, and press Delete.
The segment is removed, and the following clips slide to the left to replace it.
Play the edit and listen to the results.
The current second clip might sound like the first word is cut off a bit, what is commonly referred to as an upcut. In addition to that concern, does the breath at the end of the first clip distract and call attention to the edit? Or, does the breath naturally flow into the next clip?
Using the ripple trim techniques you've learned, clean up the edit to smooth the audio transitions between these two new neighbors.
You may first want to remove the breath at the end of the first, or ending clip. You may also need to insert or remove frames to the start point of the second clip, the starting clip. Refer to Using the Keyboard to Ripple Trim an End Point in this lesson to review ripple trimming.
Visually, this edit is a jump cut. A jump cut occurs when similar but nonsynchronized content appears to jump in space and time at an edit point. The B-roll you will add in the next section will hide this error.
)
)
)
)
)
Exercise 4.4.3 Joining a Through Edit
In the previous exercise, you used the Blade tool to divide a clip into segments. The resulting through edits may be easily repaired if you made them in error or change your mind about splitting up a clip.
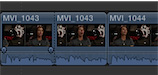
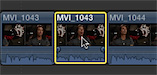
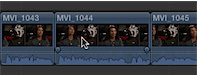
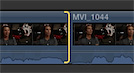
- In your project, locate MVI_1044.
- In the Tools pop-up menu, choose the Blade tool, or press B.
Skim toward the end of the clip just after Mitch says, "New," and then pauses.
The audio waveform displays a definite pause, represented as a "valley" in the waveform.
Click in this waveform valley to blade the clip and create a through edit.
- The through edit point appears as a dashed line. Because we really did not want to split this clip, you are going to rejoin the through edit.
- Press A to choose the Select tool.
With the Select tool, click the through edit point (dashed line) to select it.
Only one side of the through edit will be selected with the Select tool active. That's OK.
Press Delete.
The through edit point is removed and the two segments are rejoined into one clip.
)
)
)
Exercise 4.4.4 Refining Some Sound Bite Edits
Before progressing to the next layers of B-roll and music, let's polish the "technically flying in awe" section of the project by adjusting the sound bites' contents and pacing.
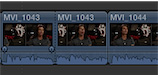
Currently, the second instance of MVI_1043 ends with the word "shooting," which does not flow smoothly into the next clip. This occurs at roughly the 40-second mark in the Timeline.
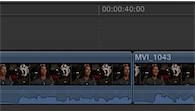
Earlier, you trimmed off Mitch saying, "so." You could use that here to blend into the next sound bite.
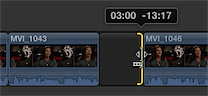
Place the skimmer so that the ripple trim appears with the filmstrip pointing left at the end of the second instance of MVI_1043.
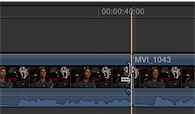
Ripple trim the end point of the second instance of MVI_1043 to the right to insert roughly 11 frames of content.
Review the edit
That created a nice story flow.
The end of the third instance of MVI_1043 will be a little tougher to get a "clean" ending; that is, a natural-sounding ending when you are actually cutting the sound bite off mid-sentence. The clip's current end point is at "experiencing," which doesn't sound right. Let's trim that end point to a little earlier in the sentence.
Ripple trim the end point to the left roughly one second.
The clip should now end after Mitch says, "filming," and most likely has an extra syllable or two that need to be removed.
With the end point still selected, press the comma (,) and period (.) keys to nudge trim frame by frame, refining the edit point.
This trim edit may take a few moments to get the right frame for the end point. That frame is going to be right on the "g" of "filming."
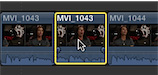
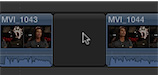
As for MVI_1044 and MVI_1045, these two get the axe. They just don't fit with this short version of the story.
Select both clips, and press Shift-Delete to replace both clips with a gap clip.
Trim the gap clip to a duration of three seconds.
Trimming creates room for a natural sound break and music swell before Mitch segues into the next sound bite.
With these edits in place, you have built the sound bite foundation for your project. Take a moment to review your story.
)
)
)
)