- Reference 4.1 Understanding a Project
- Reference 4.2 Defining the Primary Storyline
- Reference 4.3 Modifying Clips in the Primary Storyline
- Reference 4.4 Timing the Primary Storyline
- Reference 4.5 Editing Above the Primary Storyline
- Reference 4.6 Creating a Connected Storyline
- Reference 4.7 Editing Below the Primary Storyline
- Reference 4.8 Finessing the Rough Cut
- Reference 4.9 Sharing Your Progress
- Lesson Review
This chapter is from the book
This chapter is from the book
This chapter is from the book
Reference 4.8 Finessing the Rough Cut
Your project is racing to the end of this phase of the workflow. The details and adjustments you need to perform become more granular as you finish addressing the major editorial issues. You may still perform some major changes, but you should now see the light shining at the end of this editorial tunnel. At this stage, a project generally needs audio adjustments and a bit more trimming. By now, your project is definitely ready for a run-through with the slip trim.
The slip trim changes the content within the clip container. You change the start and end points of the content simultaneously revealing earlier or later source materials without changing the clip's duration or position in the project. Think of the clip as your iPhone and the clip content as the photos on your iPhone. When you want to see earlier photos, you swipe with your finger from left to right to pull the earlier photos into view. The reverse to see later content is to swipe right to left to pull that content into view.

Dragging right to slip earlier content into view.
While performing a slip trim, the two-up display of the new start and end points appears in the Viewer. The two-up display shows your changes in real time as you drag the slip trim across the clip. When you release the mouse button, the clip is already updated in the project.
)
Slip trimming may also be used on audio-only clips. However, for smoothing out audio edits at this stage of the workflow, adding some transitions and audio fade handles will do the job. Every clip that contains audio content has fade handles to create audio envelopes for ramping.

Your project has a basic music bed, the B-roll edits, and even the sound bites positioned and trimmed to align them to visual or audio cues in other clips. For this first rough cut, you will adjust some clip positions and timings to coincide with the music clip's major moments.
Exercise 4.8.1 Adjusting the Edits
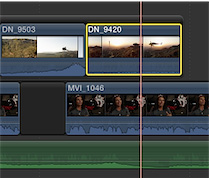
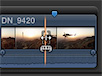
In DN_9420, the sunset shines dramatically through the helicopter's windows; and during the clip, the music swells to a climax. But we can do better. In this exercise, you will align those audiovisual moments for maximum effect.
In the project, select DN_9420, and skim to the first frame of the sun coming through the helicopter windows.
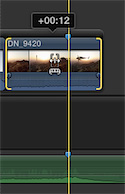
Press M to set a marker at that dramatic visual moment.
Marker appears under the skimmer along the clip's top edge.
Now you need to set a marker on the music swell. Unfortunately, it's a little hard to hear while the previous sound bite is playing.
Select the music clip, and then click the Solo button, or press Option-S.
Only the selected audio clip is audible and in color while the nonselected clips' audio is muted and desaturated in the interface.
Now that you can hear the music clearly, let's place a marker on the music swell.
Using the Select tool, click the music clip, skim to the music swell, and then press M to set a marker.
With the marker set, click the Solo button again, or press Option-S, to disable the Solo function.
Now the task is to align those two markers. You'll perform two edits with the ripple trim: shortening the B-roll and extending the last gap clip to align the music swell with the sunset.
Ripple trim to remove a few frames from each clip of the Takeoff storyline. Your goal is to move the sunset marker closer to the music swell.
Here are some trim points to consider:
- Start of DN_9463: Could the helicopter already be in forward movement? You'll need to verify the storyline follows the previous clip.
- DN_9415: Don't trim too much here. This is a "landscape" shot that needs time for the viewer to gain perspective.
- Start of GOPR1857: Trim to just before Mitch turns his head.
These edits should get you very close to aligning the markers.
)
)
Also using the ripple trim, push the last sound bite farther out by lengthening the gap clip. Insert enough frames so that the last sound bite starts when the music starts again.
You can finish aligning these markers using one or both of these methods: ripple trim more of the earlier B-roll clips, or slip edit the content of DN_9420.
)
Using the Slip Edit
The slip edit is a safe edit for setting the B-roll clips to their best content without disturbing other edits.
- From the Tools pop-up menu, choose the Trim tool, or press T.
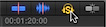
Move the Trim tool over the middle ofDN_9420.
The Slip tool appears.
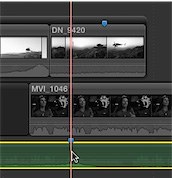
Drag DN_9420 until the marker aligns to the music marker.
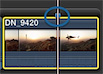
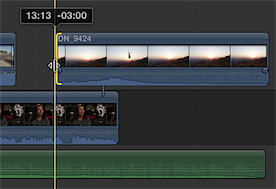
While dragging with the slip trim, a two-up display of DN_9420 appears in the Viewer.
The image on the left shows the start point of the clip, while the right image shows the end point. The start and end points are updating in real time as you drag the slip trim. Although not particularly needed for this edit, the two-up display is great for ensuring that the best content is included between the displayed start and end points.
With the two markers aligned, play the entire project, slip trim at the ready, evaluating whether the B-roll clips are displaying their best contents within their current durations. You may wish to do so with your speaker/headphone volume lowered.
While you review the project, ask questions about the effectiveness of your results. Can you avoid the lens flare in the instrument/GPS panel shot? Should there be more lens flare content? Should the project show less of Mitch leaning back and pointing out the side window, or should you slip the clip to include Mitch pointing out the front?
)
Exercise 4.8.2 Adjusting Clip Volume Levels
The two basic rules of mixing audio are: Don't peak the meters; and if it doesn't sound good, change it. That change should not be a knee-jerk reaction. Don't get in the trap of continuing to boost the volume of a clip to make it louder than the other clips. If the sound bites are too quiet, you don't necessarily crank up the sound bites. Maybe you need to turn down the volume of the music or B-roll nats.
In this exercise, you will perform some simple volume level adjustments to ensure that the sound bites are clearly audible, and that the overall audio mix does not reach up to 0 dB on the Audio meters. A safe target is to not allow any of your loudest audio go above –6 dB on the meters.
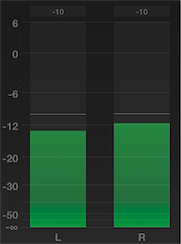
In the Dashboard, click the Audio Meter button.
The larger Audio meters open to the right of the Timeline. Although you'll delve deeper into audio mixing in Lesson 6, at the present you just want to ensure that your audio levels don't peak at or beyond the 0 dB mark.

You experienced changing the volume of one clip, the music clip, a few minutes ago. When you want to change the volume levels of multiple clips at once, you can use a keyboard shortcut to do so.
In the Takeoff connected storyline, select all the B-roll clips within the storyline.
While watching the clips' volume controls, press Control-– (minus sign) and Control-= (equals sign) to lower and raise the volumes of the selected clips.
Continue playing through the rest of the project listening to the mix while watching the Audio meters. Select a clip or multiple clips, and use the volume control or the shortcut keys to keep the audio meters below 0 dB, and more importantly, so you can clearly hear Mitch talking.
The peak indicators, the thin lines left over from the highest meter reading should not go much over –6 dB.
)
)
Exercise 4.8.3 Connecting Two Additional B-Roll Clips
To complete this rough cut's B-roll edits, you've got two concluding B-roll clips to add. Currently, the sunset shines through the helicopter's windows at the music swell and grand pause. Then the music starts again, and Mitch begins his last sound bite. Time to land the helicopter "at the end of the day," and to fly off into the sunset when remembering the day's adventures.
In the GoPro event, locate a clip assigned the Landing keyword.
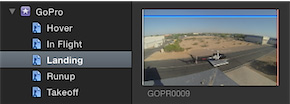
Looking in the Landing Keyword Collection of the GoPro event, you find GOPR0009.
In the Browser, skim to where the helicopter is completely visible in the frame, and mark a start point.
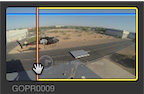
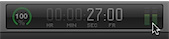
Although you just trimmed this clip, its duration is still almost 30 seconds. You might need only 10 of those seconds.
Skim GOPR0009 and set an end point as the helicopter lands.

The duration should now be roughly 10 seconds.
Using the connect edit method of your choice, connect edit the landing clip to the primary storyline about where the music restarts. This will also be just as or slightly before Mitch starts talking. Play the results.
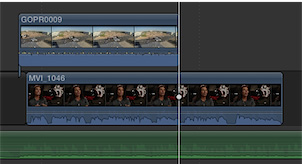
This edit feels choppy because the sunset clip cuts to black followed by another clip cutting in from black. Before fixing that, you have one more clip to edit into the project.
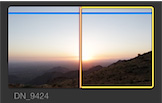
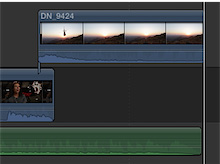
- In the Browser, search for an In Flight B-roll clip that shows the helicopter flying off into the sunset. You should find DN_9424.
You will be trimming this clip to get it just right, but for now, set a start point before the helicopter enters the frame. You want that action to happen just as Mitch is finishing the last sound bite.
Connect edit DN_9424, "flying into the sunset," just as Mitch is saying, "Adventure I went on." Trim the clip to end with the music
That works. To finish with this clip, give its content some breathing room by adding several seconds to the clip's start.
Drag the start point of the "flying into the sunset" clip, and extend the start point to the left to when Mitch says, "Wow."
Since you just added these two clips, take a moment to adjust their audio levels to more closely match the previous adjustments you made to the other clips.
Great! All the clips for your first edit are in your project. A final refinement pass will soften some not-so-clean edits.
Exercise 4.8.4 Refining Edits Using Cross Dissolves and Fade Handles
Some of your audio edits may contain a click or pop at their start or end points. Every clip that has audio has the potential to "catch a click." A quick solution is to rapidly fade the audio in or out using a technique called ramping.
Catch a Click
Pleasant sounding audio travels in a sine wave with a peak and a trough per cycle.
)
Each cycle of the waveform traverses the zero crossing point 2x as the soundwave peaks and then goes down to the trough and then repeats. When an audio clip has a start point that catches the audio soundwave anywhere other than at zero, you may hear a click as the playhead grabs on to the soundwave in progress.
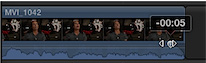
At the end of the first sound bite, move your pointer over the audio waveform of MVI_1042.
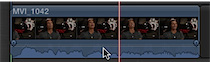
Two fade handles, or "birds-eyes," appear at the ends of the clip. These envelope handles allow you to quickly or gradually ramp the audio into or out of the edit.
Move your pointer over the ending fade handle.
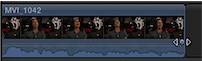
When positioned over the handle, the pointer changes to a pair of arrowheads pointing left and right.
Drag the fade handle to the left about five frames.
The number of frames to move is dependent upon how tight the edit is against "kid." You do not want to cut off the last word Mitch says.
Position the pointer over the beginning of the next sound bite.

Drag the fade handle right from the start point to add a small ramp into the clip's audio.

The clicks and pops are fading away. These audio ramps also soften the clip's entry and exit. When an audio clip was recorded in a noisy environment, a cut into or out of the clip will make the edit undesirably obvious as the noise pops into or out of the mix. In addition to audio edits, let's soften some video edits. A fade-in is not necessarily required if your edit starts with black. But the sunset clip definitely needs an easy, blending transition in and out.
For now, you will use a keyboard shortcut to apply the default transition: cross dissolve. When placed between two clips, a cross dissolve transition blends two images together by varying their levels of transparency. One appears to fade away while the other appears to fade into view. When applied to a single edge of clip that does not adjoin another clip, the Command-T cross dissolve will either fade the clip in from black or fade out to black. A few cross dissolves placed into your project will smooth the clips' entries and exits.
Using the Select tool, click the start point of the sunset through the windows clip, and press Command-T to add a cross dissolve.
A cross dissolve with a one-second duration blends the previous shot into the sunset shot. This sets up the shot and begins to slow down the pacing for the ending segment.
While you may apply many transition types and customizations here, let's add a few more cross dissolves to your project.
Select the end point of the sunset through windows clip, and press Command-T.
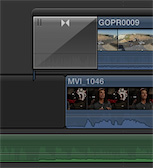
Select the start point of the GOPR0009 clip, and press Command-T.
Review this transition by playing the project.
Notice that while the video is fading in from black, a momentary cut to Mitch on-camera appears as the helicopter landing clip continues to fade in. This occurs because the Mitch clip starts while the transition from black is still in progress.
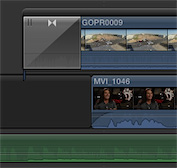
You will need to either drag the GOPR0009 storyline left until the transition does not overlap the Mitch clip, shorten the transition duration, or lengthen the gap clip to push Mitch's sound bite to start after the transition completes.
As easy as it is, selecting single points is tedious. Fortunately, you can apply a transition to both points of the same clip at once.
In the project, select the DN_9424 clip, and press Command-T.
A cross dissolve is applied to both edit points, but the ending dissolve should be a little longer than the default duration of one second.
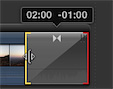
Place your pointer over the left edge of the transition in the project.

The pointer becomes a resize icon without a filmstrip. This allows you to set the transition's duration.
Drag the transition's start edge to the left away from the transition's center until the duration info indicates two seconds.
Now you have a slower fade to black at the end of the project.
Review your project, looking and listening for edits that could be softened with a cross dissolve or audio ramp. A quick tip while you are reviewing: When it comes to video transitions, less is more.
With a few audio ramps and a couple of video cross dissolves, your rough cut is ready to show to the client.
)
)
)
)