- Getting started
- Creating a new Web site
- Adding files to the Web site
- Creating a component to be used as a navigation bar
- Adding a layout grid
- Aligning and distributing multiple objects
- Adding text using a table
- Creating a custom color palette and adding color to text
- Specifying keywords
- Adding a component to an existing Web page
- Updating the custom color palette
- Designing a Web page using floating boxes
- Editing a component
- Previewing in GoLive
- Review questions
- Review answers
This chapter is from the book
This chapter is from the book
This chapter is from the book
Creating a new Web site
You'll begin this lesson by creating a new Web site for Gage Vintage Guitars. You'll create a blank, single-user site.
Start Adobe GoLive.
By default, an introductory screen appears prompting you to create a new Web page, create a new site, or open an existing file.
NOTE
You can set preferences for the introductory screen to not appear when you start GoLive. If the introductory screen doesn't appear, choose File > New Site to display the GoLive Site Wizard, and go to step 3.
Click New Site to display the GoLive Site Wizard.
Make sure that Single User is selected, and click Next.
For simplicity all the lessons in this book are set up as single-user sites. However, whether you are a single user or working with a team, you may want to consider creating a workgroup site to take advantage of Adobe Web Workgroup Server features, which let you create different file versions, compare versions, and revert to previous file versions. To create a workgroup site, you first need to log on to the workgroup server (see the Adobe GoLive 6.0 online Help for more information).
Make sure that Blank Site is selected, and click Next.
In the Site Name text box, enter gage as the name of the new site. Make sure that
Create Project Folder is selected so that GoLive creates a site project folder for you, and click Next.
Click Browse, and then use the dialog box to select the Lesson03 folder, located in the Lessons folder on your hard drive, and click OK (Windows) or Choose (Mac OS).
Click Finish in the Site Wizard.
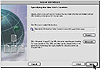 Creating new site
)
GoLive creates a site project folder named gage folder within the Lesson03 folder. This folder contains a site project file (gage.site) to manage the site contents; a root folder (gage), which by default contains a blank home page called index.html; a data folder (gage.data) where you store different types of reusable site objects and other resources; and a settings folder (gage.settings) where GoLive stores settings you make in the site window and the Site Settings dialog box.
)
The site window appears with the Files tab selected. The Files tab displays the contents of the site's root folder. Remember, all of the folders and files displayed in the site window reflect actual folders and files on your hard disk.
)
Now you're ready to add files to the site.
About GoLive workgroup sites
GoLive workgroup sites are simply GoLive sites that are stored on the Adobe Web Workgroup Server instead of the file system of your computer. The Workgroup Server acts as a repository for sites being developed rather than as a typical Web server. Though stored on the Workgroup Server, workgroup sites have the same structure as regular single-user sites and appear the same in the site window when you open them. However, special workgroup features of GoLive are activated when you open a workgroup site. These features let you track who's doing what in the workgroup—which files in the site are available for editing, which are being worked on by others, and what's left to do for each file.
Files in a workgroup site—pages, images, style sheets, or any other components of the site—have to be checked out before you can edit them. Once a file is checked out, others in the workgroup who have the site open can see in their site window that the file is temporarily locked and unavailable for editing. They also know who has the file checked out, and when it was checked out. The file still appears in the site window, and it can still be opened, but in read-only form.
–From the Adobe GoLive 6.0 online Help.