Indexing Photos Using Faces and Places with Aperture 3
Note: This excerpt does not include the lesson files. The lesson files are available with purchase of the book.
This chapter is from the book
This chapter is from the book
This chapter is from the book
In Lesson 3, you learned that metadata can come from a camera, or can be entered manually in the form of keywords, captions, ratings, and so on. Those types of metadata are great for identifying when and how the photo was taken. But how can you precisely determine where a photo was taken or who is in the photo? You could take scrupulous notes while shooting...yeah, me neither. Thankfully, there are easy and engaging ways in which Aperture can help you.
In this lesson, you’ll examine two features that provide very natural ways to index photos—Faces and Places. Faces is a feature that not only detects faces of people in your photos, but with some minor assistance from you can also recognize those people. The second feature, Places, uses GPS data to identify where photos were taken.
Beginning with version 3.3, Aperture and iPhoto can share a photo library. When you adjust images using Aperture’s tools, the changes appear in iPhoto, and vice versa. You don’t need to import, export, or reprocess photos from one app to the other—it happens automatically. Faces and Places work across both apps, too.
)
Moving from iPhoto to Aperture
For many iPhoto users, switching to Aperture is a natural progression. Aperture includes almost all the fun and elegant features of iPhoto while adding more comprehensive image management, editing, and output capabilities. The unified library makes it easy to step up from iPhoto to the advanced tools in Aperture. Or return to iPhoto to create a calendar or cards after making professional edits to images in Aperture. Whether your photos are intended for professional use, or purely for fun, you get the best of both apps.
Switching Libraries
Aperture allows you to switch between different libraries without quitting the application. These could be multiple Aperture libraries that you have for different clients or separate libraries that, due to their size, need to be stored on additional storage devices. Aperture also allows you to open iPhoto libraries, beginning with iPhoto version 9.3. This is handy for keeping your personal photos separate from your client libraries, while letting you take advantage of powerful Aperture features. And even after opening an iPhoto library in Aperture, that library is still available to iPhoto. Additionally, you can open Aperture libraries in iPhoto if you want to take advantage of some iPhoto-only features. Just make sure that only Aperture or only iPhoto is open while using the other’s library.
To open a different library:
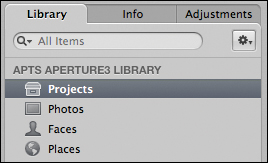
- In Aperture, select Projects in the Library inspector.
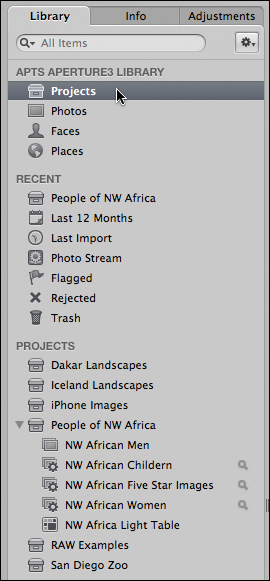
Take note that you are currently looking at the projects contained in the APTS Aperture3 Library. These projects are the ones you have been working with thus far such as the San Diego Zoo and People of NW Africa. That is about to change.
- Choose File > Switch to Library > Other/New.
)
Aperture presents the Library Selector window that lists all of the libraries available to Aperture. Here you see the current library APTS Aperture3 Library and the APTS iPhoto Library that you copied from the book’s DVD during the Getting Started instructions. Below the list, you are given the opportunity to search for additional libraries or to create a new library.
- Select the APTS iPhoto Library in the list, and then click Choose.
Aperture switches to the APTS iPhoto Library and displays its contents. iPhoto Events are displayed in the top Projects section of the Library inspector. These new projects are skimmable to allow you to preview the projects’ images. You could now begin working with the iPhoto images with the advanced tools of Aperture. Let’s switch back to the previous Aperture library before proceeding.
)
- From the File menu again, choose Switch to Library > APTS Aperture3 Library.
)
The Projects displayed in the Browser and the Library inspector return to the familiar elements you had been working with previously.
)
Switching between libraries is painless; however, you may want to gather images from multiple libraries into one. In the next exercise, you’ll create one library out of the Aperture and iPhoto libraries you used in this exercise.
Merging Libraries
Although switching between libraries is incredibly easy in Aperture, you may want to carry the images, metadata, and searches of one Aperture library into another. This scenario occurs when images you need for one project are split between two libraries. Here you will import an iPhoto library into the current Aperture library. However, you could have a situation where you want to merge two Aperture libraries as well. To import an iPhoto library into an Aperture library:
- Begin in the Library inspector, selecting the Projects icon listed under the APTS Aperture3 Library.
- Choose File > Import > Library.
Aperture automatically navigates to the expected location for the iPhoto library, which is the Pictures folder inside your user folder. For this book, you are utilizing an iPhoto library installed elsewhere.
- In the Import dialog, select Documents in the left sidebar. Inside the Documents folder, select the APTS Aperture book files folder, and then select the APTS iPhoto Library. Click Import.
Aperture begins the merging process. A progress bar appears at the top of the interface.
When Aperture has finished the merger, the APTS Aperture3 Library updates to display its new contents. All of the Events of the iPhoto library now appear as projects in Aperture.
)
)
)
)