Fig. 1 You can draw the hotspots for client-side imagesdirectly in the Document window.

Fig. 2 The Properties inspector, displaying image properties.

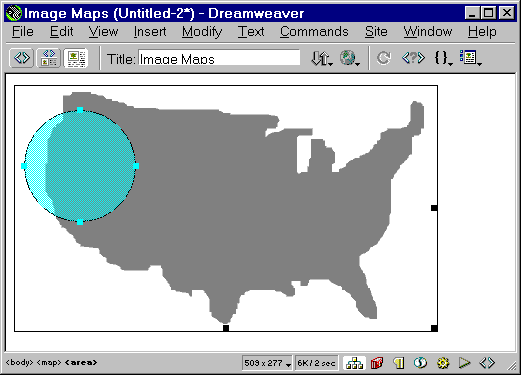
Fig. 1
You can draw the hotspots for client-side imagesdirectly
in the Document window.
Fig. 2
The Properties inspector, displaying image properties.
Fig. 3 The Properties inspector, displaying hotspot properties.

Fig. 4 A close-up of the Map text box and the hotspot buttons on the Properties inspector.
Tips
Coordinates on an image map are measured from the top, left corner of the image. If you resize an image after you create an image map, you will need to rearrange the hotspots to match the new image size.
Dreamweaver includes an Image Map Editor (Figure 1) for making client-side image maps.Using Dreamweaver 4, you draw the hotspots, or links, directly in the Document window (Figure 1), instead of having to open a separate Image Map window. When you draw the hotspot, the Properties inspector (Figure 2) changes to show the properties for that hotspot (Figure 3).
Naming your image map:
The first thing you should do when creating an image map is to name your image map.