Creating a Podcast
Date: Aug 29, 2005
For more information on Digital Lifestyles topics, visit our Digital Lifestyles Reference Guide or sign up for our Digital Lifestyles Newsletter
Now that you know what a podcast is, what's it's used for, and how it can affect your life, you may be inspired to create your very own podcast for distribution over the world's podwaves. Perhaps you would love to create a podcast but feel that the technology obstacles preclude you from ever doing so. Or perhaps you aren't worried about the technology but are unwilling to take the time to learn the ropes. Not to worry. Before you succumb to the fear of podcasting technology and crumple up in a fetal position while moaning gently about RSS feeds, have a look at this chapter; it'll change your point of view.
In this chapter, I take a look at the process of creating a podcast, from the nuts and bolts of recording techniques to the software that can help you edit and manipulate the podcast. I also include some tips and interviews with podcasting pioneers and aficionados whose hard-won experience will be to your benefit. After covering the equipment and the software needed for podcast creation, I walk you through the creation of a podcast from start to finish, using basic equipment and popular software.
Choosing Content
Before you get the ball rolling on creating a podcast, it is critically important to figure out what will be said (or not said) during the show. What limits are there when it comes to choosing content? In short, there are almost no limits to what can be included in podcasts. Podcasting allows you to create shows, dramatizations, vignettes, commentaries, documentaries, and any other content imaginable. Indeed, podcasting is limited only by individual podcasters' imaginations. The sky is the limit, and I encourage you to exercise your creative muscle when brainstorming podcast ideas.
Before the Podcast
This section deals with everything relating to the creation of podcast content, from outlining a show's content to booking guests and formulating questions for them. Although it is possible for a podcaster just to pick up a microphone and create a "show,"it requires a much larger effort to ensure that the podcast sounds professional while being a compelling listen. In this section, you see what you can do before the tape is rolling to maximize the quality and enjoyability of your podcast.
Some podcasts are clearly created by the seat of the host's pants, with little regard to a structure or plan for entertaining or educating the listener. But the "amateur" moniker that is attached to podcasting doesn't mean that the content of podcasts needn't be professional. With a little bit of background work, one can turn amateur hour into something that is respectable and highly listenable.
There are four key elements to a successful preproduction process for a podcast:
- Draft a document that establishes the general tone, taste, and attitude of the podcast.
- Establish the topic of the show, the length of the show, and any guests who will join you.
- Create a general outline for the show, breaking content into blocks no longer than five minutes each.
- Construct a detailed script to keep the show well paced and to ensure that the host(s) and any guests who are being interviewed always have something to talk about. (If you are good at speaking on your feet, this step may not be necessary.)
Mission statement
The first thing to do is write out a mission statement or design document that sets out rules for the tone and overall structure of the show. This document should spell out the boundaries of taste with regard to language, touchy topics (politics, abortion, favorite ice creams), and the overall attitude the host(s) should exhibit.
Although this process may seem rigid for an amateur podcast, the act of going through it goes a long way toward solidifying the overall feel of the podcast in your mind. Remember, this document is not set in stone; you can change it as much or as little as you want. The important thing is to establish the ground rules before you get your pearly whites in front of the microphone. Knowing the general rules allows the host to be more natural and enjoy the process rather than sweat over the appropriateness or validity of everything he or she is saying.
Topics, guests, and show length
I'm guessing that you've already established an overall concept for your show, but even though you think "Foot Care for Firewalkers" is a fascinating theme for a podcast, you still need a topic for the first show.
I strongly suggest that you choose a topic for the show and stick to it, keeping as much of the content centered on the theme as possible. If you title your podcast "Navel-Gazing for Experts: To the Hole and Back," be sure to stay focused on the topic throughout. People who "tune in" to the podcast have done so because they have read the title and synopsis of the podcast. It is likely that listeners will be disappointed if the podcast strays too far from the announced concepts. It is advisable to make a reference list of related topics so that in the heat of the podcast, you can keep the show on track with just a glance or two at the topic list.
Next up, you need to choose who, if anyone, will be a guest on your show. Guests are fantastic; they provide instant content, and you can bounce ideas and humorous anecdotes off them. The important thing to remember when getting a guest for your podcast is to have at the very least a crude list of questions before the podcast begins. A guest might be a good friend whom you can chat with for hours, but once the mikes are on, it's a different ball of wax. Having a nice list of eight or ten questions at the ready will ensure that even if your stressed-out mind draws a blank, the show will go on!
Last, you must decide on a length for the show. Initially, shorter is better; you would be surprised how hard it can be to fill even one half-hour the first time you attempt to create a podcast.
Outline
Now that you know what the podcast is about, what the tone of the show is, and how long the podcast is, it's time to put together an outline that breaks the show into segments no greater than five minutes long. As shown in Figure 3.2 , the outline should be set up in such a way as to help you fill every minute of your podcast with entertaining and/or interesting content.
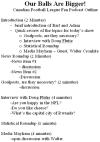
Figure 3.2 An outline is a valuable tool to help keep you on track during a podcast.
If your outline for a 20-minute show is broken into two 10-minute segments, there isn't much point in constructing it. On the other hand, if the outline is broken into 10 two-minute segments, the flow and content of the show will be easy to maintain. Even if you have a detailed outline and a guest takes five times longer to answer a question than you thought she would, the outline is still valuable, because all of the show segments are in front of you, allowing you to decide at a glance which ones to drop.
In summary, an outline helps remove any indecision during the recording of the podcast. When the host has a written schedule sitting on a desk in front of him during the recording, any unexpected happenings don't have to fluster him or cause other problems.
Detailed script
If the outline is complete enough, a detailed script may not be necessary. The need for a script depends on the host's ability to talk on the fly and keep the flow of the show going. If the host is the kind of person who has difficulty with idle banter while maintaining the flow of the podcast, however, a detailed script will be in order.
A script can be so detailed that it contains every line that is to be said during the show, but if you go to this extreme, you must be careful not to make what's being said too rigid. We have all seen movies in which the lines seem scripted, as though they are just being read and not formed naturally by the actors. In radio, you want a similar feeling—a natural feeling that gives the illusion that everything that's being said is spontaneous.
Equipment
One great thing about podcasting is that you can do it at home with a basic Mac or PC and an inexpensive microphone (which may come with the computer). High-end equipment is nice, to be sure, but many of the best podcasts out there are recorded and edited with basic equipment and widely available software.
Still, there are several ways to set up a podcast recording "studio," from using nothing more than a computer with a microphone to having high-end microphones, preamps, digital recorders, and the like in a sound-dampened room.
For serious podcasters, the list of necessary equipment is as follows:
- Microphone
- Preamp
- Digital recorder (or computer)
- Headphones
- Sound-editing software
This section examines the equipment you need to get up and running (software is covered a little later on). I need to point out that many devices that can make podcasting easier or higher quality, but I cannot cover every one of them in this book. Instead, I examine several key pieces of equipment in each category.
Microphones
Arguably the most important device in the creation of a podcast, the microphone stands between your voice and the podcast file. As such, it behooves you to ensure that the quality of the recording is as good as it can be based on your budget and expectations.
Two main types of microphones are used for podcasting: condenser microphones and dynamic microphones.
Condenser microphones use a capacitor to capture sound. This works when the pressure from the sound changes the space between the thin membranes in the capacitor. The advantage of a condenser microphone is that it has a very broad frequency response; the down side is that it requires a source of power (like a battery) to charge the capacitor so that it can work.
Dynamic microphones work by measuring the movement of a wire coil around a magnetic field as the sound waves agitate the wire. The advantages of a dynamic microphone are that it is cheaper to make than a condenser microphone and can be miniaturized more easily.
The down side is that the frequency response isn't as good as that of a condenser microphone, making the sound quality inferior.
If the frequency response (quality of sound) is important to you, I recommend a condenser microphone. Most microphones that come with computers are dynamic microphones, and although they are acceptable, you will eventually have to purchase a quality microphone if you want your podcasts to sound professional.
Behringer C-1
Frequency Response: 40 Hz–18,000 Hz
Power: Phantom
The Behringer C-1 ( Figure 3.4 ) is a professional-quality condenser microphone that uses a cardioid pattern to accept sound. At around $55, the C-1 is an outstanding microphone for the beginning, intermediate, or even expert podcaster. The real bonus is that the quality is high but the price is surprisingly reasonable for a product of this caliber.
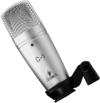
Figure 3.4 The Behringer C-1 condenser microphone is an awesome value and can more than do the job.
(Photo © Copyright 2005. BEHRINGER Spezielle Studiotechnik GmbH.)
Electrovoice 635A
Frequency Response: 40 Hz–18,000 Hz
Power: Phantom
The Electrovoice 635A microphone ( Figure 3.5 ) is probably the best-known microphone in the TV and radio business. A very dependable (some would say nearly indestructible) microphone, the 635A is a mainstay in the radio business and will serve any podcaster well, especially if recording on the road is in the cards.

Figure 3.5 The Electrovoice 635A is a mainstay micro phone and, according to Tod Maffin, is the "best microphone you can buy when starting out."
Stageworks CC12
Frequency Response: 40 Hz–18,000 Hz
Power: Phantom
The Stageworks CC12 ( Figure 3.6 ) is a more-than-suitable condenser microphone that is comparable to the Behringer in many ways. The CC12 uses a supercardioid pattern to accept sound and, as such, produces very clear sound capturing. Although it lists at $99, the Stageworks CC12 condenser microphone is widely available for around $50.
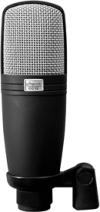
Figure 3.6 Like the Behringer microphone, the Stageworks CC12 offers high quality for a low price.
MC01 Professional Condenser Microphone
Frequency Response: 30 Hz–16,000 Hz
Power: Phantom
The MC01 ( Figure 3.7 ) is the microphone for the high-end user (relatively speaking). At $180, the MC01 is designed for studio use and can be used to record both voices and musical instruments. The MC01 comes with a shock-mount system and a carrying pouch that makes it easy to tote around.

Figure 3.7 The MC01 Professional Condenser Microphone is my choice for a high-end microphone.
Audio Technica ATM73A-SP
Frequency Response: 25 Hz-17,000 Hz
Power: Battery
This headset cardioid condenser microphone is best used by those who want to create podcasts as a one-man (or one-woman) show. At $120, the ATM73A-SP ( Figure 3.8 ) isn't inexpensive, but it is a high-quality microphone that you can clip to your head so that you don't have to worry about being directly in front of it all the time.
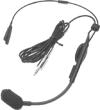
Figure 3.8 A headset-based cardioid condenser microphone is a great choice for a lone podcaster.
DT 234 PRO Headphone
Frequency Response: 20 Hz–18,000 Hz
Power: Phantom
This headset cardioid microphone costs around $99. Made by Industrial Audio Software, the DT 234 ( Figure 3.9 ) contains a dynamic transducer, meaning that the quality is ultimately not as robust as that of a con denser microphone. That said, the DT 234 is a comfortable and reasonable performer best used by podcasters who do their work alone and don't have to share their microphones frequently.
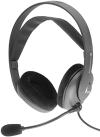
Figure 3.9 The DT 234 headset-based cardioid dynamic microphone
Logitech USB Headset 200
Frequency Response: 100 Hz–16,000 Hz
Power: USB port
Priced around $45, the Logitech Stereo USB Headset 200 ( Figure 3.10 ) is a good choice for those who are willing to forgo the highest sound quality in exchange for mobility and ease of use. The Headset 200 plugs into the USB port of your computer and is easy to set up. The microphone is a dynamic noise-canceling device that strives to filter out background noise. The result can be a mellowing of the user's voice, but it is a small price to pay, considering what you are getting for your money with this product.
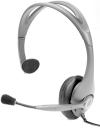
Figure 3.10 A low-cost but effective headset microphone, the Logitech USB 200 is a solid option.
Labtec Desk Mic 534
Frequency Response: 100 Hz–16,000 Hz
Power: 1.5 V DC (supplied through connector cable)
I include this microphone because it is a very common device that is included with many PC computer bundles. As a result, many readers may already have this microphone sitting on their desk. Although it's not a high-end condenser microphone, the $14.99 price tag makes it an excellent choice for those on a budget.
Apple Computer built-in microphones
Frequency Response: Varies
Power: Internal
Many Apple computers come with a built-in microphone. iMacs have a microphone in their screen, and many older Macs come with an external microphone that can be plugged in. Although these microphones do not offer super-high quality, and although there can be some issues with the computer's fan sound getting picked up, these built-in microphones can do the job in a pinch.
Audio interfaces/preamps
Many of the microphones mentioned in this chapter require phantom power—that is, they require a device to supply power to them so that they can work. These devices can't be plugged straight into the computer; instead, they must be connected to a preamp device that acts as an input controller between the sound input devices and your computer.
Although these devices add another layer of cost to your podcast setup, they are not terribly expensive, and they also allow access to several extra features you probably didn't even consider. Preamps offer the ability to input any sort of sound into your computer, including inputs from a musical instrument (like an electric guitar) or even inputs from an old eight-track tape that you want to convert to an MP3 file. In short, a preamp computer device allows the input of virtually any kind of audio signal. For everything from making podcasts to recording an acoustic guitar track for GarageBand (a music-creation program for the Macintosh computer), a preamp is a wise investment.
Behringer Tube Ultragain MIC200
|
|
The Behringer Tube Ultragain MIC200 ( Figure 3.11 ) is a preamp that's perfect for live and hard disk recording applications (such as creating a podcast). The great thing about the MIC200 is that it uses vacuum tubes, which create a warmer sound and make the device a great match for condenser microphones. The MIC200 includes 16 distinct preamp effects that are designed for everything from drums to vocals. At $60, the price is right. The one caveat about the functionality of this powerful device is that it does not have a USB connector, making it more difficult to connect to a PC or Mac than other preamps are. |

Figure 3.11 The Behringer MIC200 is a solid preamp that uses old-fashioned vacuum-tube technology.
Griffin iMic
|
|
The iMic (www.griffintechnology.com; Figure 3.12 ) is a USB device that functions as a universal audio adapter for both the Mac and PC. With the iMic, you can connect any sound input (including microphones) to any Mac or Windows computer with a USB port. Because the iMic is so easy to use and also supports line-level output for speakers or an external recording device, it's the perfect match for podcasters. At $39.99, it is one of the best—and least expensive—units available. |

Figure 3.12 The iMic is a low-cost, yet effective, solution.
The benefit of USB audio input devices (preamps) comes from the fact that the inputs are isolated from any electronic "noise" that might otherwise be picked up from a computer's sound card. How much of a difference a USB device makes isn't entirely clear, but in the case of the iMic, it works like a charm.
XPSound XP-202
|
|
The XPSound XP-202 ( Figure 3.13 ) is the Cadillac of USB audio preamps. Workable on both the Mac and PC, the XP-202 includes a phono preamp as well as a Mic preamp for recording voice and other live performances. Manufactured by XPSound, the XP-202 includes a USB connection and a built-in sound card for processing information right on board. |

Figure 3.13 The XP-202 is the high-end preamp for podcasters who want the best.
At $199, this is not the inexpensive alternative, but for anyone who wants more control of the sound input process, the XP-202 is the right machine for the job. The feature list includes:
- USB interface
- 24-bit operation
- 2 microphone inputs
- 1 headphone amplifier (onboard)
- Mix/balance control
- Powered by the USB port
M-Audio MobilePre USB
|
|
At $159, the MobilePre USB from M-Audio (www.m-audio.com; Figure 3.14 ) is an outstanding preamp for both the Mac and PC platforms. The MobilePre USB has two channels, stereo microphone input, a powered headphone monitor, phantom power, stereo line outputs, and a gain switch. It's an easy-to-use, powerful preamp that will more than suffice for most podcasters (in fact, it's what I use). |

Figure 3.14 The M-Audio MobilePre USB is a solid preamp for both the Mac and PC.
Although designed specifically for use on laptops in mobile situations, this little preamp is plenty powerful enough to sit proudly in any home studio.
PowerWave USB
|
|
With a price tag of $99, Griffin Technology's PowerWave USB ( Figure 3.15 ) falls between its sibling, the iMic, and M-Audio's MobilePre USB. Like the other units, the PowerWave USB is capable of receiving input from any microphone while importing it to the PC or Mac it's connected to. The PowerWave also includes an amplifier to drive monitor speakers and is powered by the USB port. |

Figure 3.15 The PowerWave USB is Griffin Technology's high-end audio input device.
Headphones
Headphones can be considered a luxury, but when it gets down to brass tacks, you will quickly find that a decent pair of headphones is more of a necessity. You cannot monitor the podcast during the actual recording unless you have headphones, for example. If the podcast were playing back through your computer's speakers as you were recording it, a noisy feedback buzz would be the result. For this reason, it is important to get a pair of headphones that is at the very least comfortable for you to have on your head while creating your podcasting masterpiece.
This section suggests several quality headphones for your consideration, but ultimately, any headphone that you are comfortable with will do. If you already own headphones—even MP3 player headphones—they will do the trick. There are literally hundreds of headphone models out there, so all I can recommend is that you use a set that sounds good to you and is comfortable. Of course, if you already are using one of the microphones with attached headphones, you can skip this section.
Sony MDR-V150 Headphones
At $19.99, these MDR-V150 headphones ( Figure 3.16 ) are a quality yet inexpensive option from a well-known manufacturer. They are comfortable over-ear headphones with 30mm drivers and ferrite magnets for exceptional response (for the price).

Figure 3.16 Despite being a very basic set of headphones, the Sony MDR-V150 model is good enough for the beginner.
Sony MDR-V700DJ Headphones
These are a midlevel set of headphones from Sony. The sound quality of the MDR-V700DJ headphones ( Figure 3.17 ) is noticeably better than that of the cheaper Sony 'phones, so for those who insist on high fidelity, these are a great choice. The V700DJ is a disk-jockey model with swivel ear cups, allowing the wearer to flick the ears over to permit conventional hearing. Many podcasters like this feature when they are engaging in an interview (they like to have one of their two ears exposed). At $149.99, these headphones aren't cheap, but the sound-fidelity difference is noticeable.

Figure 3.17 These DJ headphones feature swivel ear cups.
JVC HA-G55 Headphones
The JVC HA-G55 headphones ( Figure 3.18 ) are a middle-of-the-road choice priced at $55. With a frequency response of 12 Hz to 25,000 Hz, they are capable of delivering a wide range of sounds to your ears. The advantage of the HA-G55s is that they have full-size, deep-base ear cups that allow for a rich sound that encircles the listener. These headphones are another excellent choice.
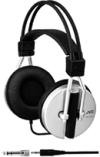
Figure 3.18 Priced between the two Sony models mentioned earlier in this section, the JVC HA-G55 headphones are a quality option.
Digital recorders
Although it may be tempting to rush out and purchase a digital recorder for your podcast needs, I need to point out that your computer itself is a powerful digital recorder, and the need for one of these devices is certainly not critical as long as you have a Mac or Windows PC. Still, digital recorders do have a certain amount of je ne sais quoi that makes them more glamorous.
Of course, there are legitimate reasons to get a digital recorder, not the least of which is the portability these devices afford the user. A digital recorder allows you to record programs virtually anywhere, provided that you have a microphone (some digital recorders have built-in microphones) and power to drive the unit. The only limitation with a digital recorder is its memory size; high-quality digital recordings take up a lot of memory space, so the size of the memory in a recorder is the main limiting factor when it comes to recording.
In this section, I take a look at three digital-recorder options: a high-end digital recorder, a midrange MP3 player option, and an iPod using Griffin Technology's iTalk microphone. The digital-recorder market offers plenty of choice, and it isn't within the scope of this book to examine them all, but taking a look at the cost and features of several units can help fill in the blanks about digital recorders and the need (or lack thereof) to own one.
Edirol R-1
|
|
The Edirol R-1 ( Figure 3.19 ) is one example of a high-end digital recorder. Although there certainly are more elaborate (and expensive) recorders on the market, this unit (at a price of around $500) is my choice at the high end. The R-1 is a handheld 24-bit digital recorder that is capable of recording high-quality broadcasts virtually anywhere. |
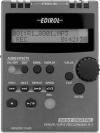
Figure 3.19 The Edirol R-1 is one example of a high-end digital recorder.
The feature list of this product is very impressive:
- 137-minute MP3 (compressed) recording time (with built-in 64 MB memory card)
- 24-bit uncompressed recording
- Dual built-in omnidirectional microphones
- External microphone input
- Line inputs
- 13 internal digital effects
- Built-in equalizer
- Built-in tuner (to tune musical instruments)
- Built-in metronome
- USB 2.0 connectivity
Clearly, the Edirol R-1 is a full-featured digital recorder that exceeds the needs of most podcasters. For anyone who is looking to become a serious podcaster, the Edirol is worth considering. Its many built-in features, the high quality of its recordings, and its portability make it a very popular choice.
iRiver IFP-795
|
|
The iRiver IFP-795 ( Figure 3.20 ) is a tiny (512 MB) MP3 player that can play for up to 40 hours on one AA battery. At $149, the IFP-795 is reasonably priced for a flash MP3 player, but it is much more than just that. Weighing in at just under an ounce and a half, the IFP-795 is a surprisingly full-functioned digital recorder, complete with a separate line input for an external microphone. |

Figure 3.20 The iRiver IFP-795 is an amazingly functional digital recorder that masquerades as an MP3 player.
Because the iRiver comes with software that allows easy connectivity to PCs or Macs, its USB 2.0 connection makes connection and export of recorded files a breeze. The device supports recording bit rates between 8 Kbps and 320 Kbps in WMA, MP3, and OGG music formats.
Apple iPod with Griffin iTalk
|
|
Not long after the first iPods were released, some iPod owners who were fooling around with the iPod's interface discovered a hidden menu that implied the iPod could be used for voice recording. It turns out that these folks had stumbled onto something that would show up about a year later: devices designed to record directly onto the iPod's hard drive. Today, Griffin Technology offers the iTalk, a small device that attaches to the top of the iPod photo as well as to third- and fourth-generation iPods. |
The iTalk ( Figure 3.21 ) is an ingenious device that attaches cleanly to the top of the iPod, and after you install the software (which is easy to do), the iPod becomes a competent voice recorder. The iTalk comes with a built-in speaker that allows you to record without any other equipment, but if quality is your goal, I suggest plugging an external microphone into the iTalk.

Figure 3.21 The iTalk is a mobile-recording option for iPod users.
The iTalk is a nifty little unit that will record on the iPod's hard drive in .WAV file format. When the iPod docks with iTunes, the file will be transferred to iTunes automatically, making it easy to pull off for editing.
The device does have a down side, in that the user cannot change the recording bit rate. Also, the quality of the built-in speaker, although decent, is not exactly broadcast quality. Still, as a portable recording device, the iTalk is an inexpensive ($49) option for an iPod owner.
Software
Part of what makes podcasting so appealing and so popular is the fact that it can be done relatively simply with a user's existing computer and accessories. After the audio podcast file has been recorded, it is still a good idea to use sound editing software to remove any imperfections and insert some appropriate background music. Fortunately, plenty of quality shareware and freeware programs are available to help you do just that.
It is also important to note that most sound-editing software can also be used as a digital recorder. In fact, many podcasts are created with a microphone that came with the computer, inputting directly into a program like Audacity or GarageBand. Many sound-editing programs are available, and increasingly, a new type of all-in-one program is showing up. These programs, like iPodcast Producer and Sparks, allow the user to create a podcast from start to finish and even publish the podcast, all from one program!
In this section, I examine several quality sound-editing/recording programs for the Mac, Linux, and Windows environments. I include freeware, shareware, and commercial products, some of which are limited to sound recording and editing; others are one-stop options that allow you to create a podcast and publish it without ever leaving the program.
Audacity
|
|
Audacity is the program of choice for many podcasters, in part because it is free, but mostly because it's a fantastic, powerful, easy-to-use program. Audacity can be used to record podcasts (with an attached microphone) or to edit existing sound files. Available for Mac computers, Windows PCs, and Linux PCs, Audacity is freeware and is so powerful that it most likely puts a dent in the sales figures of those programs that are for sale. You can download the program from http://audacity.sourceforge.net/download/ for each of the three operating systems ( Figure 3.22 ). |
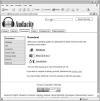
Figure 3.22 Audacity is available for most computer users, be they Mac OS, Linux, or Windows inspired.
As often occurs in the world of the Internet and computing, this freeware program is superior to some of the for-sale programs on the market. In the realm of podcasting, Audacity has quickly risen to be the top dog for audio mixing and recording (when recording directly on a PC or Mac).
The deep feature list for Audacity includes these items:
- Can record from microphone, line input, or other sources
- Can create multitrack recordings and dub over existing tracks
- Can record up to 16 channels at the same time (special hardware required)
- Can import WAV, AIFF, AU, and Ogg Vorbis files
- Can import and export MP3 files
- Easy editing using cut-and-paste methodology
- Volume fade in/out feature
- Built-in effects generator, including Echo and Phaser sounds
- Can record at up to 96 KHz (more than double a music CD's quality)
- Upgradable with plug-ins
Audacity, shown in action in Figure 3.23 , is such a complete and easy-to-use recording/editing tool that it is my first choice for all three platforms. There are lots of programs out there, but for someone who is just starting out on a tight budget, free is a great price to pay, and Audacity is also a fantastic piece of software.

Figure 3.23 Audacity is available for Mac, Windows PC, and Linux, and is very powerful.
BlogMatrix Sparks! 2.0
|
|
Sparks! 2.0 ( Figure 3.24 ) is an all-in-one solution for the Mac and the Windows PC, making it very simple to create a podcast and publish it without ever leaving the program. Sparks! 2.0 is a podcast aggregator as well as an audio recorder, editor, and podcast publisher. It's free for most of the features, but if you want to use the recording feature, you must pay a $10 fee (although the recording feature comes with a 30-day free trial). |

Figure 3.24 Sparks! 2.0 has a built-in, multitrack audio recorder/editor.
Sparks! is truly a one-stop solution for podcasters and podcast listeners. The feature list for this software is very impressive and includes
- The ability to record and edit podcasts
- The ability to publish podcasts with ease
- Acts as a podcast aggregator (
Figure 3.25
)

Figure 3.25 Sparks! 2.0 acts as a very functional podcast aggregator if need be.
- Acts as an Internet radio portal
- Acts as a blog reader
- Allows the creation of podcasts from Internet radio and other sources
- Can use multiple tracks and import music to create podcasts
As a one-stop shop, Sparks! 2.0 is an impressive piece of software. For true podcasting aficionados, I suspect that Sparks! 2.0 won't satisfy completely, but for the casual podcaster or the podcaster who just wants to create occasional podcasts, Sparks! is an excellent solution.
GarageBand/GarageBand 2
|
|
Folks who own Macintosh computers likely have a copy of GarageBand ( Figure 3.26 ) already sitting on their hard drives. If for some reason GarageBand has eluded you, it is included with all new Macintosh computers and can be purchased with iLife '05 for $79.99. What makes GarageBand so appealing to Macintosh enthusiasts is the way in which it interacts with iTunes and Mac OS X. As with most Apple applications, GarageBand's ease of use is very impressive, allowing a first-time user to put together an impressive multitrack recording in only a few minutes. |

Figure 3.26 If you own a Mac, there's a good chance that you already own GarageBand, the only sound recorder/editor you'll need.
GarageBand's ease of use comes from simple audio-track creation, drag-and-drop editing, and the ability to add music or other audio files simply by dragging them out of iTunes. Although GarageBand was designed specifically for the creation of music, it is still an elegant solution that works seamlessly with the rest of the software on your Macintosh when creating podcasts.
GarageBand's features include:
- Multitrack recording
- Point-and-click editing
- Compatibility with iTunes
- Multiple voice effects
- Complete control of all aspects of recording, including timing and pitch
iPodcast Producer
|
|
iPodcast Producer (iPP; Figure 3.27 ) is a commercial product that runs $149.95 from Industrial Audio Software's Web site (www.industrialaudiosoftware.com). iPP is meant exclusively to be a tool for recording, editing, and then publishing podcasts. The product is not as slick as Audacity or GarageBand, but it does contain the features necessary to get the job done. |

Figure 3.27 iPodcast Producer is a competent piece of software but a little pricey when one considers what is available for free.
iPP contains a sound/music recorder with two tracks (one for voice and one for music), a fader, and the ability to add up to 12 music or sound effects to keys F1 through F12 on the keyboard. After you assign a sound to one of these keys, you can insert that sound into a recording dynamically by pressing the key that activates it. The recorder also allows for other audio sources in .WAV or MP3 file formats to be imported.
After recording, you can access the iPP Editor ( Figure 3.28 ) and edit or modify the sound files with digital effects. You can apply 19 different effects to recordings during this process. When the file is complete, IPP allows the newly created podcast to be syndicated right from the program ( Figure 3.29 ). If you don't already have a spot to save your file for the RSS feed, Industrial Audio Software can sell you space starting at $49.95 per month.

Figure 3.28 The iPP Editor allows you to tweak the sound files.

Figure 3.29 You can publish your podcast directly from within iPP.
Adobe Audition 1.5
|
|
Adobe Audition ( Figure 3.30 ) is a high-end professional sound editing/ recording suite that offers advanced audio editing, mixing, and sound processing capabilities. This software is aimed mainly at professionals, but at $299, it is not priced outside the range of a serious podcaster. It certainly isn't hyperbole to say that Adobe Audition contains myriad features that a podcaster is likely never to use, but for those mavens who want every possible capability at their fingertips, this software is a great value for the money. |

Figure 3.30 Adobe Audition is one of the best choices for those who want high-end sound editing when creating a podcast.
Audition's feature list is so long that it might take up several pages in this book, so I'll stick to the highlights as they pertain to the realm of podcasting:
- All-in-one application for mixing, creating, editing, and adding audio effects
- Can be used to edit video soundtracks
- More than 50 digital signal processing tools and effects
- Up to 128 stereo tracks
- Up to 32 inputs with an equalizer on every track
- Record, edit, and mix high-resolution 32-bit files at sample rates up to 192 KHz (double the quality of DVD audio)
- Audio restoration features that allow you to clean up poor recordings
- Multichannel encoder for creating 5.1 surround sound (six speakers: center, left and right front, left and right rear, and subwoofer)
Although it clearly isn't for the weekend podcaster who wants to create relatively simple programs, Adobe Audition 1.5 is inexpensive enough that hard-core podcasters can enjoy its massive suite of features. You can download a trial version at www.adobe.com.
Propaganda
|
|
Like iPodcast Producer, Propaganda (www.makepropaganda.com; Figure 3.31 ) is designed to be a one-stop podcast creation station, allowing the user to create, edit, and publish podcasts with relative ease. Propaganda has a free 14-day trial; the cost to keep using it after that is $49.95. |

Figure 3.31 Propaganda is a one-stop podcast creation package for Windows computers.
The feature list of Propaganda includes:
- One-touch recording
- Recording from microphone or portable digital recorders
- On-screen VU meters
- Ability to rearrange clips in any order
- Ability to add background music and sounds
- Fade in/out transitions
- Ability to publish completed podcasts directly to a Web site
Propaganda allows you to record a podcast from a microphone and to organize and edit the voice file while adding background music and audio effects. When the podcast is complete, Propaganda allows you to upload the show to an RSS feed for distribution on the World Wide Web. If a one-stop piece of software appeals to you, Propaganda is an acceptable alternative for creating and publishing podcasts.
Sound Byte
|
|
Sound Byte ( Figure 3.32 ) is a bit of a different animal from the other software discussed in this section, because it does not directly help you create podcasts or publish them; instead, it works as a computerized cart machine. In radio stations of the past, a cart machine was a device that held a large number of cartridges with short audio blurbs, commercials, sounds, and other such material. When the DJ needed a particular sound, he or she could press a button, and that sound would come off the cartridge and get played on the air. This was a way for radio stations to add unique sounds to broadcasts, and it worked pretty well. |

Figure 3.32 Sound Byte allows you to create a palette of sounds that you can access with a click of the mouse.
Sound Byte, from Black Cat Systems (www.blackcatsystems.com), costs $24 (after a free trial) and effectively duplicates those old radio cartridge systems with the digital equivalent. The palette comes with 75 slots, each of which is capable of holding a distinct sound byte, piece of music, or sound effect (or whatever you want). When you're recording a podcast, you can simply click one of the sound effects to insert that effect into the background.
For podcasters who like to fly by the seat of their pants and add sound effects as needed, Sound Byte is an outstanding tool. Sound Byte is available only for the Macintosh at this point, but it is a valuable tool that certain podcasters appreciate and use.
Sound Recorder
|
|
There are many freeware, shareware, donationware, and commercial sound recorders on the market, but Windows users need not go any farther than their Start menu to find an audio recorder that can do the job. In Windows XP, you can find Sound Recorder ( Figure 3.33 ) in this path: Start/Programs/Accessories/Entertainment/Sound Recorder. |

Figure 3.33 Sound Recorder is free, and it's sitting right there in Windows.
Sound Recorder is limited in that it records only in mono, in 8 bits at 22 kHz, but for some podcasts, that level of quality is enough to get by. Amazingly, this little utility contains an effects menu that allows you to increase or decrease the clip's speed, add an echo to the clip ( Figure 3.34 ), or even reverse the clip's direction. This may be your chance to resurrect the "Paul is dead" controversy!

Figure 3.34 Surprisingly, this little utility has a few tricks up its sleeve.
Sound Recording and Editing Tips
Much of the skill you develop in creating podcasts will come with experience. No matter how much you know about the various terms and aspects of software packages and hardware, in the end, the most important thing is doing. That said, there are a few important tips that will help you when you are recording, editing, and mixing your podcast:
- When recording, try to use your normal voice. Many people attempt a "radio" voice, and it comes off sounding fake or contrived. Practicing talking in your normal voice will help your first podcast come off better.
- First-time podcasters often speak too loudly into the microphone. It's important not only to speak at a conversational level, but also to be careful not to vary the volume of your voice or the distance between your mouth and the microphone a great deal. Doing either of these things will result in an uneven podcast in which your voice will "drop out" or "explode" during the show.
- Use a pop filter (also known as a pop screen) in front of the microphone to eliminate pops when saying the letters, P, B, and F.
- When recording, make sure that the levels don't go over the 0-decibel mark on the DB meter. If that happens, the high end of the recording will get clipped off, resulting in very poor sound quality.
- Record at the highest sampling rate possible. CD quality is 44.1 kHz; DVD quality is 96.1 kHz. It's important to record at the highest quality that your recording device will allow. When using a small digital recorder, the size of the memory stick is the usual limiting factor. On a computer, however, there is usually enough hard drive space to record at any level.
- If you are going to use commercial music in your podcasts for any reason, you must get an appropriate license for it (see "Legalities" later in this chapter). Most music is licensed by ASCAP or BMI, and both have licenses for podcasters.
- When interviewing a guest, don't be afraid to rerecord your questions, especially if the questions didn't come off right in the first place (for example, you were coughing or stammering while asking the question). It's easy to rerecord the question and place it over the original question. The listener need never know.
- Use a fade-in and fade-out at the beginning and end of the podcast. This small touch gives a very impressive feel to the show and makes the proceedings come across as being professional.
- Include background music during the podcast (see "Legalities" later in this chapter). Background music can be used in several ways. First, it can demarcate different phases or sections of the podcast, rising in a crescendo to signify the passing of a segment and falling off again to signify the beginning of a new topic or to introduce a guest. Second, music can and should open and close a show, with several seconds of music preceding and following the first and last things said by the host.
Music
Music is a very important part of podcasting. After all, many podcasts are like terrestrial radio broadcasts, in that they play a selection of popular music. Even for all-talk podcasts, music is often part of the program in one form or another. Although music plays an important role in making podcasts sound professional, there are issues around the licensing of musical content within a podcast.
Despite the limitations, there are ways (such as licensing or using Creative Commons licenses) to include music in your podcasts. It's a sticky area, however, and it's important to know the lay of the land before you try to walk across it.
Legalities
Few people may realize this, but each and every time a song is played on the radio, on television, or even at a sporting event, a royalty is paid to the rights holder of that song. How much of a royalty is paid depends on where the song is played. For example, the use of a song in a commercial, such as the Rolling Stones' "Start Me Up" (for Microsoft Windows 2000) or the Beatles' "Revolution" (for a Nike shoe ad), can generate hundreds of thousands or millions of dollars. On the other hand, a radio station playing a particular song might require a payment of only 16 cents. Whatever the cost, royalties are designed to reimburse the creative people who wrote and performed this music.
Of course, many songs are owned not by the artists who wrote them, but by large corporations. Either way, the money is owed fair and square.
As one might expect, podcasting can throw a wrench into the royalty situation when it comes to music. Are the many mom-and-pop operations creating amateur podcasts still responsible for paying royalties for the music they may use in the background during their shows? If the podcast contains licensable music, the answer is YES.
Two main bodies manage royalty collection for music catalogs: ASCAP and BMI. ASCAP (American Society of Composers, Authors and Publishers) is a performing-arts organization that acts as a collector and advocate for those artists associated with it. BMI (Broadcast Music, Inc.) is similar to ASCAP in that it represents artists with regard to the collection of royalties for music that is played in public. Surprisingly, despite the sudden appearance and rapid growth of podcasting, both of these organizations have agreements that more or less cover the basics for podcasters.
ASCAP has a contract known as the ASCAP Experimental License Agreement for Internet Sites & Services, Release 5.0. This license costs $288 up front and includes fairly complex fee calculations. This contract is offered on a per-year basis, and the fee is not pro-rated, so if you pay $288 on December 20, 2005, you will have to pay $288 again on January 1, 2006. This is a very dynamic area, however, and any of the above details could change even by the time you read this book. To have a look at ASCAP's license, check out www.ascap.com/weblicense.
BMI has a similar license that appears to be slightly easier to negotiate. The up-front cost of this license is $283, and of course, there are also fee structures, depending on how music is used in the podcasts. To see BMI's license, go to www.bmi.com/licensing/forms/Internet0105A.pdf.
Bob Goyetche, of "The Bob and AJ Show" fame, says that when it comes to playing music in his show, the team ultimately looked at two alternatives:
- "We turned to indie musicians. We get specific permission from songwriters and performers, which gives us permission to play their tunes."
- "The background music we use is Creative Common–licensed music from open-source music sites. Usually, the stipulation is that as long as we give attribution, we can use the material."
It is clear that if you want to create a podcast that includes popular music, and you are interested in proceeding in a legal fashion, you will have to obtain licenses from these organizations and follow them to the letter. That said, it is unclear how many podcasters are currently following these rules. It probably won't surprise anyone if these rules change in the coming months or years. Either way, it is important to stay up to date on this issue if you are an active podcaster.
Creative Commons
Created in 2001 by Lawrence Lessig, Creative Commons (http://creativecommons.org; Figure 3.35 ) is a not-for-profit organization with the goal of expanding the amount of creative work available for others to build upon and share legally. Creative Commons licenses were originally designed for the United States, but now, Creative Commons licenses can be obtained in 29 countries.
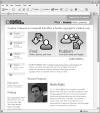
Figure 3.35 Creative Commons is an excellent place to find music for your podcasts.
This is a new system, built within current copyright law, that allows an individual to share his or her creations with others and to use music, images, and text online that has been identified as having a Creative Commons license. To learn more about the history of Creative Commons, visit http://creativecommons.org/about/history.
Several of the podcasters I interviewed for this book mentioned Creative Commons as a source for the music they use in their podcasts. If you want to include music in your podcasts, I suggest that you visit the Creative Commons Web site and learn more about what is available. As an artist, you can choose one of several licenses, including:
- Attribution. You let others copy, display, perform, and distribute your copyrighted work (and derivative works based upon it), but only if they give you credit.
- Noncommercial. You let others copy, display, perform, and distribute your work, but only for noncommercial purposes.
- No Derivative Works. You let others copy, display, perform, and distribute only verbatim copies of your work. There can be no derivative works based upon your work.
- Share Alike. You allow others to distribute derivative works only under a license that is identical to the license that governs your own work.
The Creative Commons Web site can point you to several excellent sites that contain Creative Commons–licensed sound files and music. One such site is Opsound (www.opsound.com) , shown in Figure 3.36 . This site is an excellent source of music that you can use in your podcasts provided that you follow the rules of each license. If the idea of reading the license for each song gets under your skin, remember that licensing commercial music is very expensive and requires far more paperwork.
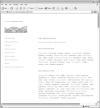
Figure 3.36 Opsound is a great site for Creative Commons–licensed music.
Tutorial: Creating a Podcast
Now that I've covered the basic equipment and process of creating a podcast, I'll take you step by step through the process of creating a podcast for both Macintosh and Windows PC computers.
In the case of the Macintosh, I used a third-party microphone, a preamp, and GarageBand in OS X to create the show. On the PC, I used a third-party microphone, no preamp, and Audacity for recording and sound editing.
I realize that there are literally hundreds of combinations of software, equipment, and operating systems, so I chose two relatively generic setups for creating the podcasts on each platform. The important thing to remember is that the process is fundamentally the same, no matter what is being used to create the show. It goes without saying that a complex preamp/mixing board and a high-end digital recorder will alter the process, but for the purpose of following from idea to finished podcast, these tutorials do the trick.
Creating a Macintosh podcast
Although other Macintosh programs are available, the fact that GarageBand is bundled with new machines makes it the most ubiquitous sound recording/editing software for the Macintosh. For this reason, I chose to use GarageBand as the software for this tutorial. The list of equipment I used is as follows:
- Karaoke Dynamic Microphone (no joke)
- M-Audio MobilePre USB preamp
- Macintosh G5 dual 2.0 GHz processors, 2.5 GB RAM, OS 10.3.9
- GarageBand version 1.1.0 (26)
1 Connect the equipment
I am assuming that you came up with the concept for the podcast, an outline, and possibly even a script before you made it to this point. That said, the first step is to connect all the equipment properly, starting with connecting the preamp to the USB port and then the microphone to the preamp ( Figures 3.37 through 3.40 ). When this is accomplished, ensure that the preamp is receiving power (the lights are on).

Figure 3.37 Connect the preamp to the computer via the USB port.

Figure 3.40 If you have no preamp, the micro phone can be plugged directly into the Line-In jack on the Macintosh.

Figure 3.38 Check to see that the power is active on the preamp.

Figure 3.39 Insert the microphone jack into the preamp microphone input; then set up your microphone with your pop screen (if you have one) in front of you.
2 Configure the application and OS
This next step is important, because if the correct inputs aren't selected in System Preferences, the microphone will not work properly. You must also open GarageBand and create a new project for your podcast to be created in. Follow the steps in Figures 3.41 through 3.48 to set up a straight vocal track (without any effects) so that recording can begin.

Figure 3.41 Open System Preferences, and click the Sound icon. Then click the button labeled Input.

Figure 3.48 In the New Track dialog box, click the Real Instrument button and then select Vocals. The default effect position will be No Effects; leave this as is. For these purposes, Mono is also acceptable (although if you have a stereo microphone, you can click the Stereo button). Click OK to continue.

Figure 3.42 In the list box, select MobilePre. (This is the M-Audio MobilePre USB preamp device I am using.)

Figure 3.43 Using the microphone, test the Input Level by watching the meter above the volume control. Adjust the volume so that normal speech brings the meter up to about 70 percent of maximum.

Figure 3.44 Open GarageBand, and select Create New Song.

Figure 3.45 When you select Create New Song, you will get this dialog box, asking you what to name it and where to save it. The Tempo, Time, bpm, and Key settings at the bottom of the dialog box can be left as is.

Figure 3.46 When the GarageBand project opens, you will see a Grand Piano track. Choose Track > Delete Track to delete it.

Figure 3.47 Now choose Track > New Track.
3 Record your podcast
Now that everything is set up and ready to go, it's time to record the podcast. Before you start the actual podcast, record the first couple lines of your podcast; then go back and listen to it ( Figure 3.49 ). If you feel that your vocal track needs some adjustment, open the Track Info dialog box by choosing Track > Track Info. Here, you can adjust the equalizer, add effects, and manage echo and reverb. After you have set up your vocals just so, get your script out, and click the Record button to start the podcast ( Figures 3.50 and 3.51 ).
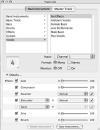
Figure 3.49 After recording a short test track, if you don't like the sound, you can open the Track Info dialog box (choose Track > Track Info) and make any changes you feel are necessary.

Figure 3.50 Click the Record button, and start talking!

Figure 3.51 If you make a mistake, just pause for a second and then pick up where you left off (the mistake can be edited out later). The other option is to stop the recording and begin a new track.
4 Edit your vocal content
The podcast recording is now in the bag. Unfortunately, you made a few verbal flubs and had to repeat yourself in several places to ensure that the material was covered cleanly. This is what editing was made for, and fortunately, it's what GarageBand was made for as well. Using the Track Editor, you can selectively remove (or move around) any portions of the recording that you want ( Figures 3.52 through 3.56 ).

Figure 3.52 Begin by selecting the main track (there may only be one); then click the scissor-shaped icon. This brings up the Track Editor, where you can manipulate the recording quickly and easily.

Figure 3.56 Using the simple cut-and-paste interface in GarageBand, manipulate the recording so that it represents the intended broadcast. This usually involves simple cutting of mistakes and rejoining of the audio track.

Figure 3.53 In the bottom-left corner of the Track Editor is a slider that allows you to enlarge the scale of the recording strip. Enlarge the scale to between the third and fourth notches.

Figure 3.54 Now move to the areas that you want to cut. Using the mouse, select the individual sections of the recording you want to eliminate; then choose Edit > Cut (Command-X).

Figure 3.55 When the portion is cut out, there will be a gap in the soundtrack. Use your mouse to grab the far end of the soundtrack to slide the two halves back together again. In this manner, you can remove any unwanted content and join up the recording again so that the listener never knew anything was cut.
5 Add music and finishing touches
Now is the time to import any music (see "Legalities" earlier in this chapter) into the background and/or at the beginning and end of the podcast. On the Mac, iTunes makes this very simple, because you can drag and drop files directly from iTunes into your podcast ( Figure 3.57 ). Similarly, you can drag an MP3 or AAC file from the Desktop into GarageBand. When the music is in place, click the tiny inverted triangle under the track name to open the Track Volume control ( Figure 3.58 ). With this control, you can adjust the volume of the track in detail, fading in and out as you please ( Figure 3.59 ).

Figure 3.57 Drag files directly out of iTunes and into GarageBand, if you want. Here, an original version of "Row Row Row Your Boat" is being dragged into GarageBand.

Figure 3.58 When the music is in place, click the inverted triangle to bring up the Track Volume bar. By clicking the volume line in this bar, you create points that you can manipulate to control the volume in minute or heavy-handed ways. Using a series of four points, make your music fade in at the beginning of the podcast and then fade out at the end.

Figure 3.59 Depending on the volume variability of your voice during the recording, you may want to adjust the volume on the main voice track, although I recommend against doing so unless it is absolutely necessary.
6 Export the podcast to MP3 format
The last phase of the podcast creation process is outputting the file in a usable format. Ideally, the MP3 format is the one that can be accessed by the widest range of listeners, so I recommend that you choose that format. That said, GarageBand does not export in MP3 format; it exports in AAC format into iTunes. For this reason, you must export to iTunes first and then convert to an MP3 file in iTunes to complete the process ( Figures 3.60, 3.61 , and 3.62 ).

Figure 3.60 To export your podcast to iTunes, choose File > Export to iTunes.

Figure 3.61 When the export is complete, your podcast will show up in iTunes as the latest file added.

Figure 3.62 In iTunes, select the podcast; then choose Advanced > Convert Selection to MP3 to finish the process. Congratulations—you've completed your first podcast! For instructions on how to publish your podcast, turn to Chapter 4.
Creating a PC podcast
Windows PCs have the largest library of software available for creating podcasts. They also have by far the largest variation in equipment components. PCs have a large variety of motherboards, sound cards, video cards, types of RAM, and even CPUs, and for this reason, it is difficult to present an example of a common PC setup for creating podcasts. That said, the vast majority of PCs have sound cards with microphone inputs, and the lion's share of them run the Windows operating system.
I came up with a process for creating a podcast on a PC that a preponderance of PC users will be able to follow, using the following items:
- Radio Shack PZM omnidirectional condenser microphone
- C-Media PCI Sound Card (in Dell Dimension 4500)
- Dell Dimension 4500 P4 2.4 GHz, 1 GB RAM
- Windows XP (although other Windows configurations are very similar)
- Audacity, Version 1.2.3 (PC version)
1 Connect the equipment
As in the Macintosh tutorial, I am assuming that you came up with the concept for the podcast, an outline, and possibly even a script before you made it to this point. When you are ready to begin, you must make the necessary connections to get the ball rolling ( Figures 3.63, 3.64 , and 3.65 ). In this case, the connections need only be that the microphone is plugged into the microphone or Line-In jack of the sound card on the back of the PC.

Figure 3.63 In the case of the Realistic (Radio Shack) PZM omnidirectional condenser microphone, check to see that it has a fresh battery (there is no preamp to provide phantom power) before you plug it in.

Figure 3.64 If your microphone has a 6.5mm (1/4-inch) jack, you will likely need an adapter to turn the jack into a standard 3.5mm jack that PC sound cards accept.

Figure 3.65 Plug the microphone into the microphone input on the sound card (located on the back of your computer). If you make a mistake and plug it into the Line-In jack, it won't be the end of the world; you can always change the input in Audacity later. If you have a pop filter, this is also the time to set it up in front of the microphone.
2 Configure the application and OS
This next step involves making sure that the microphone is working as an input device in Windows. To do this, you must enter the Windows Sounds and Audio Devices control panel and ensure that the microphone is working ( Figures 3.66 through 3.71 ). Then you must open Audacity, create a new file, and test your microphone to ensure that it is working properly with that program ( Figures 3.72 through 3.75 ).

Figure 3.66 From the Start menu, choose Settings > Control Panel > Sounds, Speech, and Audio Devices.

Figure 3.71 After a short time analyzing your system, the wizard shows this dialog box, which allows you to test the functioning of your microphone. When the wizard is complete, the microphone should be working properly.

Figure 3.72 Now it's time to launch Audacity. When it's up and running, choose File > Save Project As to name and save your podcast.

Figure 3.75 The left portion of the Audio Track window will tell you what the recording settings are. These should say Mono, 44100 Hz, and 32-bit float rate. If you are using a stereo microphone, you can click the Audio Track control to select a Stereo input. Likewise, if you want to increase or decrease the sampling rate, you can do that in this menu as well. 44100 Hz is 44.1 kHz, which will produce a CD-quality recording.
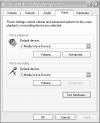
Figure 3.67 Clicking Sounds, Speech, and Audio Devices brings up the Sounds and Audio Devices Properties dialog box. There are five tabs at the top of this dialog box; click the tab labeled Voice.
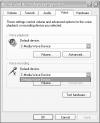
Figure 3.68 In the Voice Recording area, there is a menu from which you can choose the default recording device. This should already be set to the sound card that is in your computer (in this case, a C-Media card). If you have more than one device available, you can select it here.

Figure 3.69 While still in the Sounds and Audio Devices Properties window, if you want to adjust the balance or the volume of the various inputs to the computer, click the Volume button in the Default Device window. This brings up the Recording Control dialog box, which allows you to adjust the volume and balance for four inputs: Microphone, CD Audio, Line In, and Wave.

Figure 3.70 If you want to test that the microphone is working properly, click the Test Hardware button. This will bring up the Sound Hardware Test Wizard.

Figure 3.73 In the middle of the main Audacity window is a drop-down menu labeled Microphone. If your microphone is plugged into the microphone jack of your sound card, you're all set. If, however, your microphone is plugged into the Line-In jack, you must select the appropriate input from the Microphone drop-down menu.

Figure 3.74 Next, choose Project > New Audio Track.
3 Record your podcast
Now that everything is set up and ready to go, it's time to record the podcast. Before you start the actual podcast, record the first couple lines of your podcast; then go back and listen to it ( Figure 3.76 ). If you feel that your vocal track needs some adjustment, and you want to add an effect to it, you can add it after the recording (Audacity doesn't add effects dynamically). When you have completed the practice run, start the recording, and let it rip ( Figures 3.77 and 3.78 )!

Figure 3.76 After recording a short test track, play back the recording to ensure that it sounds OK.

Figure 3.77 When you're ready, click the Record button, and start talking!

Figure 3.78 If you make a mistake, just pause for a second and then pick up where you left off (the mistake can be edited out later). The other option is to stop the recording and begin a new track. I recommend that you pause and then restart at the point where you made your mistake. This way, you will be editing just one track.
4 Edit your vocal content
The podcast recording is now in the bag. Unfortunately, you made a few verbal flubs and had to repeat yourself in several places to ensure that the material was covered cleanly. This is what editing was made for, and fortunately, the folks who made Audacity have made it easy for us to edit out any verbal mistakes ( Figures 3.79 through 3.82 ).

Figure 3.79 Audacity allows you to edit the tracks right in the Audio Track window. To edit a specific portion or add an effect to it, highlight that portion of the track.

Figure 3.82 To move a portion of the recording around, choose Edit > Cut. Then, using the selection tool, click the place in the recording where you want the cut piece of audio to be placed. When the area is selected (a line will appear in the recording showing the exact point of insertion), choose Edit > Paste.

Figure 3.80 When the portion of the track you want to alter is highlighted, click the Effect menu and drag down to the effect you want to apply to the recording. In this case, you are adding an Echo effect to the selection.

Figure 3.81 If you want to remove a specific portion, select that portion; then choose Edit > Cut. When you do this, the portion you selected will be cut from the recording.
5 Add music and finishing touches
The voice recording is now just right, but it's just a plain voice recording. Now is the time to import any music (see "Legalities" earlier in this chapter) into the background and/or at the beginning and end of the podcast. Audacity allows for the easy drag-and-drop addition of any MP3 or WAV file. Simply pick up the MP3 file you want, and drag it to the area beneath your main sound track ( Figure 3.83 ). The MP3 will be added as a separate audio track. When the music is in place, you can highlight specific sections and adjust the volume or apply effects such as a fade-in or fade-out as you see fit ( Figures 3.84, 3.85 , and 3.86 ).

Figure 3.83 Drag audio files directly to Audacity. When you do, the files will be imported automatically.
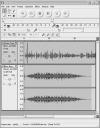
Figure 3.84 When the music is in place, you can adjust the volume control on the bar on the left, or you can select portions of the music and add effects to it. This is where you can add the Fade In and Fade Out effects.

Figure 3.85 Note the (very loud) MP3 recording and how it is tapered at both ends. This file has had a short Fade In and a longer Fade Out effect added to it.

Figure 3.86 If you want to add any effects to any portion of the recording, now is the time to do it. To add an effect, simply select the portion of the recording that you want to alter; then choose the effect you want to add from the Effect menu. You can undo the addition of effects, if need be.
6 Export the podcast to MP3 format
The last phase of the podcast creation process is outputting the file in a usable format. Ideally, the MP3 format is the one that can be accessed by the widest range of listeners, so I recommend that you choose that format ( Figures 3.87, 3.88 , and 3.89 ). Audacity can export files as .WAV files, MP3 files, or Ogg Vorbis files. For the purposes of mass acceptance, the MP3 is the file of choice.

Figure 3.87 When the podcast is complete, choose File > Export As MP3.

Figure 3.88 When you select the Export as MP3 file, a warning appears that the file will be mixed down into two tracks (a stereo recording). This is fine.

Figure 3.89 Next, a dialog box asks you to name the file and select a place to save it. This dialog box also allows you to change your mind about what kind of file format to save it in. That's it! When the file has been exported as an MP3 file, the job is complete.
For more information on Digital Lifestyles topics, visit our Digital Lifestyles Reference Guide or sign up for our Digital Lifestyles Newsletter

