Setting
Code Preferences:
Code Colors
Dreamweaver sets colors in the Code inspector or in Code View so that you can tell different tags apart. By default, tags are given the colors pictured in Table 1. Plain text is black, generic tags are navy blue, and comments are gray.
Code Colors preferences allow you to set the background of the HTML inspector, as well as text colors for specific tags and types of tags. You can change the colors for any tag and supply colors for tags that aren't yet specified.
To edit HTML Color Preferences:
- From the Document window menu bar, select Edit > Preferences.
The Preferences dialog box will appear.
- In the Category box at the left of the dialog box, click on
Code Colors. That panel of the dialog box will appear (Figure
1).
- The Background color of the Code inspector is white by default. To change this color, do one of the following:
- Type the hex code for the color in the Background text box (Figure 2).
- Click on the Color button, and then click on a color in the Color picker (Figure 3).
- Click on the Color button, and then click the eyedropper cursor on a color you like anywhere on your desktop.
- Click on the Color button, and then click on the System Color button. Use the Colors dialog box to fine-tune your color choice (See Chapter 3 for more detail).
- Repeat Step 3 for other elements you'd like to change, including
(non-tag) Text, Comments, and Tag Default.
- To set the color for a specific tag, such as <img>
or <table>,
scroll through the Tag Specific list box until you see the tag
you want, and then click on it. (Type the first letter of the
tag to jump through the list.) Options for your selection will
appear (Figure 4).
- To change the color, click on the radio button next to the Color
button. Then follow Step 3 to select a color.
- To have any text within the tag retain the regular text color,
make sure the Apply Color to Tag Contents radio button is unchecked.
To have all text and code between the opening and closing tags
take on the new tag color, check the Apply Color to Tag Contents
radio button. In my example, all text and tags between <FRAMESET>
and </FRAMESET>
would appear in the color I selected.
- When you're all finished, you can move to the next section to edit more preferences; or you can click on OK to save your changes and close the Preferences dialog box.
| Table 1: Default Color Preferences | ||
|---|---|---|
| Tag | Color | Hex Code |
| Plain text | #000000 | |
| Default tags | #000080 | |
| Comments | #808080 | |
| A | #008000 | |
| COLW | #008080 | |
| HSPEC | #008080 | |
| IMG | #800080 | |
| OBJECT | #800000 | |
| SCRIPT | #800000 | |
| SERVER | #800000 | |
| TABLE | #008080 | |
| TBODY | #008080 | |
| TD | #008080 | |
| TFOOT | #008080 | |
| TH | #008080 | |
| THEAD | #008080 | |
| TR | #008080 | |
| VSPEC | #008080 | |
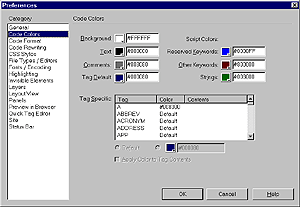
Fig. 1
The Code Colors panel of Dreamweaver's
Preferences dialog box.
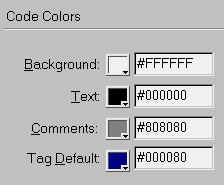
Fig. 2
A close-up of the Code Colors. Click on a button to open the
color picker.
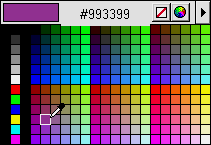
Fig. 3 The
color picker. Click on any color to choose it, or click the eyedropper
anywhere on your page or your desktop.
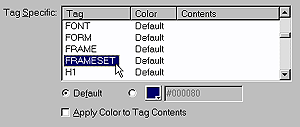
Fig. 4 A
close-up of the Tag Specific list box. Here, I've selected the Frameset
tag.
Tips
- Code colors are updated as you work if you have Syntax Coloring turned on. To turn on Syntax Coloring, open the Code inspector, or switch to Code View or Split View in the Document window. Then, select Syntax Coloring from the Options menu (Figure 5). For more about how Syntax Coloring works, see Chapter 4.
- These colors appear only in Dreamweaver; there is no code in the file that would make them appear when you open the page in a different text editor.
- It's a good idea to open the Code inspector and make sure your color choices result in readable text, particularly if you change the Code inspector's background color.
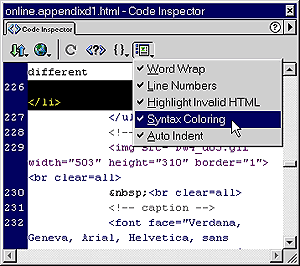
Fig. 5 With Syntax Coloring turned on, the colors are applied to your code as you type. Select Syntax Coloring from the Options menu on the toolbar in either the Code inspector or Code View.