Working with Shape Layers in Adobe After Effects CC (2015 release)
This excerpt references lesson files, which are available with the purchased book.
Getting started
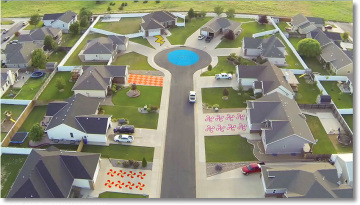
Shape layers are created automatically when you draw a shape with any of the drawing tools. You can customize and transform an individual shape or its entire layer to create interesting results. In this lesson, you will use shape layers to build dynamic and whimsical designs on the street and driveways of a neighborhood.
First, you’ll preview the final movie and set up the project.
Make sure the following files are in the Lessons/Lesson04 folder on your hard disk, or download them from your Account page at www.peachpit.com now:
- In the Assets folder: Beat.aif, drop.aep, Melody.aif, tracking.aep, Tracking.mp4
- In the Sample_Movie folder: Lesson04.mov
- Open and play the Lesson04.mov sample movie to see what you will create in this lesson. When you are done, quit QuickTime Player. You may delete this sample movie from your hard disk if you have limited storage space.
As you start After Effects, restore the default application settings. See “Restoring default preferences” on page 2.
- Start After Effects, and then immediately hold down Ctrl+Alt+Shift (Windows) or Command+Option+Shift (Mac OS) to restore default preferences settings. When prompted, click OK to delete your preferences.
- Close the Start window.
After Effects opens to display a blank, untitled project.
- Choose File > Save As > Save As, and then navigate to the Lessons/Lesson04/Finished_Project folder.
- Name the project Lesson04_Finished.aep, and then click Save.
Creating the composition
Next, you’ll import the files you need and create the composition. You’ll import two footage items and two saved project files.
- Double-click an empty area of the Project panel to open the Import File dialog box.
- Navigate to the Lessons/Lesson04/Assets folder on your hard disk, Ctrl-click (Windows) or Command-click (Mac OS) to select the Beat.aif and Melody.aif files, and then click Import or Open.
- Choose File > New > New Folder to create a new folder in the Project panel.
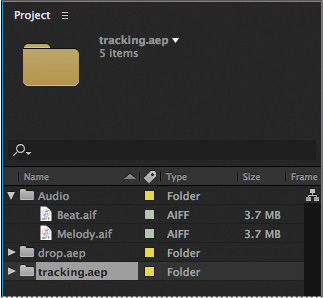
Name the folder Audio, press Enter or Return to accept the name, and then drag the two audio files you imported into the Audio folder. Then expand the folder so you can see its contents.

- Double-click an empty area of the Project panel to open the Import File dialog box again.
- Navigate to the Lessons/Lesson04/Assets folder. Ctrl-click (Windows) or Command-click (Mac OS) to select the drop.aep and tracking.aep project files, and then click Import or Open. The video files and other elements you will need later are imported with the projects.
Now you’re ready to create the composition.
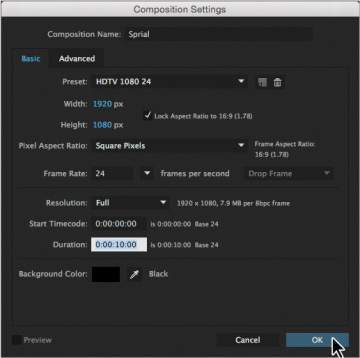
Press Ctrl+N (Windows) or Command+N (Mac OS) to create a new composition.
- In the Composition Settings dialog box, name the composition Spiral, select the HDTV 1080 24 preset, and set the Duration to 10:00. Then click OK.
After Effects opens the new composition in both the Timeline and Composition panels.


