- Magnification�
- Moving the View�
- Navigator Palette Tricks�
Moving the View
If you’re like most Photoshop users, you find yourself moving the image around a lot. Do a little here, do a little there, and so on. But when you’re doing this kind of navigation, you should rarely use the scroll bars. There are much better ways.
Use the Hand Tool
The best way to make a small move is to select the Hand tool with your keyboard (by pressing the spacebar) instead of choosing it from the Tools palette. Then just click-and-drag to where you want to go.
End Up Down Home
Many people ignore the very helpful Page Up, Page Down, Home, and End keys when working in Photoshop, but we find them invaluable for perusing an image for dust or scratches.
When you press Page Up or Page Down, Photoshop scrolls the image up or down by one whole window of pixels. Although there’s no Page Left or Page Right button, you can jump one window of pixels to the left or right by pressing Command-Page Up or Command-Page Down in Mac OS X, or Ctrl-Page Up or Ctrl-Page Down in Windows. You can scroll in 10-pixel increments by adding the Shift key to any of these shortcuts.
Also note that pressing the Home button jumps to the upper-left corner of the document, and pressing the End button jumps to the lower-right corner. David often uses this technique when using the Crop tool, to quickly adjust the upper-left and lower-right corners.
Match Up Your Windows
When you’re working on multiple images at the same time, it’s helpful to sync their views. Several commands on the Arrange submenu (under the Window menu) automate this process:
- Match Zoom sets the magnification percentage for every open image to the zoom level of the current document.
- Match Location leaves the magnification alone but scrolls each document window to the same part of the image as the current file. For instance, if the current file displays the lower-right corner, all the images will scroll to the lower-right corner. (Unfortunately, Match Location is only approximate; it won’t match to the exact pixel.)
- Match Zoom and Location is the one we use most often. You can guess what it does.
Quick Clicks with Context-Sensitive Menus
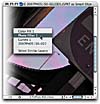
When you Control-click (Mac) or right-click (Windows), Photoshop displays a context-sensitive menu that changes depending on the tool you have selected in the Tools palette. It’s worth trying out with any tool you use (see Figure 4).

Figure 4 Context menu for the Move tool, displaying available layers under the cursor.
For brush or retouching tools, the context menu is a quick way to adjust the brush. The context-sensitive menu for the Move tool lets you select a layer. If you have four layers in an image and three of them overlap in one particular area, you can Control-click on that area (right-click in Windows), and Photoshop asks which of the three layers you want to jump to. If the Move tool isn’t selected, you can almost always get the Move tool’s context menu by holding down Command and Control-clicking in Mac OS X, or holding down Ctrl and right-clicking in Windows.
The context-sensitive menu for the Marquee tool contains a mishmash of features, including Delete Layer, Duplicate Layer, Load Selection, Reselect, Color Range, and Group into New Smart Object. (We have no idea why Adobe picked these and left others out.) Many of these features don’t have keyboard shortcuts, so this menu is the fastest way to perform them.