Page Design in Dreamweaver CS4 with apDiv Tags
- Drawing apDiv Objects
- Editing the CSS Code
- More Layout Techniques
Like this article? We recommend
Like this article? We recommend
Like this article? We recommend
Depending on how you count, there are two or three basic ways to lay out a web page. Tables emerged as one traditional page design technique. The developers of HTML, the web page markup language, didn't envision much in the way of page layout, and only included table functionality as a way of posting data. Creative designers stretched the limits of table coding tags to create columns of content, boxes for images and media, rows for banners and navigation bars, and other page components.
Another technique for managing page layout is creating framesets—pages within pages, with a frameset defining where those pages appear in a browser window.
While both tables and frames remain in wide use as page design tools, the global adoption and ongoing development of Cascading Style Sheets (CSS) has opened up whole new dimensions to page design. In particular, designers now apply CSS attributes to HTML Div tags—tags that serve as containers for formatting attributes. Dreamweaver CS4 uses apDiv tags (ap stands for absolute placement) for this purpose.
Page design with CSS offers a number of advantages over tables:
- CSS is more flexible. CSS page design isn't constrained to rows and columns.
- CSS is more adaptable. Users and product developers can configure CSS to facilitate page display in environments ranging from reader devices for sight-impaired users to a variety of mobile browsing devices.
- CSS is intuitive. At least, it is in Dreamweaver CS4, where you can draw CSS boxes the way you would design a page in Adobe Illustrator or Adobe InDesign.
- CSS is updatable. A CSS style applied as a page-formatting device throughout a website can be updated instantly (or almost instantly). For example, boxes that hold images can be reconfigured from black backgrounds to orange backgrounds, page margins can be adjusted, or navigation bars can be reconfigured globally by redefining a shared CSS style.
Once defined, a CSS style can be saved and reused. This is done by saving the CSS code to an external style sheet—that is, a separate, linked file that stores shared CSS code. Setting up an external style sheet is a bit beyond what I can cover in this article, however; we're going to cover quite a bit of territory just in working through page layout in CSS.
Before launching into the process of page design with CSS in Dreamweaver, let me clue you in to one more element of the process. Page layout attributes in CSS are attached to HTML tags, and generally to the particularly flexible DIV tag. As I show you how to lay out pages with CSS in Dreamweaver, for the most part you'll just draw boxes on your screen and choose attributes for them (such as background color). But behind the scenes, Dreamweaver will be generating a DIV tag and writing CSS attributes for that tag.
Drawing apDiv Objects
Dreamweaver's basic technique for generating DIV tags with CSS involves attributes that specify absolute placement. For example, suppose you create a rectangle on the page and then move and resize it. Dreamweaver generates a DIV tag with size and placement attributes to match your work. Follow these steps to see this process in action:
- With
a web page open in Dreamweaver, choose Insert > AP Div (see Figure
1).
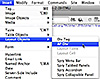
Figure 1 Inserting an apDiv tag.
- A
rectangular container is generated on the page. By default, the container is in
the upper-left corner of the page, and is 200 pixels wide by 115 pixels high. If
you're using Code and Design view (choose View > Code and Design), you can
see the generated apDiv
tag in the code window. To move the container, click and drag the upper left
corner of the rectangle—a grabber hand appears as shown in Figure
2.
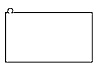
Figure 2 Moving an apDiv tag.
- To resize the apDiv tag, grab any of the six corner or side handles and drag in or out (see Figure
3).
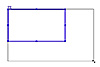
Figure 3 Resizing an apDiv tag.
)
)
)
You can create a page layout by generating, moving, and resizing a number of apDiv tags. The page layout in Figure 4 uses four apDiv tags: an apDiv tag for a banner, one for a left navigation column, one for the main page content, and one for a right-side column.
)
Figure 4 Designing a page with four apDiv tags.
Dreamweaver CS4 provides a number of features that facilitate aligning apDiv tags. For example, you can select two or more apDivs and choose Modify > Arrange to access a submenu with alignment options. In Figure 5, I'm left-aligning two apDivs.
)
Figure 5 Aligning apDiv tags.
Once you've positioned and sized your apDiv tags, use the Properties inspector to apply basic formatting such as background color. (Choose Window > Properties if the Properties inspector is not visible.) For example, with an apDiv selected, choose a background color from the BG Color swatch as shown in Figure 6.
)
Figure 6 Assigning a background color to an apDiv tag.
Alternatively, you can apply a background image—such as the gradient I'm applying to the main body of my page in Figure 7.
)
Figure 7 Assigning a background image to an apDiv tag.
At this stage of the process, you have a basic page design. You can begin to add content to any of the apDiv tags. Select the tag and enter text, insert images, add media, and so on (see Figure 8). Experiment with this capability, and don't worry if you run into design issues such as the need for padding to keep content from running right up against the edges of your apDiv. We'll adjust those details shortly.
I'll show you how to fine-tune the attributes of your apDiv tags next, but at this point it's expedient to add content so that you can identify what kinds of tweaking your apDiv formatting will need.
)
Figure 8 Content added to apDiv containers.