This chapter is from the book
This chapter is from the book
This chapter is from the book
Installing Lightroom
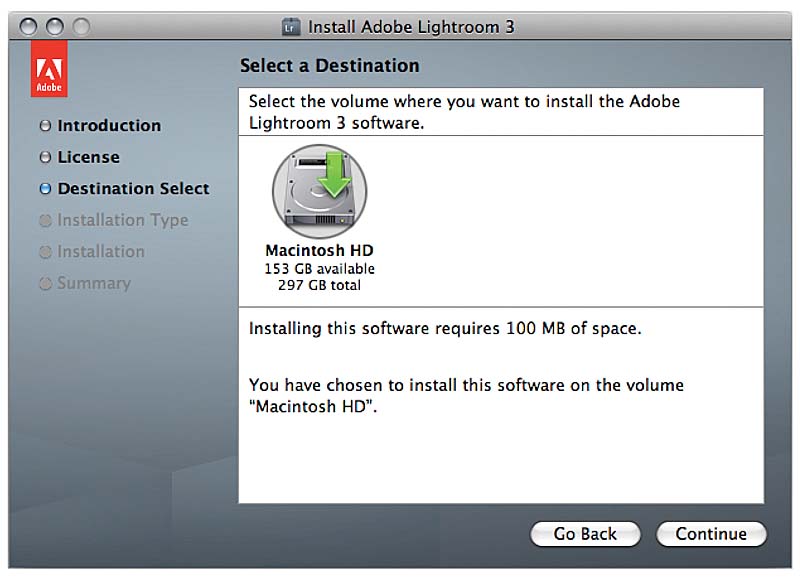
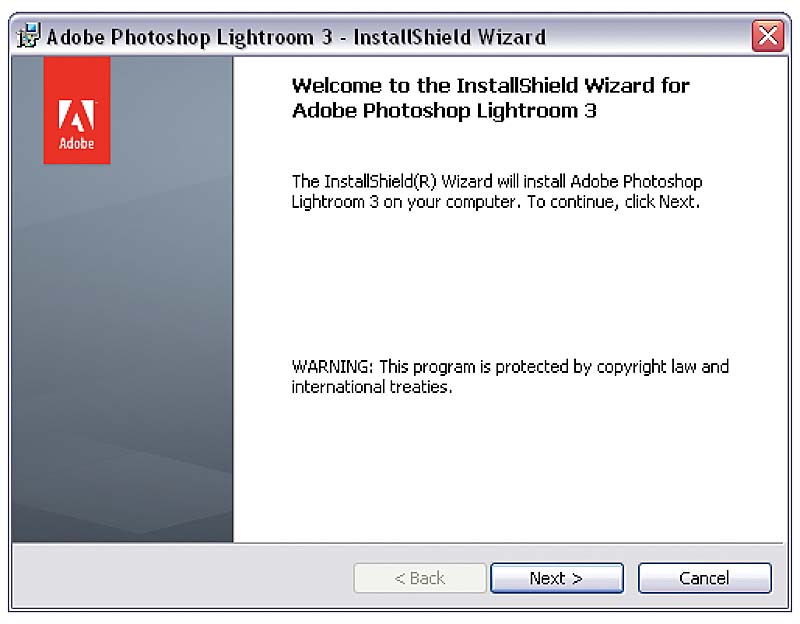
The Lightroom installation process should be quick and easy. All you need to do is download the program or load the installation DVD and run the installer. Figure 1.2 shows the Mac OS installation dialog and Figure 1.3 shows the PC version. Simply click the Continue or Next button and follow the on-screen instructions. All you have to do is confirm which drive you want to install Lightroom to and that’s it. If you have an earlier version of Lightroom on your computer, the Lightroom installer will know exactly what to do (see sidebar). The first time you launch Lightroom, you will need to read and agree to the terms and conditions and, if installing for the first time, enter a program serial number. If you are installing Lightroom 3 and upgrading an existing Lightroom catalog, you will also be asked at this stage if you would like Lightroom to run a verification process to test the integrity of the current catalog.
)
Figure 1.2 The Lightroom installation dialog for Mac OS X.
)
Figure 1.3 The Lightroom installation dialog for Windows XP.
Flash updates
Make sure that you read the Read Me file, and download and install the latest Flash update. You will need this to preview Flash galleries generated from the Web module.
64-bit processing
If your computer hardware is 64-bit enabled and you are also running a 64-bit operating system, you can run Lightroom as a 64-bit program either on an Intel Mac or on a Windows Vista 64-bit or Windows 7 system. Intel Mac users will need to follow the instructions in Figure 1.4 to enable the program in 64-bit mode, while Windows Vista and Windows 7 users will need to make sure they download or install the 64-bit version of the program. The 64-bit versions of Lightroom allow you to go beyond the 4 GB RAM limit that was imposed on 32-bit operating systems, assuming that you have more than 4 GB of RAM installed on your computer. If you do have more than 4 GB of RAM installed, then you should see an 8 percent to 12 percent boost in performance speed. Lightroom’s performance will be relative to the size of your master image files. The minimum specifications outlined on page 8 may suffice if you are editing only raw or JPEG files from a 5- or 6-megapixel camera. If you want to process files larger than this, you will almost certainly need a faster computer with more RAM memory. With 64-bit processing, you will be able to access the extra memory that is installed on your computer.
)
Figure 1.4 To enable Lightroom in 64-bit mode for an Intel Macintosh computer, locate the application, go to the Finder, and choose File → File Info. Uncheck the Open in 32 Bit Mode check box and relaunch Lightroom.
Single vs. multiple catalogs
To start with, you will probably want to work with just one Lightroom catalog, which, if you run out of space on your main hard drive, can always be moved to a new disk location at a later date. I know some people have been tempted to work with multiple catalogs. Some have done this as a way to manage their image catalogs in a more browser-like fashion, and others have done so because of problems with Lightroom performance when working with large catalogs of images. Bear in mind that a lot of the Lightroom 3 engineering work has been focussed on improving the catalog file management, so you should now see faster performance when working with large individual catalogs.
Some photographers probably feel comfortable using a folder management system for organizing their photos. But metadata management is now becoming increasingly popular. For example, there are now smarter ways to search a computer archive, such as the Spotlight feature on Mac OS X, which bypasses the need to navigate by folder when you are searching for a specific file. Similarly, Windows Vista encourages you to search the contents of your entire computer system by using text searches to discover all files with matching data.
Lightroom preferences
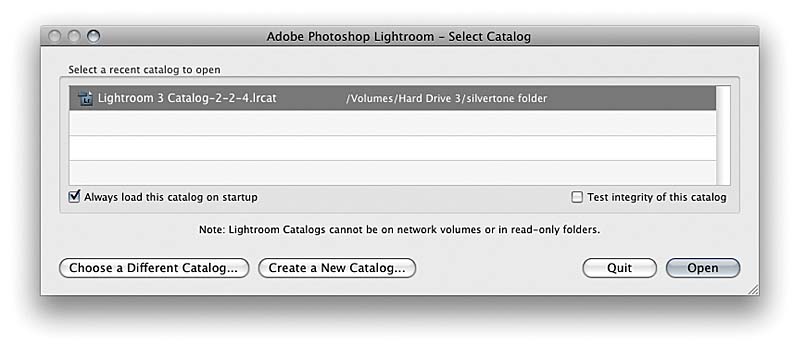
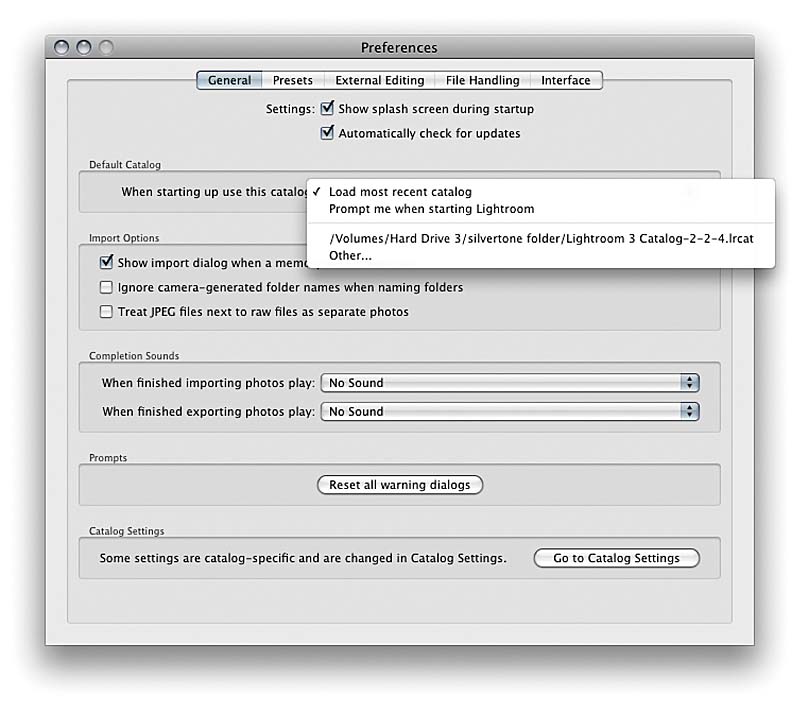
The default Library location for your Lightroom catalog is the username/Pictures folder (Mac) and the username/My Documents/My Pictures folder (PC). If you want to create a new catalog in a different location, you can do so by restarting Lightroom with the Alt key (Mac) or the Cntrl key (PC) held down during startup. This displays the Select Catalog dialog shown in Figure 1.5 where you can click the Create a New Catalog button to select a location to store a new Lightroom catalog. After you have successfully launched the program, go to the Lightroom menu (Mac) or the Edit menu (PC) and choose Preferences. This opens the General Preferences dialog shown in Figure 1.6 followed by the other preference sections shown in Figures 1.7 through 1.10. You can read more about the preference settings in Appendix A, so I’ll just point out the key settings for now.
Figure 1.5 Holding down the Alt key (Mac) or the Cntrl key (PC) during startup allows you to select which catalog to use, or create a new catalog.
)
Figure 1.6 In General Preferences, the Default Catalog section also lets you choose which catalog to use when you launch Lightroom. The default setting is “Load most recent catalog,” or you can choose “Prompt me when starting Lightroom.” If you have already created other catalogs, you can select these from the drop-down menu. If you want the Lightroom Import Photos dialog to appear automatically each time you insert a camera card ready for download, I recommend checking “Show Import dialog when a memory card is detected.”
)
Figure 1.7 You can click the Go to Catalog Settings button in Figure 1.6 to open the Catalog Settings dialog. This allows you to set the catalog backup policy, the catalog preview sizes, and metadata handling settings. You can read more about configuring the catalog settings in Chapters 3 and 5.
)
Figure 1.8 Here you can see the Presets section is selected in the Lightroom preferences dialog. If you mostly take photographs of general subjects, you might like to check the “Apply auto tone adjustments” option, especially where you have no control over the lighting. Otherwise leave this option unchecked. But I suggest checking the “Apply auto mix when first converting to black and white” option. We’ll be looking at the camera default settings later, but for now leave these unchecked. You might like to check the “Store presets with catalog” option. This allows you to store custom preset settings as part of the catalog. This means that when you export a catalog (see Chapter 5), you can include all custom presets as part of the export. However, the downside of this approach is that the presets will not be available to other catalogs and vice versa.
)
Figure 1.9 In the Lightroom External Editing preferences you can customize the pixel image editing settings for Photoshop plus an additional external editor. These are the file format, color space, and bit depth settings that are used whenever you ask Lightroom to create an Edit copy of a catalog image to open in an external pixel editing program. The File Format options include Photoshop’s native PSD file format or TIFF. The Color Space can be ProPhoto RGB (which is fairly close to the chromaticities of the native Lightroom workspace), or Adobe RGB (which many photographers like using in Photoshop), or sRGB (which is ideal for Web-based output only). The Bit Depth can be 16 bits, which preserves the most amount of Levels information but doubles the output file size, or 8 bits, which is a more standard bit depth but won’t necessarily preserve all the Levels information that is obtainable from your master library images.
)
Figure 1.10 In the File Handling preferences, the Import DNG Creation section lets you customize the DNG settings for when you choose to import and convert to DNG directly. These DNG options, as well as the others listed here, are discussed more fully in Appendix A.
Customizing the Identity Plate and appearance
There are several ways that you can customize the appearance of the Lightroom program. To start with, we will look at the Identity Plate options where you can replace the standard Lightroom logo with one of your own custom designs. You can also edit the font and colors for the top panel module selector, as well as edit the background color/pattern for the main content area.
- The top panel in the Lightroom interface contains the Lightroom Identity Plate and module selectors. If you go to the Lightroom menu and select Identity Plate Setup, you will see the dialog shown here. This allows you to enable the Identity Plate, which then appears in the top-left section of the Lightroom interface, replacing the normal Adobe Photoshop Lightroom logo. If you select the “Use a styled text identity plate” option, this displays the name that is registered as the computer administrator using the default Zapfino font. But you can change the font type and font size and use any font that is available on your computer. In the example shown here, I edited the text to show the full name of my company and changed the font to Helvetica.
- After you have configured a custom Identity Plate, you can go to the Identity Plate pull-down menu and choose Save As to save this setting as a new custom template design.
- If you select the “Use a graphical Identity Plate” option, you can add an image logo by copying and pasting or dragging a PDF, JPEG, GIF, PNG, TIFF, or PSD (see sidebar note) into the Identity Plate area. The logo image you place here should not be more than 57 pixels tall, but it can contain transparent pixels. Graphical identity plates can also be used in Slideshow and Web module templates, but be warned that a 57-pixel-tall logo will be far too small as an identity plate that is used in a print layout. For print work, you will probably want to create separate Identity Plate graphics that exceed this 57-pixel limit and are, therefore, big enough to print with. You can also customize the appearance of the module selector by choosing a new replacement font in any size you like. And if you click either of the little color swatch icons (circled), you can change the font colors for the active and non-active modules.
- Now let’s see how the top panel looks after customizing the Identity Plate. You can see here examples of how both the graphical and styled text identity plates looked when viewed in the top panel.
- In the Lightroom Interface preferences, you can customize various items such as the appearance of the interface when using the Lights Out and Lights Dim modes (which are discussed later in Step 12 on page 34). You can also customize the background appearance of the main window and secondary window when viewing a photo in Loupe view. You can set separate fill colors and textures for these two window displays.
- In this example, the main window Fill Color was set to Medium Gray with the Overlay Texture set to Pinstripes (see close-up view).
)
)
)
)
)
)
)
Help menu
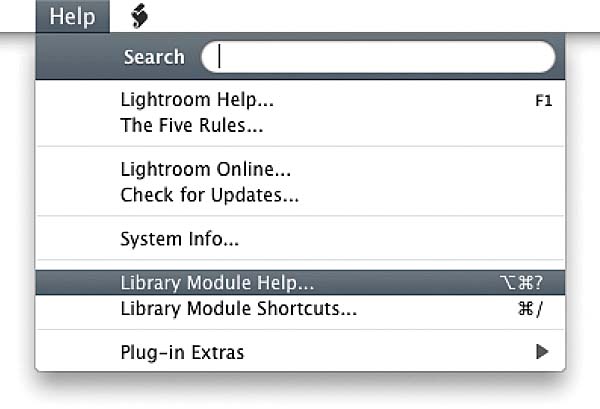
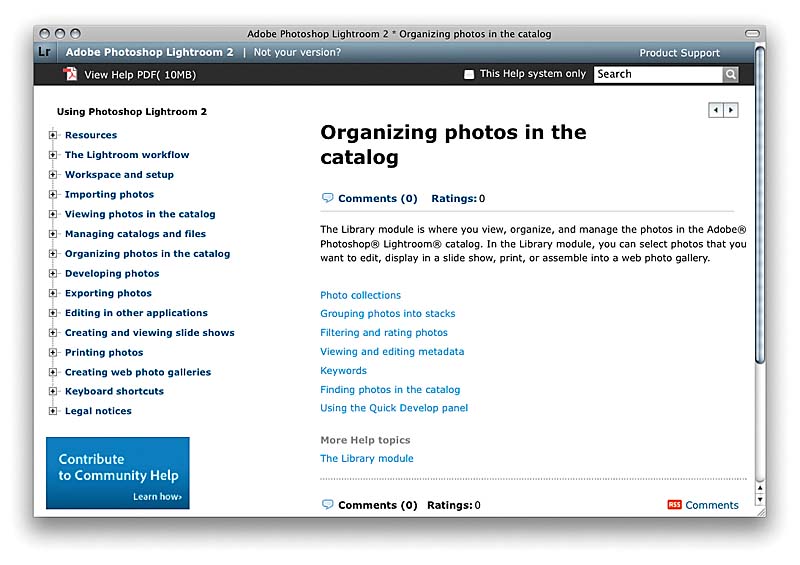
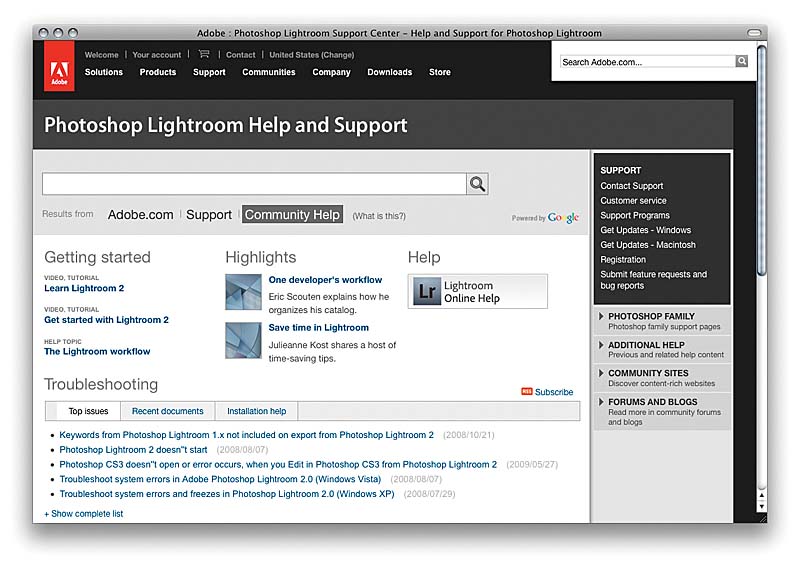
Figure 1.11 shows the Help menu, as found in the Library module. If you select Library Module Help, you can access the off-line Lightroom user guide where you can browse the help options for the current module (Figure 1.12). If you select Lightroom Help, this takes you to the Adobe Lightroom Help and Support page (Figure 1.13).
)
Figure 1.11 The Help menu is common to all Lightroom modules. This screen shot shows the Library module Help menu. The other modules look similar except they show help items and shortcuts relevant to that particular module. The Lightroom Help option (F1) will take you to a new Adobe AIR–based community help system.
)
Figure 1.12 The Lightroom off-line Help guide. This guide is installed with the program and displays the contents in a Web browser format.
)
Figure 1.13 The Adobe Lightroom Help and Support page.