- 1. Import and Open Images
- 2. Crop and Rotate
- 3. Adjust Lighting and Color
- 4. Apply Corrections
- 5. Save the Photo
3. Adjust Lighting and Color
Almost every photo needs a little lighting and color adjustment, whether that’s lightening shadows or punching up the saturation slightly to make colors pop. Elements is awash in color and lighting adjustment choices, but this is where I start.
Quick Fixes
One of the appeals of Photoshop Elements is its Quick Fix adjustments. You don’t need to be a digital imaging expert—you may just want to correct a few shots with the least amount of fuss. See Chapter 5 for more information.
To apply quick fixes:
- Open a photo in the Editor.
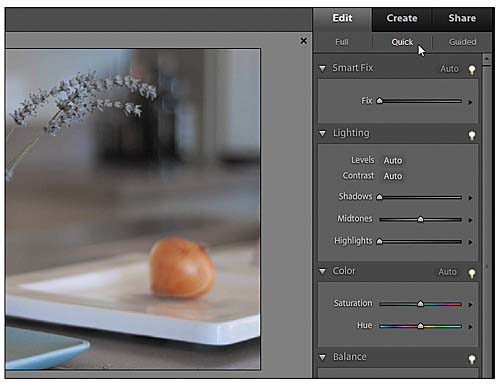
- In the Edit panel bin, click the Quick heading A to reveal the Quick Edit options.
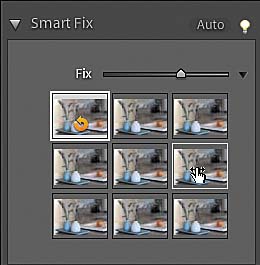
- Choose an attribute (such as Smart Fix) and drag the slider to make the adjustment. Or, click the triangle to the right of the slider to choose from a grid of settings; position your mouse pointer over a thumbnail to preview the change B.
- Click the Commit button that appears next to the attribute’s name C to apply the fix.

Figure 1-12 A The Quick Fix edits use sliders to make common corrections.

Figure 1-13 B Reveal a grid of settings presets and see how they affect the image.

Figure 1-14 C Commit or cancel the changes you made.
Manual Adjustments
If you’d rather handle the details yourself, turn to manual corrections. I prefer to use adjustment layers, which let you apply corrections without changing any of the original pixels in your image. Other controls, such as those found in the Enhance menu, are less flexible.
To apply an adjustment layer:
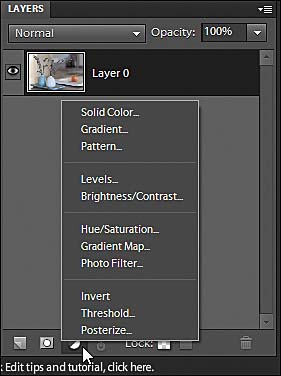
- In the Layers panel, click the Create New File or Adjustment Layer button D and choose one of the options. A new adjustment layer is created.
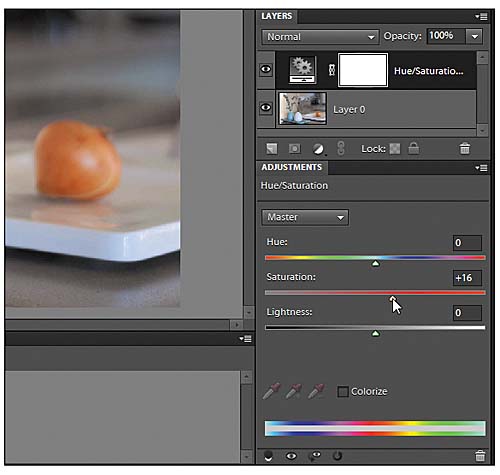
- Manipulate the controls in the Adjustments panel to alter the look of the image E.

Figure 1-15 D Add an adjustment layer to make edits that don’t interfere with the image’s original pixels.

Figure 1-16 E The Adjustments panel includes settings specific to the adjustment layer you’re on.
For example, to increase the saturation of a flat image, add a Hue/Saturation adjustment layer and, in the Adjustments pane, increase the value of the Saturation slider.