My Top 10 Reasons to Check out Lightroom 4 Beta
Like this article? We recommend
Like this article? We recommend
Like this article? We recommend
I wanted to highlight 10 things I think everyone should try when they give the Lightroom 4 Beta a spin (check out my suggestions for safely test driving the Lightroom 4 Beta). I want to start with a couple of the less sexy, but really welcome, refinements.
1. Moving Multiple Folders
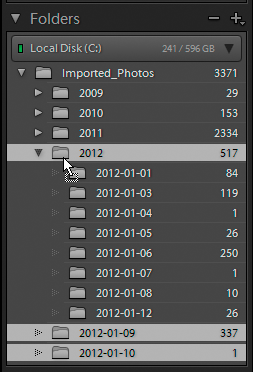
I can’t tell you how much of my Help Desk time is spent teaching people the importance of using Lightroom for all basic file management (moving, renaming, and deleting) tasks you need to perform on your imported photos. Previous versions of Lightroom make moving a bit more difficult because you can only move one folder at a time via drag and drop in the Folders panel. I am thrilled to see that it is now possible to select multiple folders in the Folders panel and drag them all to a new destination folder. Thank you! Here’s how:
1. Expand the Folders panel.
2. Select the folders you want to move.
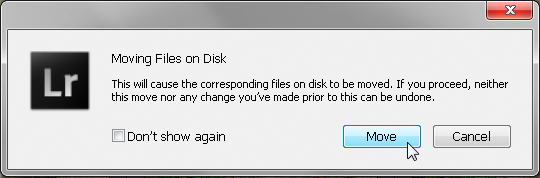
Keep in mind that you have to drag the folders onto a new destination folder, so if the folder you want to move them into isn’t showing in the Folders panel, you’ll need to add it first via the Library > New Folder menu.
2. Creating a Collection from a Folder
Here’s another cool folder trick that I love. Say you have a folder of photos that you want to use to create a new collection. All you need to do is select that folder in the Folders panel and drag it right into the Collections panel. A new collection (named the same as the folder) containing all the photos in that folder will be created within that collection set.
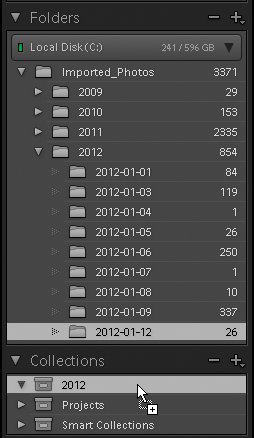
Here’s a bonus tip: hold the Alt/Option key while dragging a collection to a new location in the Collections panel to create a duplicate collection of the same photos while leaving the original collection unchanged. Works for smart collections too! Oh, while on the subject of collections give stacking a try … it’s not just for folders anymore.
3. Email
Emailing from older versions of Lightroom has always been much harder than it needed to be, in my humble opinion. Thankfully those days are over. Lightroom 4 Beta has a new built-in Email Photo function located under the File menu. Want to email a few photos to someone? Give this a try:
1. Select the photos in Grid view of the Library menu.
2. Go to File > Email Photo.
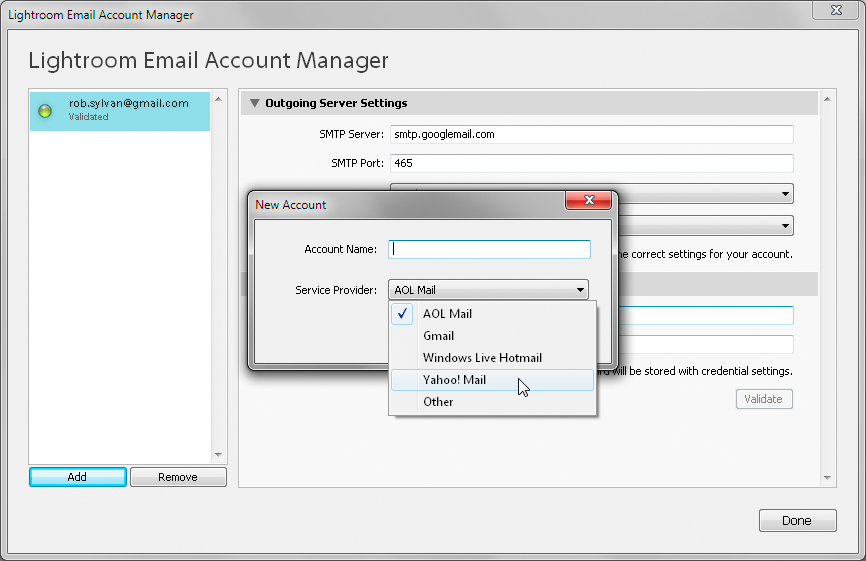
3. This will open the Email Photos dialog box, where you can complete the fields to add the recipient’s email address and send using your default email client. There are a number of preinstalled presets that control the size and quality of the exported photos, but you can also create your own via the Preset drop-down menu.
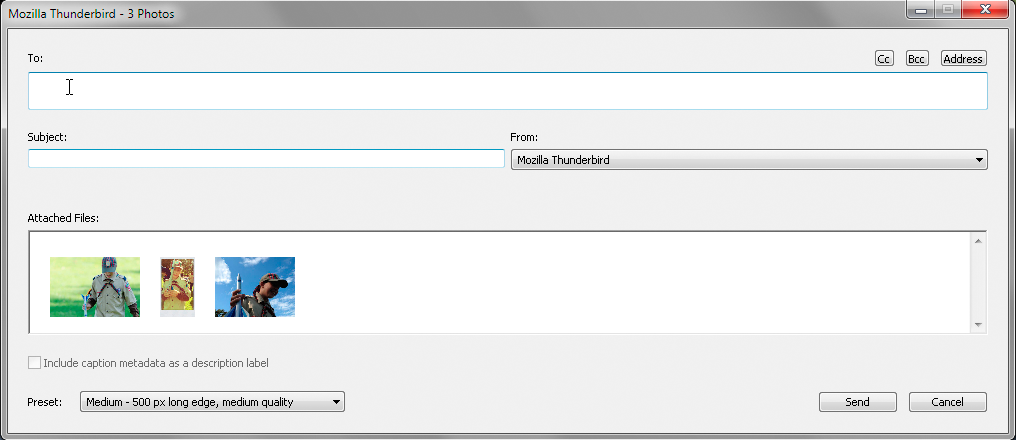
Click the From drop-down menu to go to the Email Account Manager, where you can set up Lightroom to send messages using AOL Mail, Gmail, Windows Live Hotmail, or Yahoo! Mail.
4. Video
While Lightroom 3 allows you to import video and view it in the default video player on your system, the Lightroom 4 Beta takes video support to a whole new level. When viewing thumbnails of your video files in Grid view, you will see the duration display on the thumbnail itself. If you move your cursor from left to right over the video thumbnail, you can actually see a preview of the file’s contents. If you want to play the full video, just double click a thumbnail (or switch to Loupe view) and click the play button that appears below the video.
The video playback bezel can be enlarged to show a timeline by clicking the gear shaped icon, which allows you to scrub through the video and even trim the in and out points of the video to remove that part of the video where your significant other says, “Are you taking a video now?” or at least that is how I will use it most.
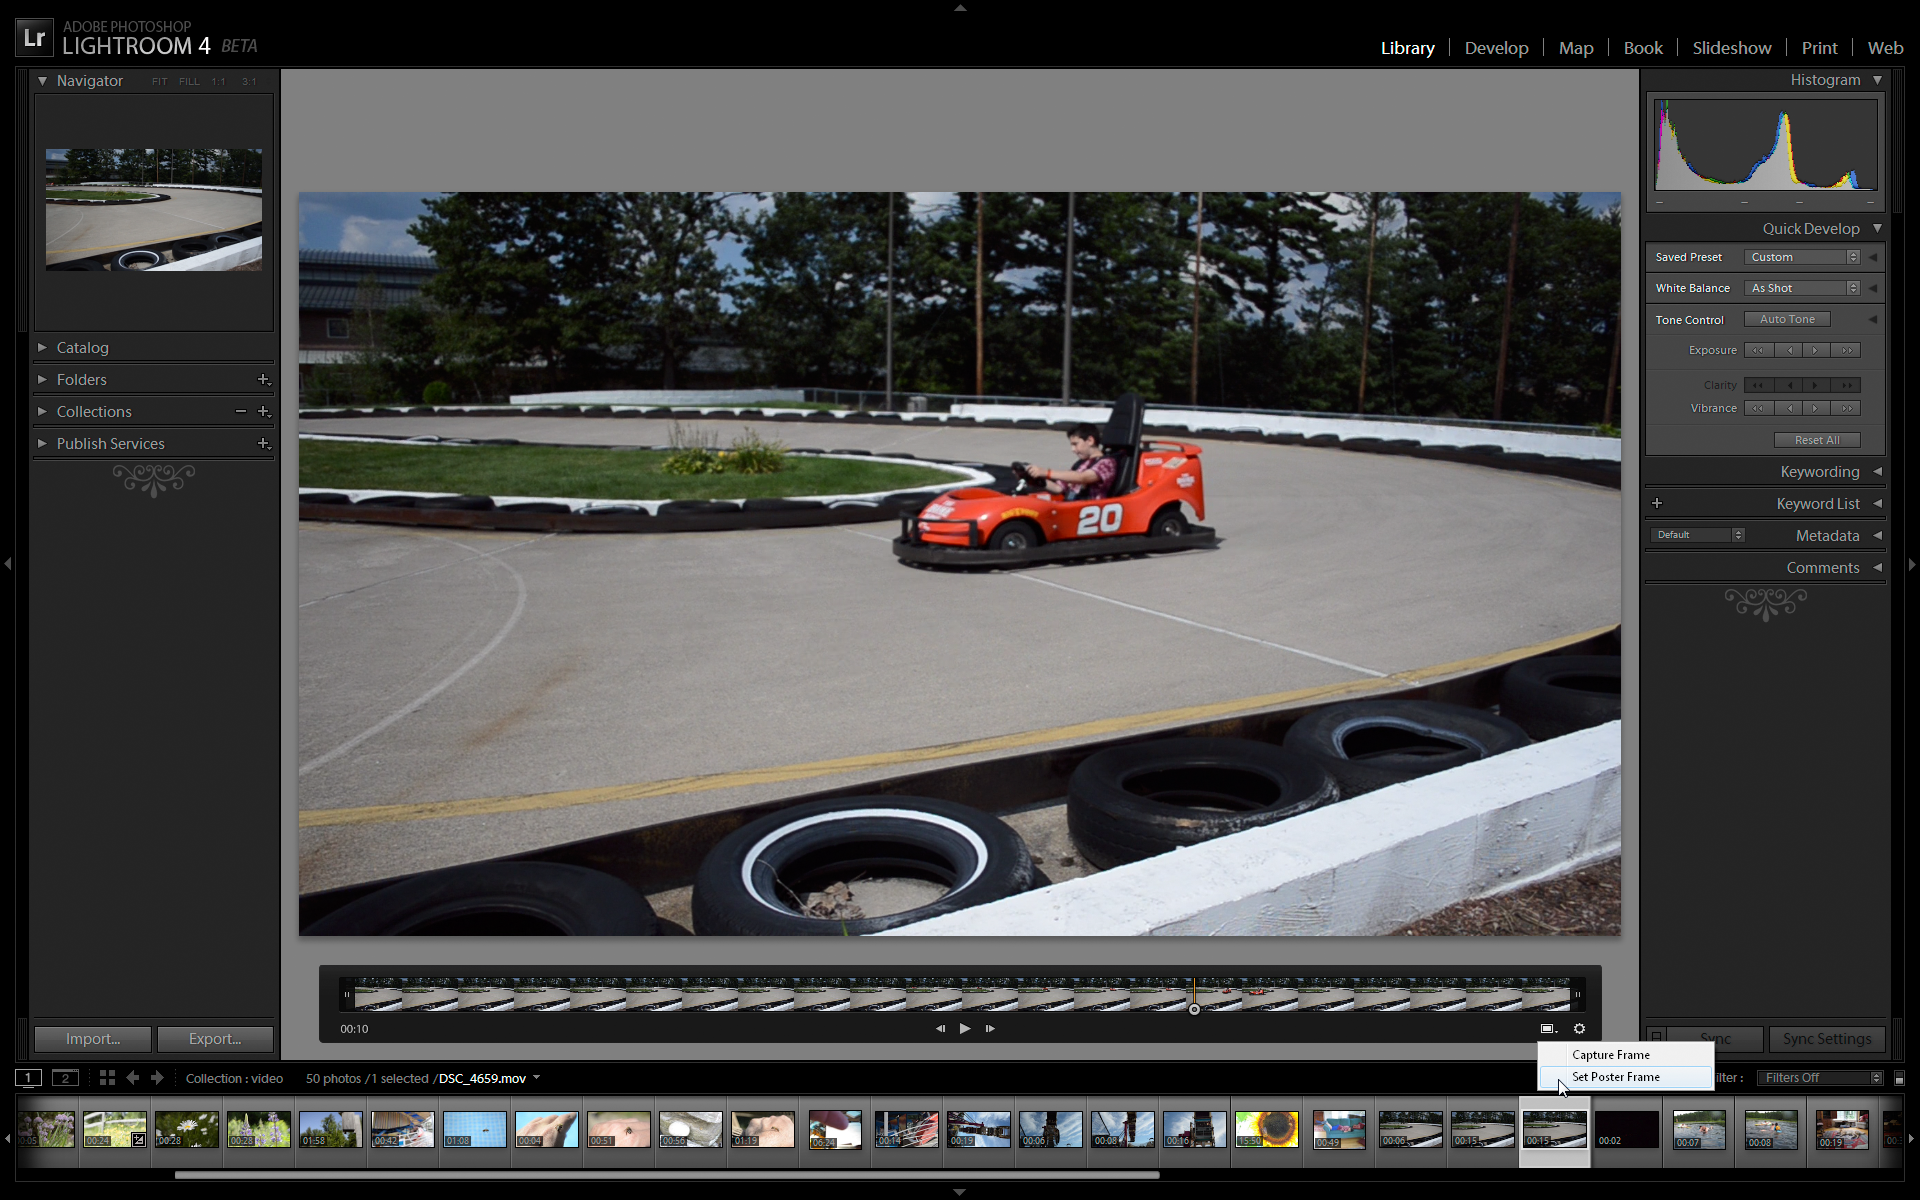
But that’s not all! You can also click the little monitor icon on the video bezel and access the menu options for setting the poster frame (this is the thumbnail you see in Grid view) or saving out a still capture frame. How cool is that? Cooler than you think. Try this:
1. Import a video clip.
2. Save out a capture frame that is somewhat representative of the important content in the clip. It will appear stacked next to the video file in the folder where it resides.
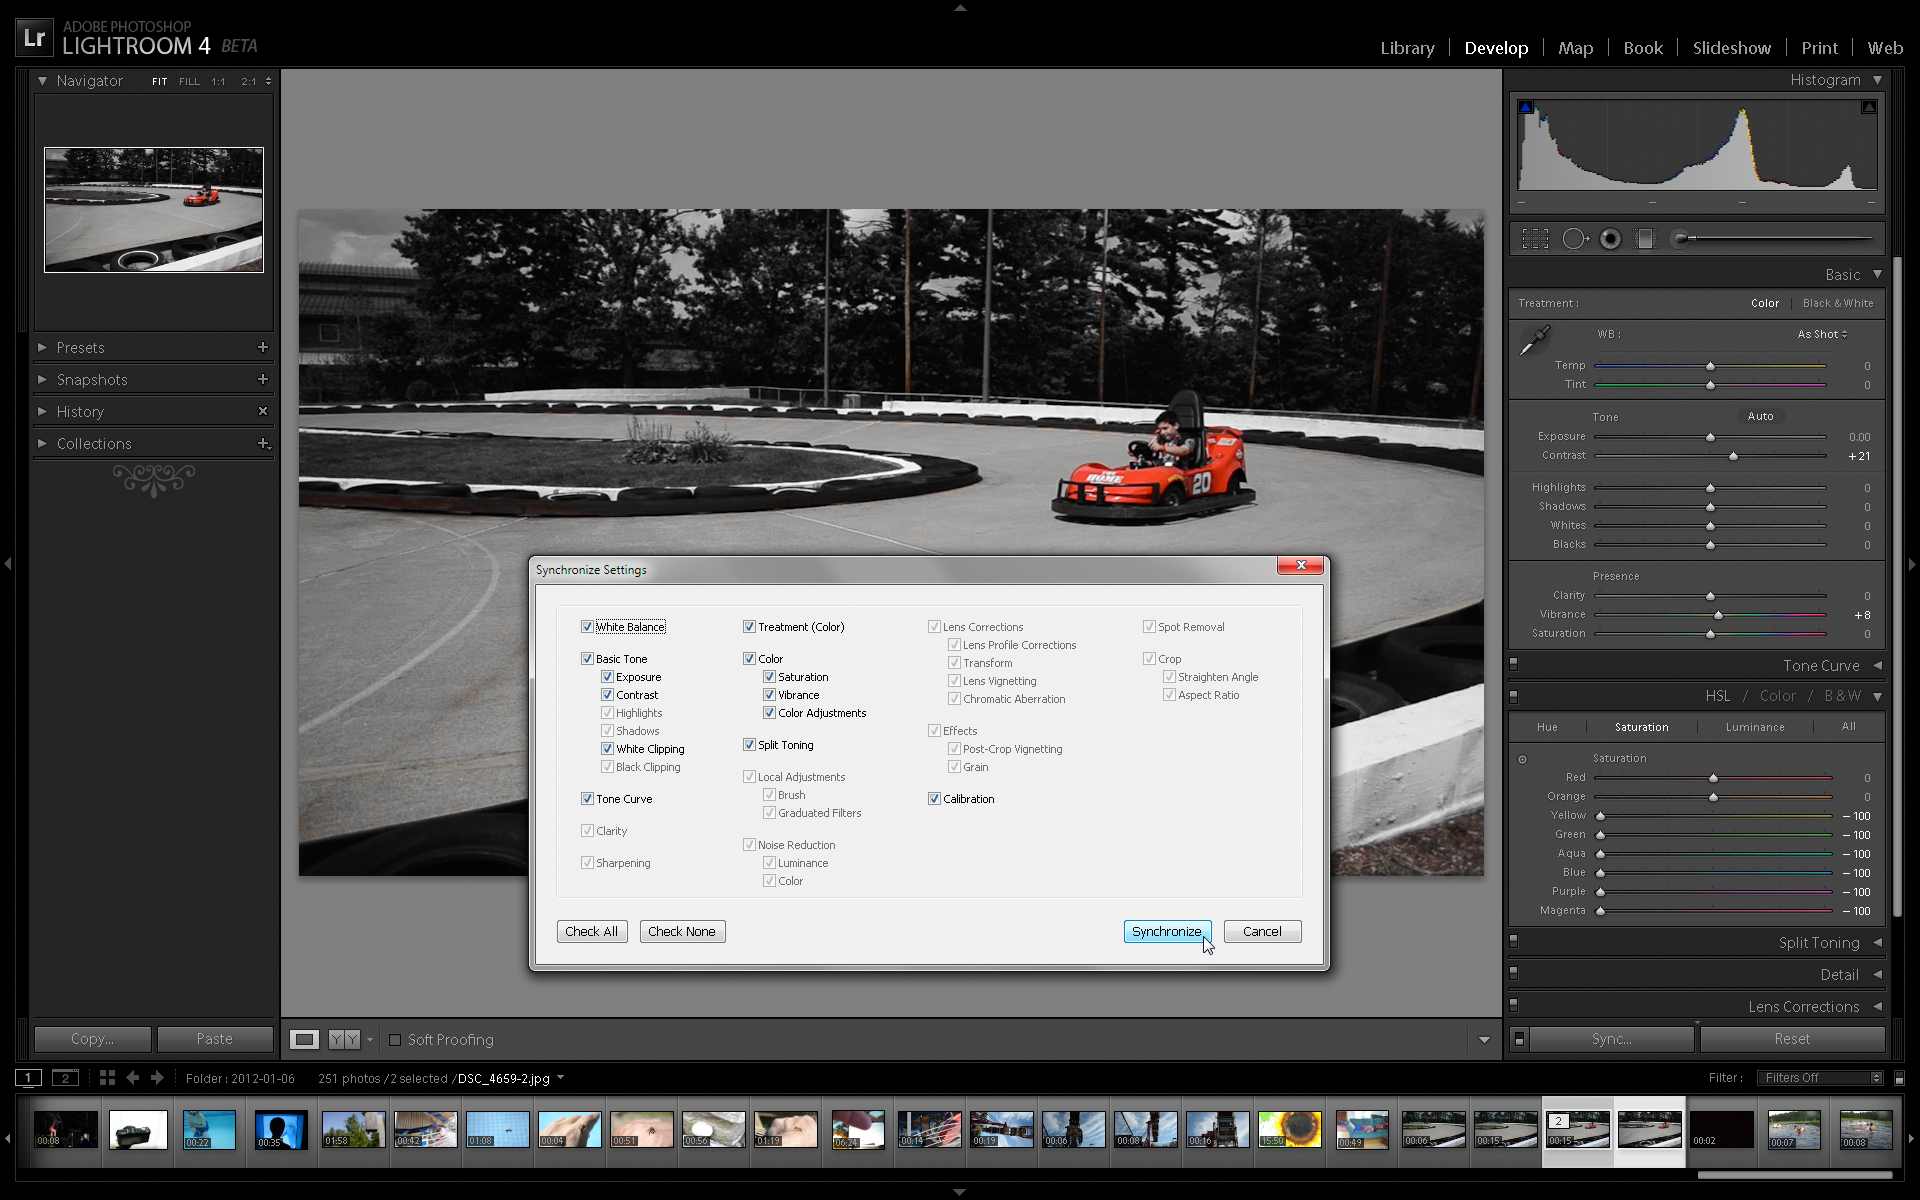
3. Select the JPG capture frame and take it to the Develop module to adjust things like white balance, exposure, contrast, saturation, vibrance, tone curve, split toning, process version or calibration to get the still looking the way you want it.
4. While still in Develop, hold the CMD/Ctrl key and select the original video in the Filmstrip. You want the JPG capture to remain the active photo (because video is not supported in Develop), but holding the CMD/Ctrl key while clicking the video will select it without losing focus on the JPG. Both files will be selected now.
5. Click the Sync button to open the Synchronize Settings dialog. Notice that only the settings that can be applied to video are active. Check all that apply and click Synchronize.
The video thumbnail will update to reflect the changes. Press E to return to Loupe view in the Library module and play the video. Note that you can also adjust the video file directly using the tools in the Quick Develop panel of the Library module or by applying a Develop preset. Only the settings that can affect video will be active.
5. Map
As cameras and phones continue to merge and GPS technology becomes more and more ubiquitous, I think the new Map module in Lightroom 4 is going to prove extremely useful and fun.
Photos that have GPS data already embedded in their metadata prior to import (such as from a smart phone or GPS enabled camera) will show a new icon (it resembles a pin) on its thumbnail in Grid view.
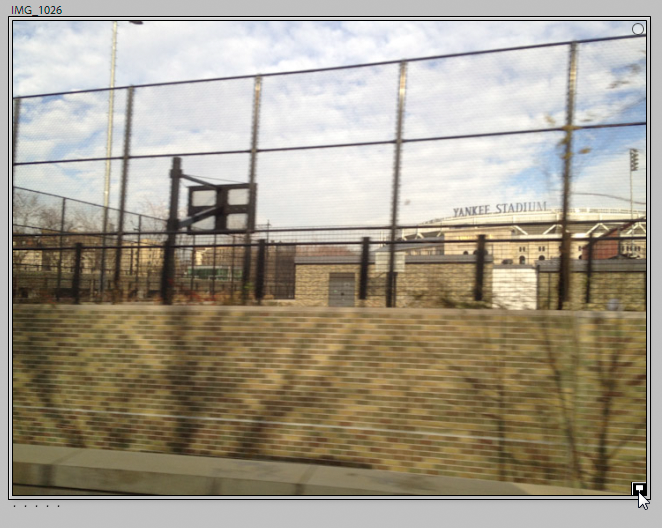
If you click that pin icon, Lightroom will jump over to the Map module and show you that location on the map along with any other photos in the area.
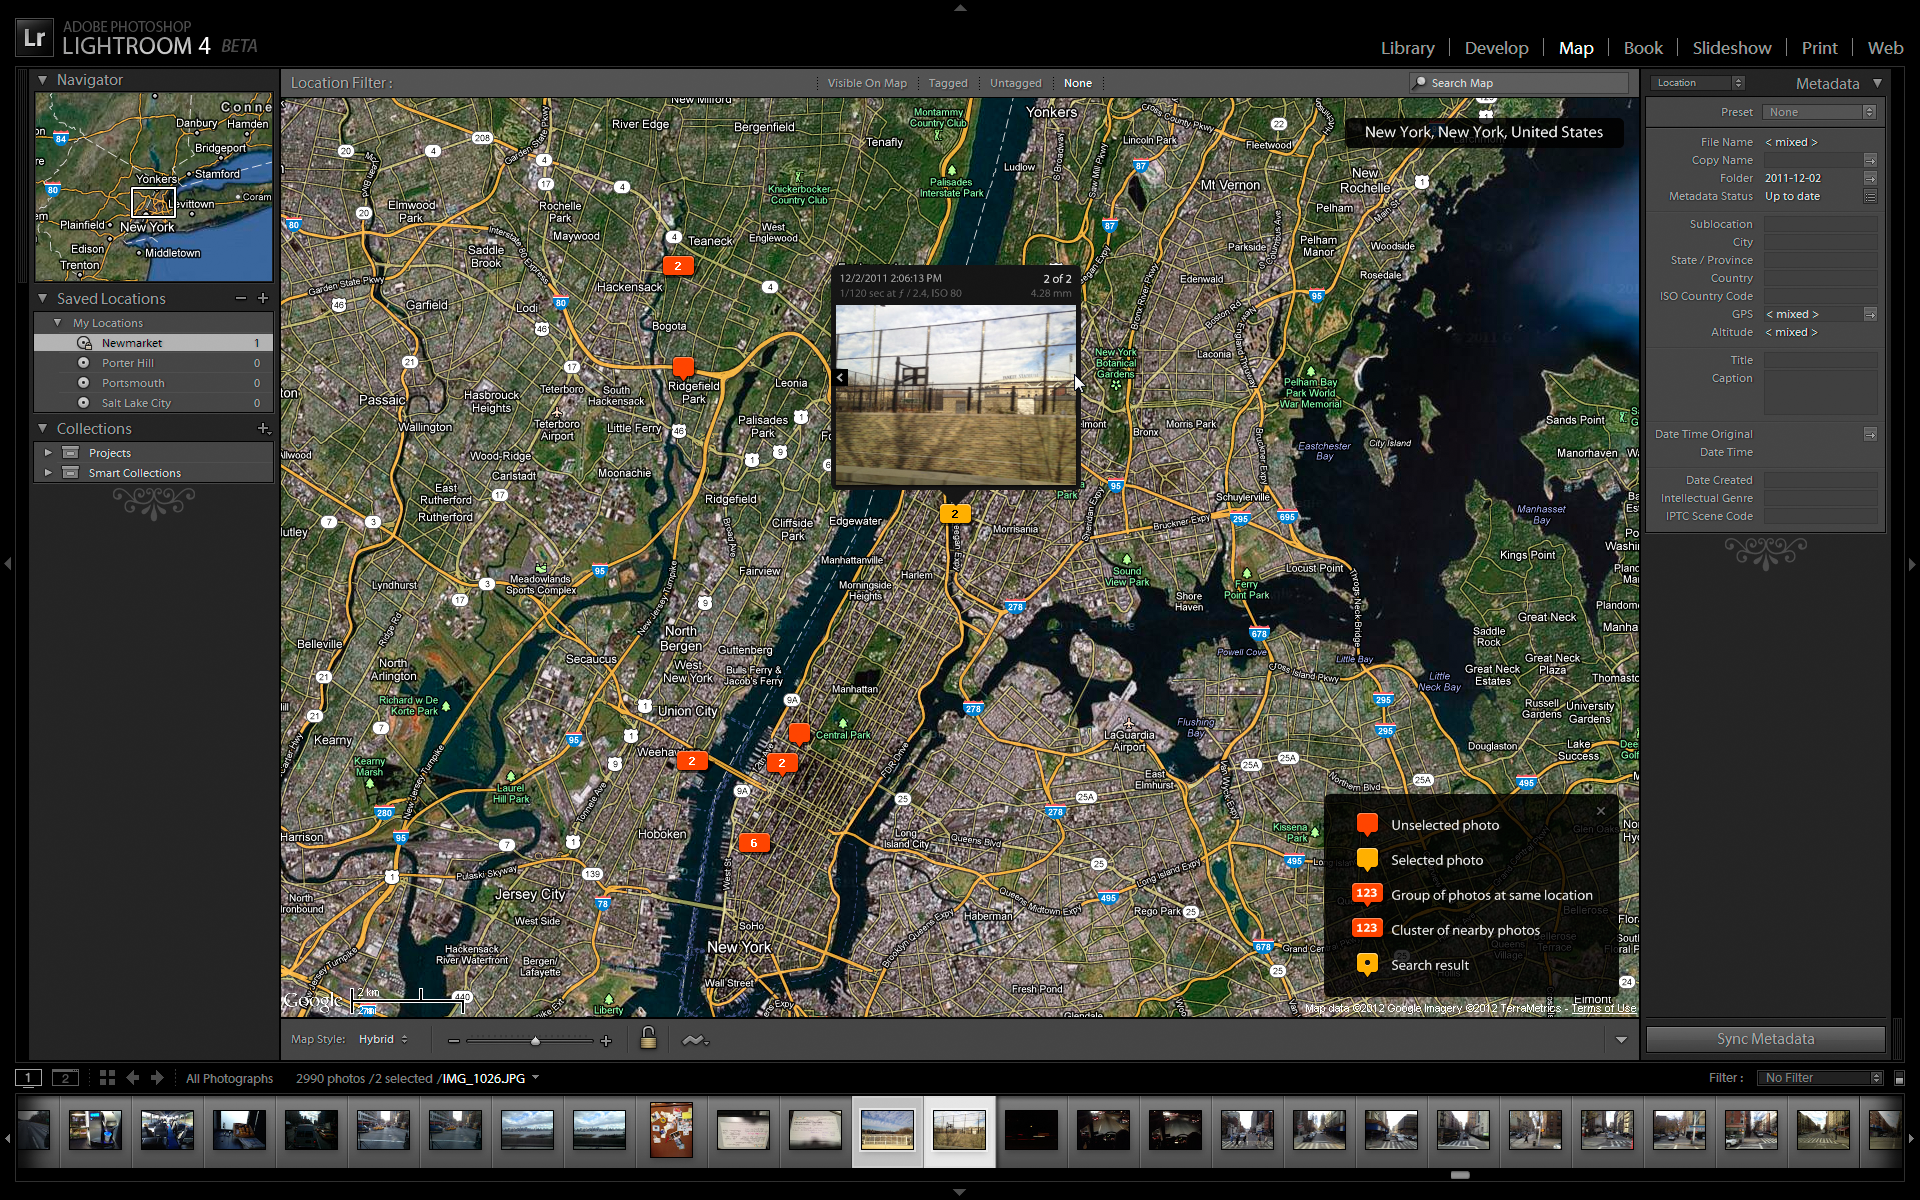
It’s OK if your photos don’t have GPS metadata already, because there are a couple of ways you can still put your photos on the map. One option is a simple drag and drop.
1. Do a search for the location where your photos were taken via the Search Map field above the map. I searched for Times Square in New York City.
2. Select the photos for that location in the Filmstrip and drag them to the spot on the map where they were taken, or right-click on the map and choose Add GPS Location to Selected Photos from the menu that appears.

If you use a GPS device that can save out a GPX tracklog, you can also sync up your photos taken during that trip via the Map > Tracklog menu. This uses the timestamps in the tracklog to compare against the capture time in each photo’s metadata to determine the coordinates for each photo (make sure your camera and GPS device have their clocks synchronized before you head out shooting).
You can zoom in and out on the map using the slider in the Toolbar or the scroll wheel on your mouse. Click the Map Style menu in the Toolbar to check out the different maps available. Keep in mind you need to be connected to the Internet to take advantage of the Google Maps interface.
If there are locations that you use frequently, you might want to save them in the Saved Locations panel. When you have found the location, click the + sign at the top of the Saved Locations panel to configure the location. You can control the size of the radius the location represents and give it a name. The Private check box allows you to ensure the location information for photos located in this area is stripped out when exporting copies to protect your privacy.
6. Book
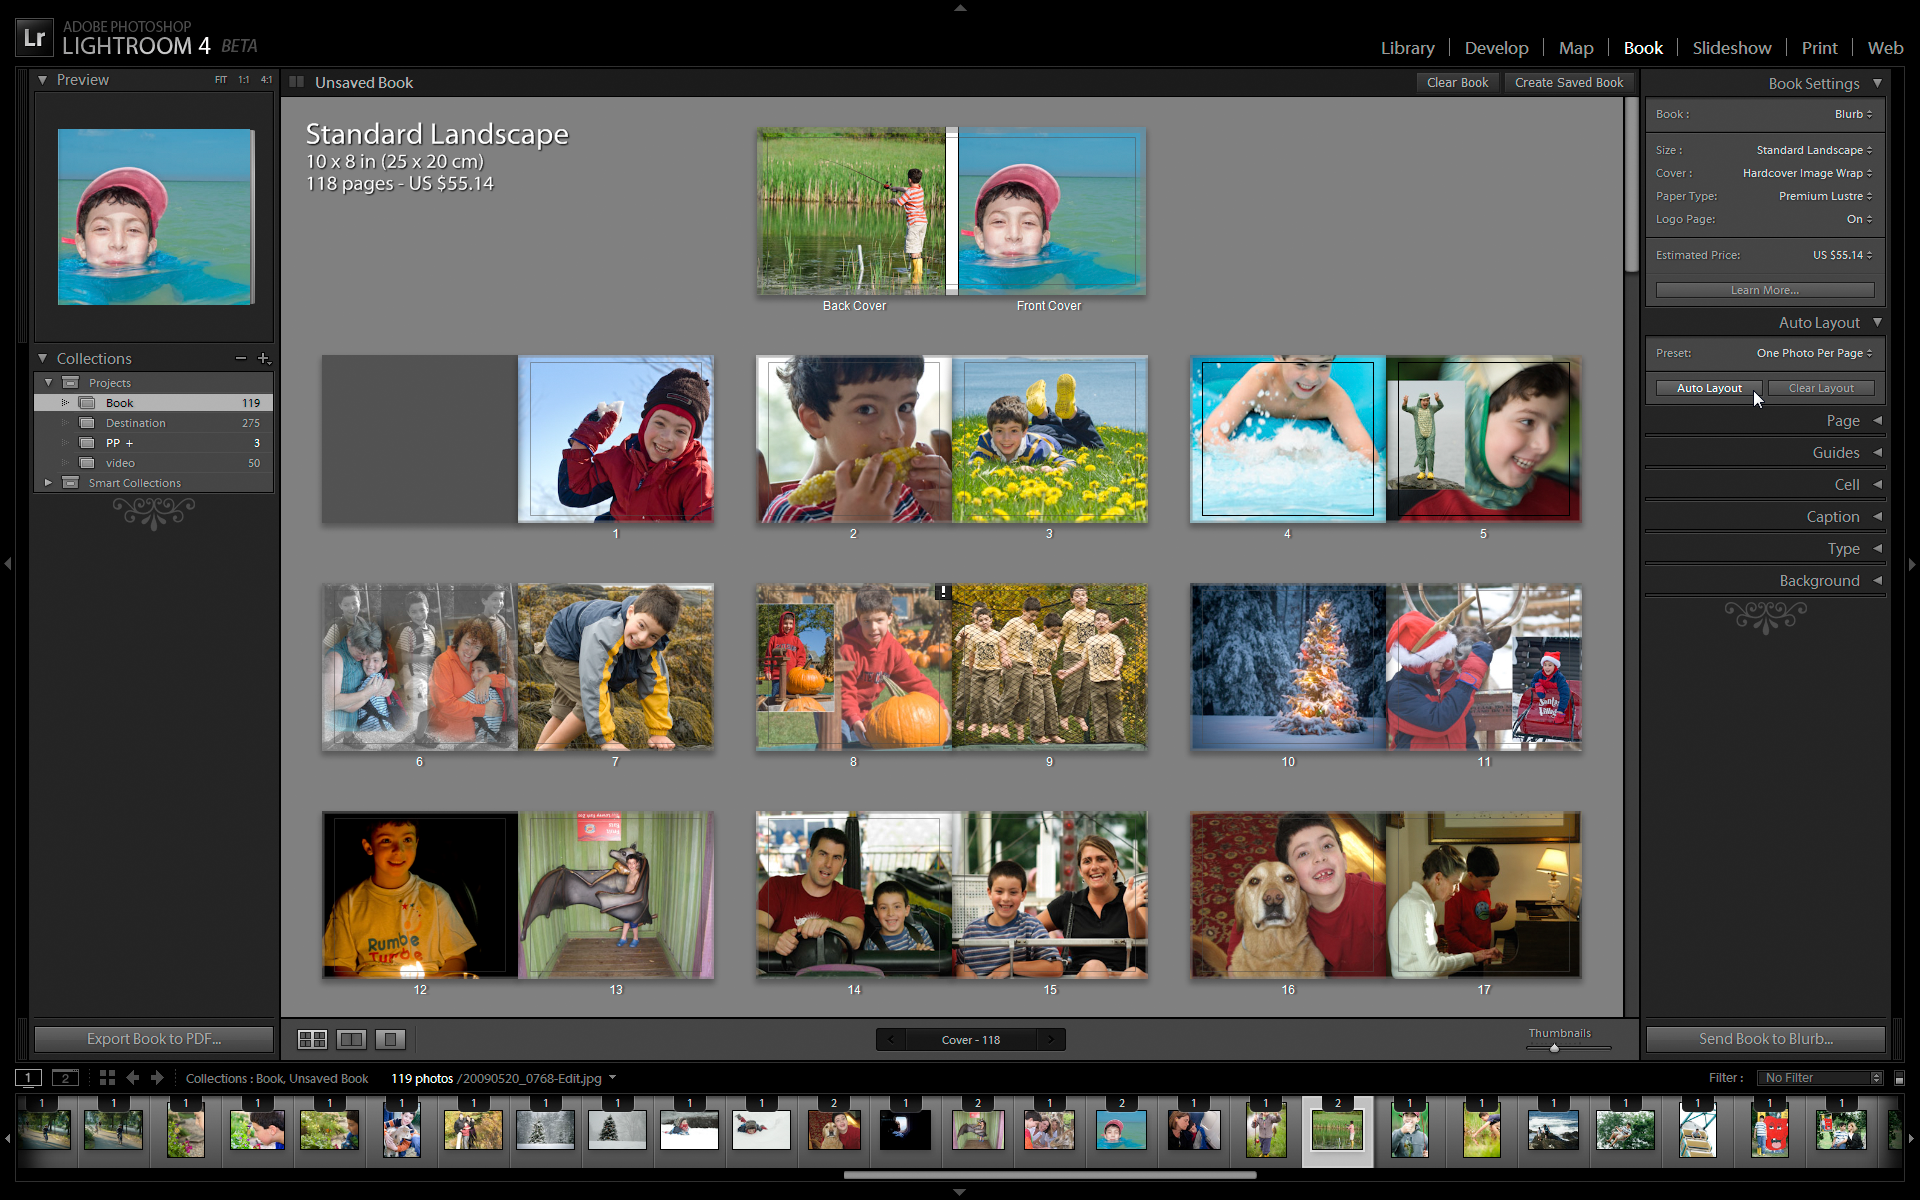
Being able to create books with your photos is a very welcome addition! Blurb is currently the only vendor directly tied into the module, but I’ve had several books printed through them and have been very pleased with the results (and cost). There is also a PDF output option that could potentially work with other vendors or just provide a simple electronic delivery option.
The easiest way to get a feel for the Book module is to create a collection of photos you want to use then click Book in the Module picker. Start at Book Settings panel to choose the type and size book you want to create, then work your way down the panels on the right side.
The Auto Layout panel will save you a lot of time laying out the book. First select a layout preset from the Preset drop-down menu, then click Clear Layout (to start fresh) and then click Auto Layout to have Lightroom populate pages using the new preset. Now you can customize the layout by dragging and dropping photos from the Filmstrip to add them to different pages, and drag and drop photos between pages to swap their order in the book. The Page panel gives you the tools to further customize each page layout and add new pages. Double-click a page to jump to the single page view (also note the icons in the Toolbar to switch between views). You can use the Caption and Text panels to add captions to photos and control the look of the text. Click the Create Saved Book button above the book layout to save your book as a special type of collection in the Collections panel.
7. Process Version 2012
When Lightroom 3 came out, we were introduced to Process Version 2010, which made huge advances in how raw photo data was processed by Lightroom and resulted in much higher quality image output. Adobe has continued to build on those advancements in the form of Process Version 2012. The biggest impact this will have on your workflow is with the new and improved tone control sliders in the Basic panel.
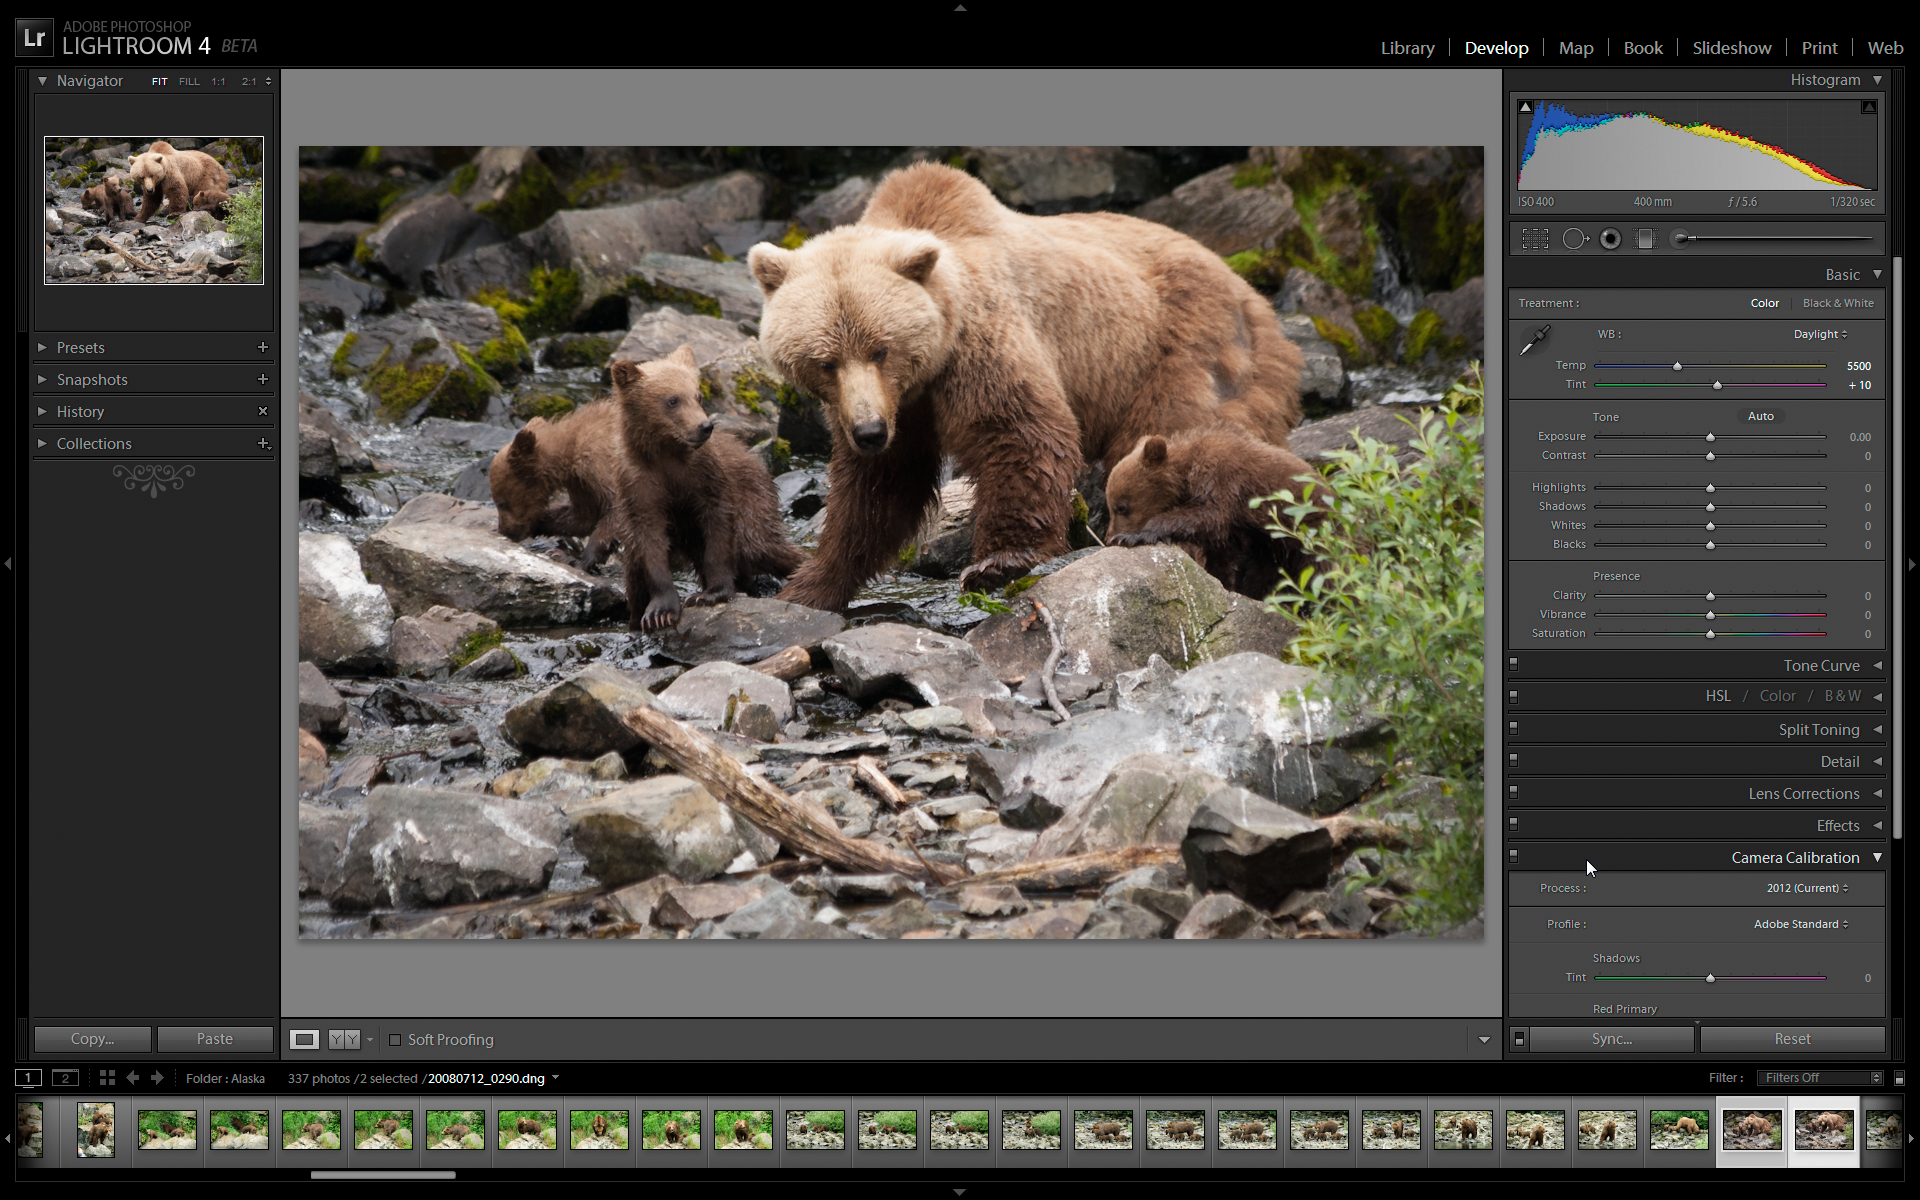
The reason for this change is to simplify the workflow, make the adjustments more intuitive, and help you extract as much data as possible from the shadows and the highlights in your photo. The best way to start using these controls is to work from the top down. Begin by adjusting Exposure to adjust the overall tonal distribution in the photo, then bring out the detail in the highlights and shadows with their respective controls, and fine tune the white and black clipping points with the Whites and Blacks sliders respectively. Place your cursor over each slider to see the corresponding area light up in the Histogram panel. Pay attention to the fact that the tonal adjustment sliders all start at zero now, and moving any slider in a positive direction results in brightening the corresponding part of the photo, while moving in a negative direction results in darkening that part of the photo.
When you import new photos that do not have any previous settings from an older version of Lightroom or Camera Raw, they will automatically be using PV2012, but if you import one of your photos that had develop settings in its metadata from an earlier version of Lightroom, it will retain those original settings and process version. So, if you see an exclamation point in the lower right corner of the photo and notice the Basic panel is missing the new sliders I mentioned, it just means you’ll need to update that photo to PV2012 (click the exclamation point to update). When you update a photo with existing settings, Lightroom does its best to map the settings to the new sliders, but be prepared for some tweaking. Process Version 2012 is still a work in progress in the beta, and you may find you prefer PV2010 for some photos.
Also note that the magic behind the Clarity slider was reworked and it is much more powerful than it was before, which means you’ll want to use lower settings than you may have been used to using in Lightroom 3. Give it a try!
8. New Local Adjustments
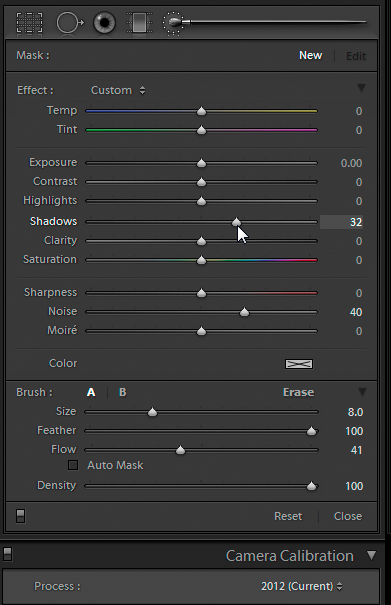
Along with the changes to the Basic panel due to the new PV2012, we now have the ability to adjust Temp, Tint, Highlights, Shadows, Noise (luminance only), and Moiré via the Adjustment Brush and Graduated Filter. This may prove to be one of the most useful additions to Lightroom 4. For example, now you can use the Adjustment Brush to brighten up a dark area of your photo and add localized luminance noise reduction at the same time! Another use might be for correcting white balance in a mixed lighting environment through a local adjustment of the Temp slider. You may have just found a few less reasons to make the trip to Photoshop.
9. Soft Proofing
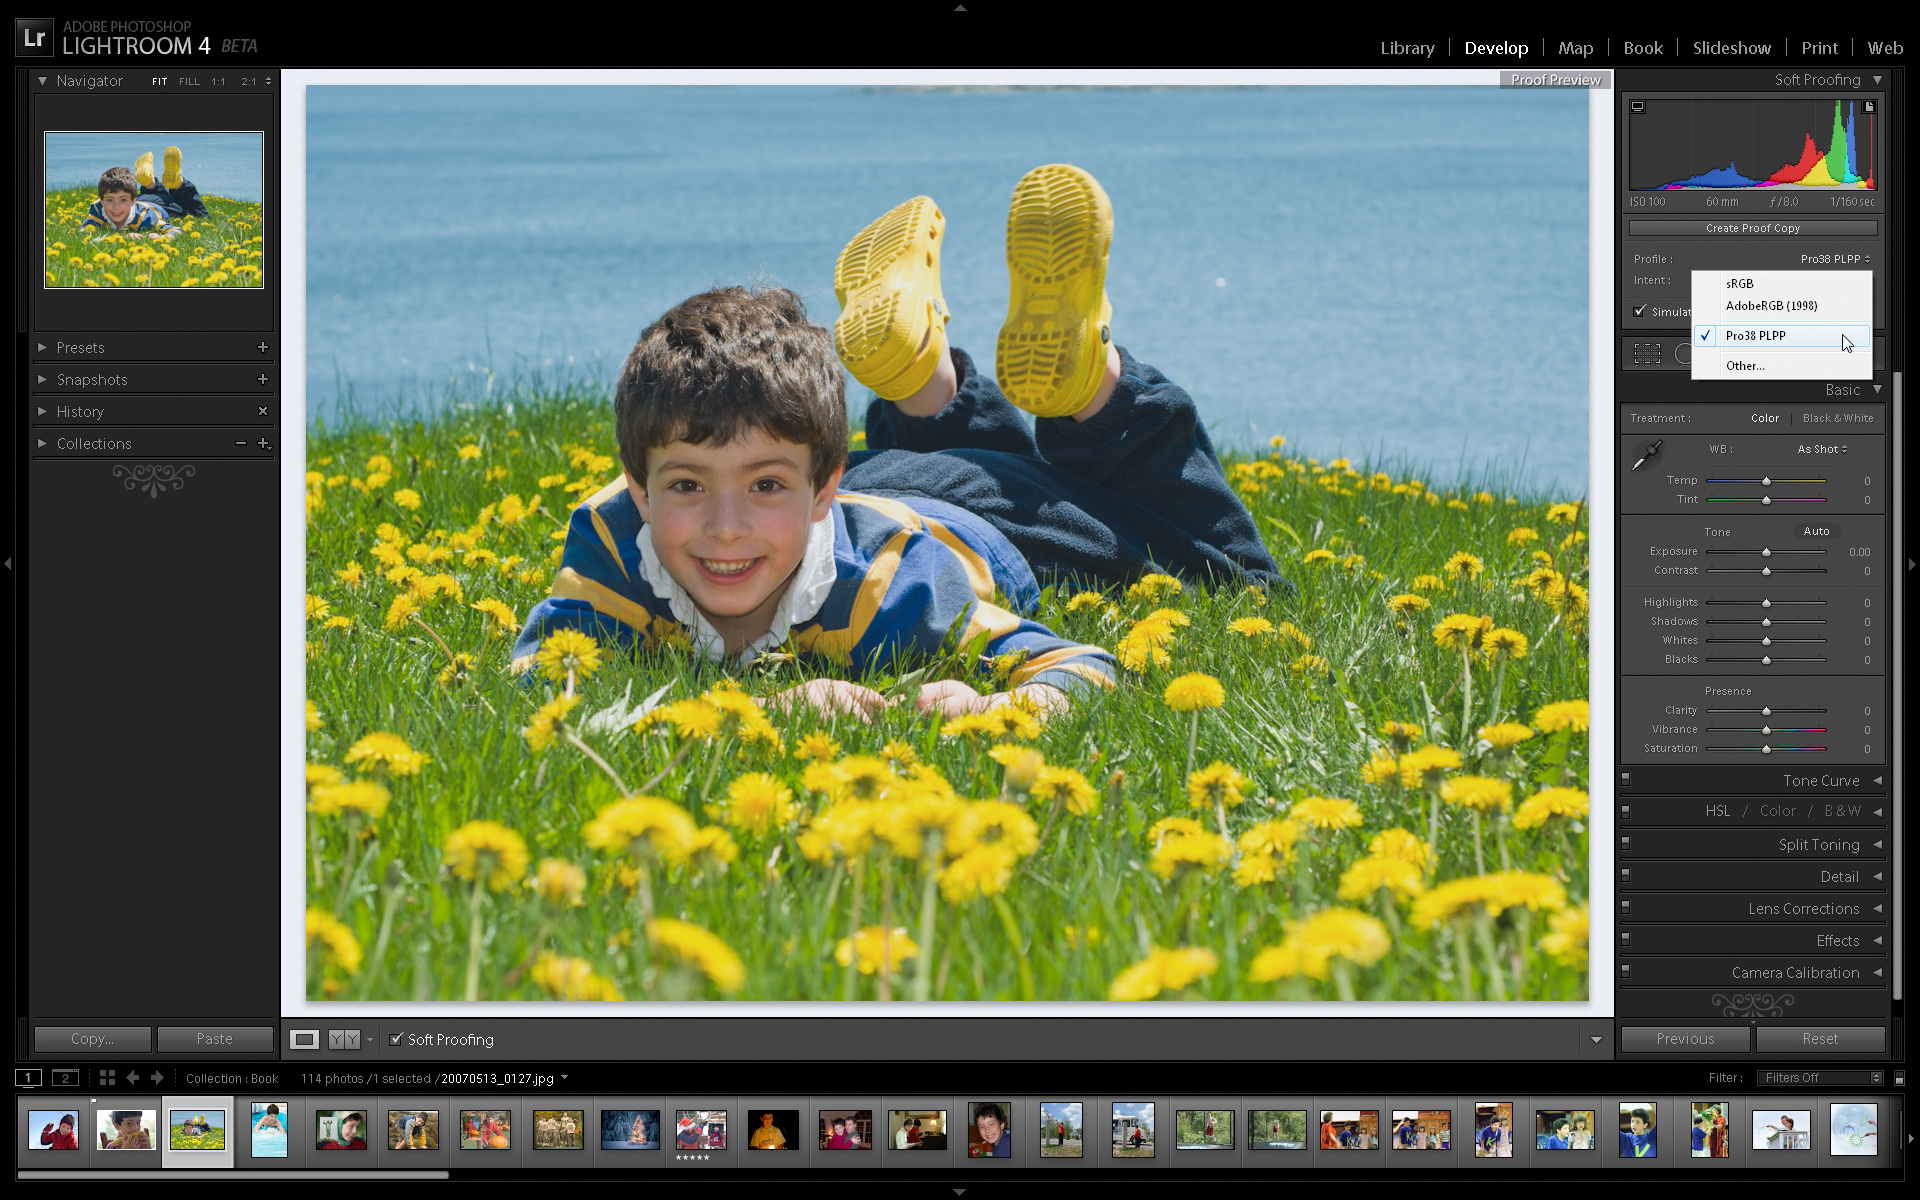
The purpose of soft proofing is to be able to preview how your photo will look in your chosen output color space (typically for a print) before you actually send it out so that you can make any adjustments you feel are needed first to ensure the colors in the photo match your expectations in the final result. This is why Soft Proofing is located in the Develop module.
When you are ready to soft proof, you can press S or check the Soft Proofing box in the Toolbar. This will put you in Proof Preview mode, which changes the area around the photo to resemble “paper white,” and the Histogram panel changes to Soft Proofing where the values in the histogram now represent the color space that is selected in the Profile drop-down menu.
Make any changes you desire to get your colors satisfactorily within the gamut of the output space and save it as a proof copy (a type of virtual copy) so that your original photo remains unchanged and take that to the Print module to be printed.
10. Export to Revel
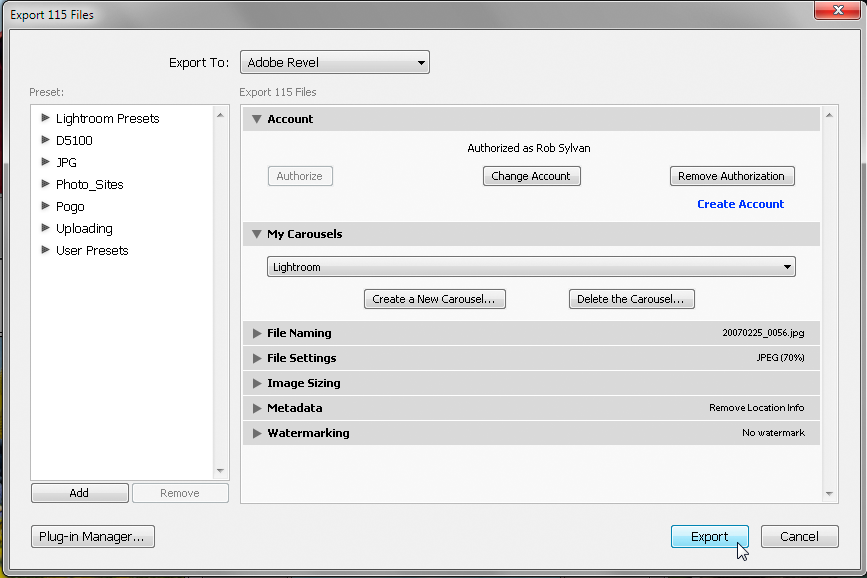
Adobe recently released a new product named Revel (originally named Carousel, but recently changed to Revel) that allows you to keep an unlimited number of JPG photos shared and synchronized between as many devices as you have in your possession (Mac computers, iPad, iPhone, and iPod Touch for now and Windows and Android to follow). This was not a product targeted at Lightroom users previously, but there is a new function in the Lightroom 4 Beta that allows you to export any number of JPG copies directly to your Adobe Revel account. You can find out more and give Revel a free 30 day trial by going to http://www.photoshop.com/products/mobile/revel.
This new integration with Lightroom 4 Beta is a step in the right direction for making it easier to get your content into the Revel cloud, and it is possible to export from a Windows machine running Lightroom 4 even though the Revel app for Windows doesn’t exist yet (handy for Windows users who also own an iPad or iPhone).
I hope you enjoy using the Lightroom 4 Beta, and please be sure to give Adobe your feedback in the dedicated Lightroom 4 Beta forum.