This chapter is from the book
This chapter is from the book
This chapter is from the book
Syncing with iTunes
Syncing with iTunes copies content from your iPad to your Mac or Windows PC, and vice versa. You can do all of the following:
- Sync by connecting your iPad to your computer, using the dock connector–to–USB cable that came with your iPad.
- Set up iTunes to sync wirelessly over Wi-Fi.
- Sync music, photos, video, podcasts, apps, and more.
- Change your sync options at any time.
Each time you sync, content is synced between your iPad and computer to reflect new, updated, or deleted content.
Before you sync, update to the latest versions of iOS on your iPad (tap Settings > General > Software Update) and iTunes on your computer (visit www.apple.com/itunes/download).
To sync with iTunes via USB cable
- Connect your iPad to your computer via USB cable.
- Open iTunes on your computer.
- In the iTunes sidebar (on the left side), click your iPad in the Devices list
 .
.
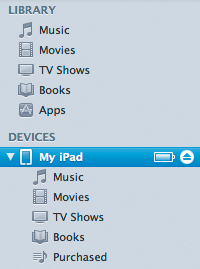 It may take a moment for your iPad to appear in the iTunes sidebar.
 - In the main section of the iTunes window, click the content tabs
 (Info, Apps, Music, Movies, and so on), and configure sync options for each one.
 Some tabs may not appear if you don’t have corresponding content in your iTunes library.
 To sync, click Apply or Sync in the bottom-right corner of the iTunes window.
Don’t disconnect your iPad from the computer while the iPad screen says Sync in Progress. You can cancel the current sync by dragging the Cancel Sync slider on the iPad’s screen.
)
To sync with iTunes via Wi-Fi
- Connect your iPad to your computer.
- Open iTunes on your computer.
- In the iTunes sidebar (on the left side), click your iPad in the Devices list
 .
. - In the main section of the iTunes window, click the Summary tab and then select Sync with This iPad over Wi-Fi
 .
.
To sync manually, tap Settings > General > iTunes Wi-Fi Sync > Sync Now.
Your iPad will also sync automatically at least once a day when your iPad is plugged in to power, iTunes is open on your computer, or your iPad and the computer are on the same Wi-Fi network.
- When your iPad appears in the iTunes sidebar, click the content tabs
 (Apps, Music, Movies, TV Shows, and so on), and configure sync options.
 To sync, click Apply or Sync in the bottom-right corner of the iTunes window.
Don’t disconnect your iPad from the computer while the iPad screen says Sync in Progress. You can cancel the current sync by dragging the Cancel Sync slider on the iPad’s screen.
)
Backing up in iTunes
iTunes create backups of your iPad when you
- Sync with iTunes (disabled if you have iCloud backup turned on).
- Right-click your iPad in the iTunes sidebar (on the left) and then choose Back Up.
To restore a backup, connect your iPad to your computer via USB cable, right-click your iPad in the iTunes sidebar, and then choose Restore from Backup.
When you set up a new iPad, Setup Assistant lets you restore from one of your recent iTunes backups (see “Setting Up Your iPad” in Chapter 1). You can also restore an iTunes backup when you erase your iPad. To do so, tap Settings > General > Reset > Erase All Content and Settings.
To transfer a backup from your current iPad to a new iPad, see http://support.apple.com/kb/HT2109. This article applies to iPads as well as iPhones.
Managing content manually
By default, iTunes automatically syncs your entire iTunes library whenever you connect your iPad to your computer. You can also manage songs and videos on your iPad manually, choosing just the items that you want to have with you (handy if your entire iTunes library is too big to fit on your iPad).
To add an item to your iPad, drag it from your iTunes library to the iPad icon in the Devices list of the iTunes sidebar .
To configure your iPad to manage content manually
- Connect your iPad to your computer via USB cable.
- Open iTunes on your computer.
- In the Devices list of the iTunes sidebar, click your iPad .
- In the main section of the iTunes window, click the Summary tab and then select Manually Manage Music and Videos
 .
. - Click Apply or Sync in the bottom-right corner of the iTunes window.