- Approach to Color Correction
- Primary Image Adjustments
- Useful Image Adjustments
- Using Camera Raw
Useful Image Adjustments
Although a Levels or Curves command can usually get the color-correction job done, there are often atypical problems that require particular commands. Let’s explore some other commands that have special purposes and should generally be reserved for the unique problems they address. Let’s take a look at the specialty commands.
Black & White
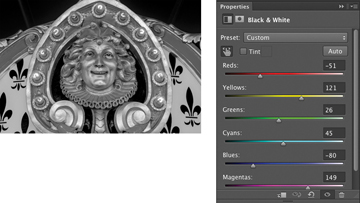
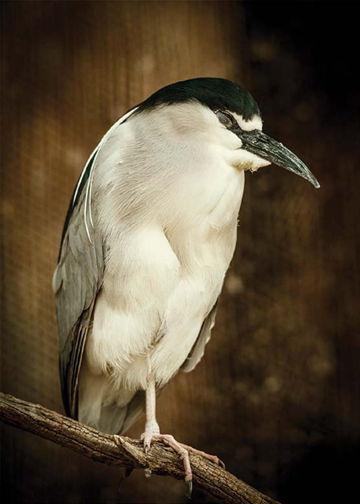
If you want to create a dramatic grayscale or duotone effect, the most effective way is to use a Black & White adjustment layer. Unlike a simple saturation adjustment, you maintain full control over how individual colors are converted. This allows you to emphasize or deemphasize specific colors and tonal ranges. Additionally, you can tint the grayscale by applying a color tone to the image (such as a sepia tone).
- Close any open files, and then open the file Ch10_Black White Conversion.tif from the Chapter 10 folder.
- Click the Black & White icon in the Adjustments panel.
- Photoshop performs a default grayscale conversion. You’ll want to adjust the conversion using the color sliders. You can also apply an Auto conversion or use a saved custom mix.
You can adjust the color sliders to emphasize gray tones of specific colors in an image. Each image is unique, so you’ll need to find the right balance. Drag a slider to the left to darken or to the right to lighten. Be sure to select the Preview check box so you can see the results of your changes.
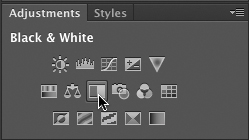
- With the Black & White command window open, click the icon in the Adjustments panel that looks like a pointing finger.
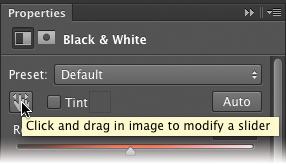
- You can click on the image to sample a target. The mouse pointer changes to an eyedropper if you move it over the image. Just click and hold on an image area to target the right color slider for the strongest color at that location. You can then drag to shift the color slider for that color, thus making it lighter or darker.
- To create a duotone effect, select the Tint option. To change the tint color, click its swatch and use the Color Picker to choose a new color that matches your needs.
Gradient Map
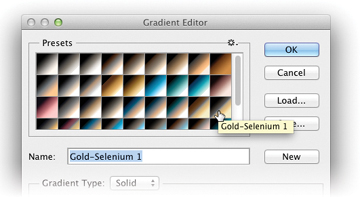
You can use the Gradient Map to dramatically or subtly stylize images. The effect works best when used as an adjustment layer. The command works by mapping the colors of a gradient to the image based on the luminance values of the source image. Let’s give the technique a try.
- Close any open files, and then open the image Ch10_Gradient_Map1.tif from the Chapter 10 folder.
- Click the Gradient Map icon in the Adjustments panel.
- In the Properties panel, click the gradient to open the Gradient Editor.
- In the Gradient Editor, choose a loaded gradient or load a new set to taste. For more on gradients, see Chapter 6, “Painting and Drawing Tools.” Click OK when you’re satisfied.
- To soften the effect, you can change the adjustment layer’s blending mode. Setting it to Hue or Color creates a nice tint effect.
Photo Filter
Professional photographers often place glass filters in front of the camera lens. These can be used to “cool” or “warm” a picture, or to add special effects. Since Photoshop often tries to simulate or correct for steps not taken in the field, the addition of Photo Filters was a logical evolution for Photoshop.
Adobe added to the “real-time,” color-correction options with the addition of 20 different adjustments. These layers simulate the traditional colored glass filters. Besides the built-in presets, you can also choose custom colors from the Photo Filter interface using the standard Color Picker.
There are three main groupings for color effects:
- Warming Filter (85 and LBA) and Cooling Filter (80 and LBB). These adjustment layers are meant to even out photos that were not properly white balanced. The Cooling Filter (80 or LBB) makes images bluer to simulate cooler ambient light. The Warming Filter (85 or LBA) makes images warmer to simulate hotter ambient light.
- Warming Filter (81) and Cooling Filter (82). These adjustment layers are similar to the previous filters but cast a more pronounced color. The Warming Filter (81) makes the photo more yellow, and the Cooling Filter (82) makes the photo bluer.
- Individual Colors. The Photo Filter also has 14 preset colors to choose from. These can be used for two primary purposes: to add a complementary color to a scene to remove color cast or for stylistic reasons.
Let’s try applying a Photo Filter adjustment layer.
- Close any open files, and then open the file Ch10_Photo_Filter.tif from the Chapter 10 folder.
- Click the Photo Filter icon in the Adjustments panel.
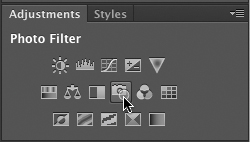
- In the Filter area, choose Warming Filter (85) to adjust the temperature of the photo.
- Deselect the Preserve Luminosity option to allow the image to darken.
- Adjust the slider to taste.
The sky and the image should be “warmer.” You can adjust the Density slider to control the intensity of the effect.
Shadows/Highlights
Exposure problems often plague photos. Dark shadows may make a photo seem unusable, but Photoshop offers a powerful command for fixing these problems. The image command Shadows/Highlights is very flexible for solving problems. The command can help salvage images where the subject is silhouetted from strong backlight. You can also use the command to improve subjects who have been washed out by the camera’s flash.

The Shadows/Highlights command does more than lighten or darken an image. It makes adjustments by analyzing neighboring pixels. However, when first opened, the tool is very basic. It is important to select the Show More Options check box, which adds significant control. Let’s give the command a try.
- Close any open files, and then open the file Ch10_Shadows_Highlight_1.tif from the Chapter 10 folder.
The Shadow/Highlights command is not available as an adjustment layer. You can still apply it in a nondestructive manner by first converting the photo to a Smart Object.
- Choose Layer > Smart Objects > Convert to Smart Object.
- Choose Image > Adjustments > Shadows/Highlights. The image is brightened automatically because the command boosts the shadowed areas by default.
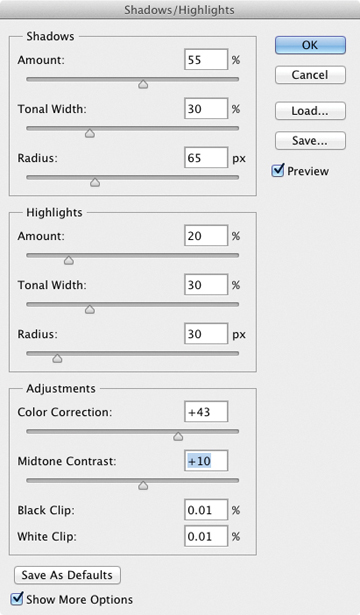
- Select the Show More Options check box and be sure to select the Preview check box.
- Adjust the Shadows and Highlights of the image:
- Amount. This value determines how strong of an adjustment is made to the image.
- Tonal Width. Small values affect a reduced region; larger values include the midtones. If pushed too high, halos appear around the edges of the image.
- Radius. Is a tolerance setting that examines neighboring pixels to determine the affected area.
- Modify the image adjustments to improve image quality:
- Color Correction. This slider modifies the saturation of the adjusted areas. Essentially, it can counterbalance washed-out images.
- Brightness. If you’re working on a grayscale image, Color Correction is replaced by a Brightness control.
- Midtone Contrast. This adjustment affects the contrast in the midtones of a photo. Positive values increase contrast, whereas negative values reduce contrast.
- Black Clip and White Clip. This adjustment modifies the black point of shadows and lowers the white point of highlights. This can lower the intensity of the effect.
- Click Save if you’d like to store the adjustment to use on another photo. When you’re satisfied, click OK to apply the adjustment.

If you’d like extra practice, you’ll find additional images in the Chapter 10 Extras folder.
Exposure
Starting with Photoshop CS2, support was added for 32-bit images. Generally referred to as high dynamic range (HDR), these images offer great flexibility in exposure. These images can better handle re-creating the wide range of exposures found in outdoor scenes or intense lighting conditions. The Exposure adjustment is usually used on images that exist in 32-bit space and is said to be a 32-bit floating point operation (often shortened to float).
Creating an HDR image is a combination of shooting techniques and a Photoshop command. It requires that the camera be secured firmly to a tripod and that you be careful when triggering or adjusting the camera to not move it (or allow anything to move in the shot either). Several photos at various exposures are taken of the same scene (a minimum of three; usually five to seven is adequate). The camera should have its auto-bracket and ISO features disabled. Each shot should be about two f-stops apart. The user then harnesses the Merge to HDR command (File > Automate > Merge to HDR) to create the 32-bit image. You’ll create an HDR image later in the book, but for now let’s jump ahead to an HDR image that’s already built.
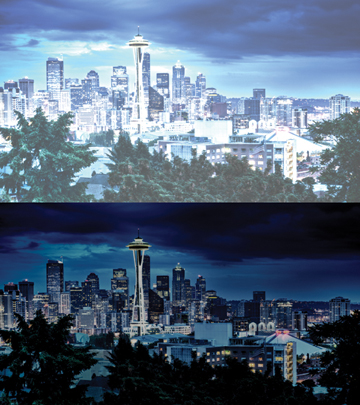
- Close any open files, and then open the file Ch10_HDR1.tif. If you click in your menus, you’ll notice that several features are grayed out. Most image adjustments do not work for a 32-bit image. This image was taken in a very low-light environment, but by combining multiple exposures together into the HDR image, I captured a much better photo.
- Click the Exposure icon in the Adjustments panel. This command makes tonal adjustments by performing calculations in a linear color space (Gamma 1.0) rather than the current color space. This offers extreme flexibility for future changes.
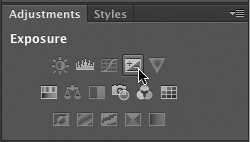
- Three properties can be modified:
- Exposure. Modifies the highlight end of the tonal range with little effect on the extreme shadows.
- Offset. Darkens the shadows and midtones with little effect on highlights.
- Gamma. Adjusts the gamma of the photo.
- Additionally, three eyedroppers adjust the image’s luminance values:
- Set Black Point eyedropper. Sets the Offset, which shifts the selected pixel to zero.
- Set White Point eyedropper. Sets the Exposure, which shifts the selected pixel to white (1.0 for HDR images).
- Midtone eyedropper. Sets the Exposure, which shifts the selected pixel to the middle gray.
- Make a dramatic adjustment and click OK. Let the image blow out, because this will show you the flexibility of HDR images.
- Apply a second Exposure adjustment and bring the image back into a more accurate exposure. Notice that the blown-out areas are restored (this is often impossible with 8- or 16-bit images captured in a single exposure because over-exposed or underexposed data is discarded).
Equalize
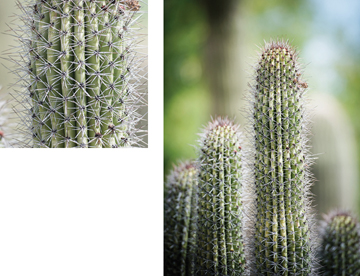
The Equalize command can restore contrast to a washed-out photo. The command attempts to redistribute pixels so that they are equally balanced across the entire range of brightness values. The command works best when you sample a small area that will drive the overall adjustment. The Equalize command takes the lightest area and remaps it to pure white, and takes the darkest area and remaps it to pure black. Let’s give it a try.
- Close any open files, and then open the file Ch10_Equalize1.tif from the Chapter 10 folder.
- With the Rectangular Marquee tool, make a selection inside the largest cactus branch.
- Choose Image > Adjustments > Equalize to repair the image.
- Make sure the Equalize entire image based on selected area check box is selected, and then click OK.
- If the image appears overexposed, you can choose Edit > Fade to reduce the intensity of the Equalize command.
Color Lookup
A new option for color grading in Photoshop CS6 is the ability to apply a Color Lookup adjustment layer. The adjustment lets you choose from several different included presets (organized into three categories: 3DLUT File, Abstract, and Device Link). Each method uses a LUT (or lookup table). The benefits of using a LUT are that color changes are absolute and work well across multiple images for consistent adjustments.
- Close any open files, and then open the Ch10_LUT.tif file from the Chapter 10 folder.
This image already has a few LUTs applied so you can see the results of the adjustments.
- Click the visibility icon next to each LUT adjustment layer. Have only one turned on at a time for the best results.
- To apply a new LUT, click the Color Lookup icon in the Adjustments panel.
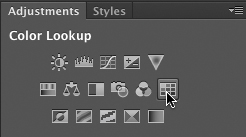
- In the Properties panel, choose a loaded preset from one of the three pop-up menus.
- Modify the adjustment layer to taste and experiment with opacity and blending modes.


