This chapter is from the book
This chapter is from the book
This chapter is from the book
Adding Reminders
What some of us call to-do items, Apple refers to as reminders. In a major change from the way reminders were handled previously, events and reminders have now been completely separated, with dedicated Reminders apps for reminders, and with events being handled by the Calendar apps.
The iCloud website, iOS devices, and the Mac now all have you work with calendar events and reminders in two entirely separate apps, the Calendar and Reminders apps, respectively  . On Windows you can use Microsoft Outlook 2007 or later (which calls reminders Tasks).
)
On iOS, you use two separate applications to handle events and reminders.
Reminders are different from calendar events, in that they can be checked off as completed; you can assign a priority to them; and you can give them a due date (but you don’t have to). Reminders with due dates not yet marked as completed automatically remain in your Reminders list. All of the Reminders apps allow you to maintain multiple reminder lists (for example, Home, Work, and the like).
In this section, you’ll learn how to use the iCloud website to work with reminders and reminder lists. Remember that as you use the iCloud website, changes you make there will automatically propagate to the rest of your iCloud-enabled devices.
To add and edit Reminders on the iCloud website
- In your web browser, open the Reminders app on the iCloud website
 .
.
The Reminders app appears
 .
. - Click to select the reminder list you want your new reminder to appear in and then double-click in an empty area of the Reminders pane.
or
Click the New Reminder button.
The insertion point appears in the line below the last reminder
 .
. - Enter the reminder, then press Return.
- (Optional) Click the Details button to bring up the Details popover
 , then do one or more of the following:
- If you want to assign a due date to the reminder, in the Remind me section, select On a day, then enter a date and time in the fields that appear. You can also choose if and how often you want the reminder to repeat from the pop up menu.
- If you like, you can change the Reminder List for the reminder.
- From the Priority pop-up menu, assign the reminder’s priority level (None, Low, Medium, or High). If you assign a priority, the reminder will show the priority as an icon of one or more exclamation points in the Reminders pane.
- If you want, add a Note to the reminder.
- You can delete the reminder by clicking the Trash button.
- Click Done.
The changed reminder appears in the Reminders pane, with information letting you tell the details at a glance
 .
. When you’ve edited the details of a reminder, those details appear with the reminder name. In this case, the reminder’s Medium priority is shown with the two exclamation marks.
)
)
)
)
)
To add or edit a Reminder List on the iCloud website
- In the Reminder application on the iCloud website, click the New Reminder List button.
A new Untitled reminder list appears, ready for you to name it
 .
.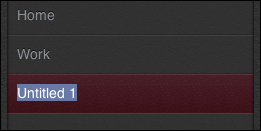 Type the name of your new reminder list.
 - Enter the new reminder list name, then press Return or Enter.
- (Optional) To edit a reminder list, click the list name to select it, then click the Edit button at the top of the Reminder Lists column
 . Do one or more of the following:
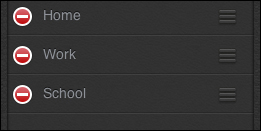 The Edit mode allows you to delete, edit, or reorder your reminder lists.
- To delete the list, click the icon with the red circle with a line through it.
- To rename the list, select the name and type over it.
- To reorder the lists, click and drag the handle at the right side of the list.
When you are done editing, click the Done button at the top of the Reminder Lists column.
TIP
You can share your Reminder Lists with other iCloud users. Click the Edit sharing settings button next to a list  , then enter their name in the Sharing Reminders popover that appears.

Like calendars, you can share your reminder lists.