Creating Effects with the Radial Filter Tool in Adobe Photoshop Lightroom 5
Unlike the centered post-crop vignette in the Effects panel, you can place the center of your Radial Filter adjustment anywhere in a photo, focusing attention on any part of the image you choose.
By default, your local adjustments are applied to the area outside the adjustable ellipse, leaving the inside unaffected, but the Radial Filter’s Invert Mask option enables you to reverse the focus of the filter.
By applying multiple Radial Filter adjustments, you can treat the inside and outside areas differently, highlight more than one area in the same image, or create an asymmetrical vignette, as illustrated here.
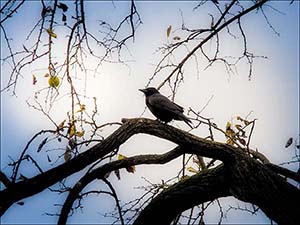
In this exercise, you’ll learn how to work with the Radial Filter tool as you create a more complex effect that will hopefully add a little atmosphere to our problem photo, which is still less than exciting.
You’ll start by setting up a combination of adjustments that will be applied through your first Radial Filter.
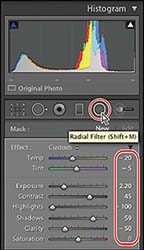
- Click to activate the Radial Filter tool—the fifth of the editing tools located right below the Histogram in the right panel group.
- Set up the local adjustment controls as shown in the illustration at the right. Set the Temperature to -20 and the Tint to -5. Reduce the Exposure setting to -2.20, increase the Contrast to 45, and decrease the Highlights to -100. Set the Shadows and Clarity values to 60 and -50 respectively. Make sure that the Feather control is set to the default value of 50 and the Invert Mask option is disabled.
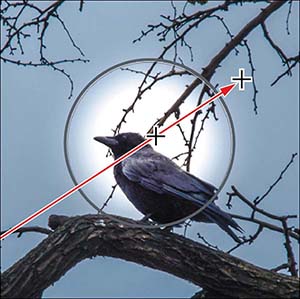
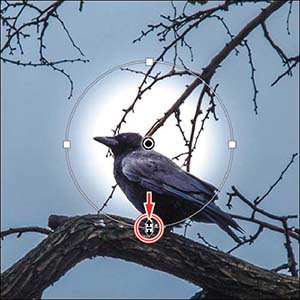
- Hold down the Shift key and drag in the Loupe view with the Radial Filter tool’s cross-hairs cursor, starting from a point at the back of the bird’s neck. When you’ve created a circle as shown in the illustration at the right, release the mouse button, and then the Shift key.
- Hold Ctrl+Alt / Command+Option and click the pin to duplicate the filter. As you can see, duplicating the radial filter has doubled the effect on the image; you should keep it in mind that the effects of overlapping filters are cumulative.
- Activate the Invert Mask option below the local adjustment controls. The same adjustments are now being applied both inside and outside the feathered mask, so that the entire image is affected evenly.
- With your second Radial Filter adjustment still selected and active, change the Temperature and Tint values to 25 and 15 respectively. Set the Exposure to 1.30, and the Contrast, Highlights, and Shadows to a common value of -100. Increase the Clarity setting to 100, Saturation to 45, and Sharpness to 100. The new settings are applied inside the inverted mask.
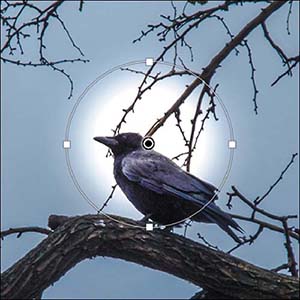
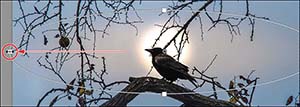
- Hold down the Shift key to constrain the shape of the filter as you drag the bottom control handle downwards. Enlarge the circle as shown in the illustration at the left, below. Be sure to release the mouse button before you release the Shift key. Drag the control handle on the left side of the circle (without the Shift key) until it lies just outside the left edge of the image, as shown on the right, below. The mask is enlarged horizontally, from its center.
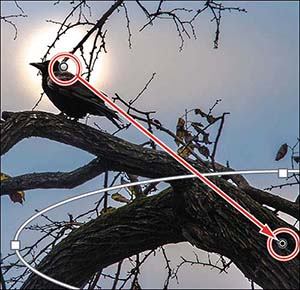
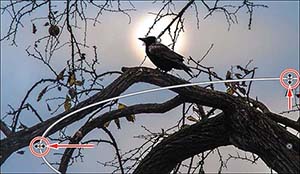
- Hold Ctrl+Alt / Command+Option and drag the pin to duplicate the active filter and reposition it as shown at the left, below; then, without holding the Shift key, drag the control handles at the top and left of the ellipse to enlarge the Radial Filter adjustment as illustrated at the right, below.
- Drag the central pin for the active Radial Filter to the left to center the ellipse horizontally, while maintaining its distance from the lower edge of the image. Set both the Temperature and Tint values to 33, increase the Exposure to 1.60, and reduce the Clarity and Sharpness to 0 and 50 respectively.
- Press the Esc key or click the Radial Filter tool below the Histogram to disable the tool and hide the local adjustment pins from view.
TIP
Holding down the Shift key as you drag with the Radial Filter tool constrains the adjustment to a circle. When dragging the control handles to scale an existing elliptical adjustment, holding the Shift key constrains the mask’s proportions.
Once established, the active Radial Filter adjustment is displayed with a circular “pin” at its center and four square control handles spaced around its circumference. Whenever the Radial Filter tool is activated, the pins for existing adjustments become visible; you can select an existing filter by clicking its central pin, drag the pin to move it, and resize the adjustment area or change its shape by dragging any of the square control handles.
