Sharpening Photos with the Enhanced Photoshop CC Smart Sharpen Filter
- Quick Overview of Smart Sharpen
- Creating the Initial Sharpening Pass
- Limiting the Sharpening Effect with Shadows and Highlights
For most digital photographers, raw workflows are ideal. However, sometimes it's more practical to work with a rendered format instead. One common example: Those who shoot in "Raw + JPEG" format may decide to start with JPEG for a particular shot, making only a few quick edits in Photoshop CC before moving to another shot. You can edit JPEGs in Adobe Camera Raw, but the alternative route I describe in this article can work just as well, if you don't want to include ACR in your JPEG workflow.
Quick Overview of Smart Sharpen
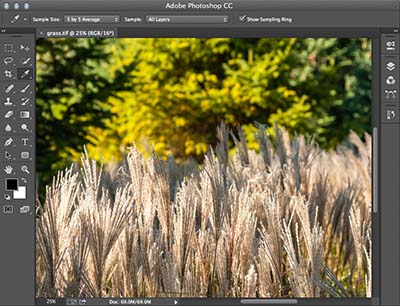
The first thing to do is open the JPEG, TIFF, or other rendered-format image in Photoshop CC. For this example, I'll use a shot with a relatively shallow depth of field, but it has a lot of detail in the foreground that can benefit from a quick pass through the Smart Sharpen filter (seen in Figure 1). This shot also contains details that need no sharpening. Smart Sharpen allows us to handle both tasks with relative ease.

Figure 1 Smart Sharpen is a great option for enhancing details when you don't have time to use a complete raw workflow.
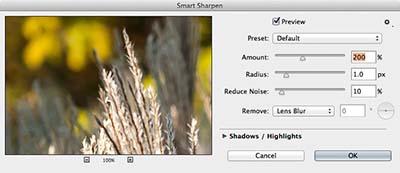
After opening the image you want to sharpen, choose Filter > Sharpen > Smart Sharpen from the main menu. This action opens the updated Smart Sharpen window in Photoshop CC, with only the basic controls visible by default (see Figure 2). The preview also shows your image magnified to 100% by default—ideally, 100% is the best setting for judging photographic details.

Figure 2 The new Smart Sharpen window in Photoshop CC provides a larger, scalable preview and better organized controls.
The sharpening controls are mostly unchanged since Photoshop CS6, but in Photoshop CC these controls have been reorganized. The preview is now much larger, and it scales with the size of the window. This feature can be extremely useful; however, depending on the computer, each time you make a change in the image, the time required to see an updated preview may increase. This is particularly the case with higher-resolution photos (16 megapixels and above).