Using Photoshop CC and ACR’s Powerful Tone Mapping and Color Correction Tools to Create 32-Bit HDR Photos
- Merging Bracketed HDR Exposures
- Tone-Mapping HDR Data in ACR
- Handling the Details: Noise Reduction and Sharpness
- Tweaking Colors with HSL
- Final Adjustments in Photoshop CC
In prior versions of Photoshop, photographers had to either use the Merge to HDR Pro feature (one of the Automation plugins) or a third-party HDR plugin like HDR Efex Pro, in order to merge a group of photos and create a realistic HDR photo. While both options are capable of producing good results, the reality is that plugins often (at an extra expense to users) offered the best set of tools for achieving the look of an HDR Photo.
Rather than reinvent the wheel, the talented folks at Adobe got the idea that Photoshop CC users could leverage the powerful tone mapping and color controls in Adobe Camera Raw (ACR), to act as a full-blown HDR photo editor! This is a huge development because unlike the Merge to HDR Pro method, it offers precise control over not only tones but also colors and detail enhancement. Let’s take a look!
Merging Bracketed HDR Exposures
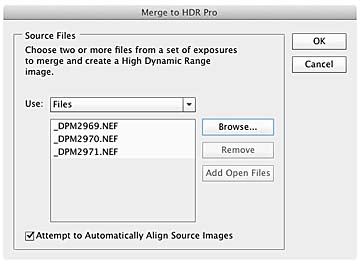
One aspect of the new HDR process in Photoshop CC is the same as in prior versions of the application: you still need to merge your exposures using Merge to HDR Pro. To do this, choose File > Automate > Merge to HDR Pro. When the dialog opens (see Figure 1), navigate to your folder of raw exposures by clicking the Browse button, and then select the files you want to include. Click Open when you have all the shots selected.
Next make sure the Attempt to Automatically Align Source Images is selected in the merge dialog box, and then click OK.

Figure 1 The merge dialog for Merge to HDR Pro in Photoshop CC remains unchanged from prior versions.
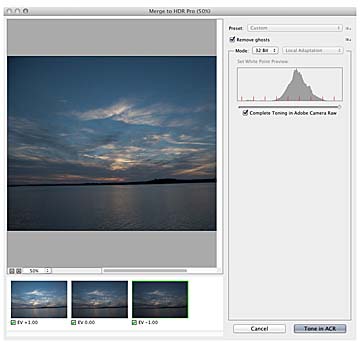
After a few seconds, your composite exposure will be loaded into the Merge to HDR Pro window, shown in Figure 2. Click the Remove Ghosts option, then experiment with the different exposures (by clicking each one), to see which “freezes” the details in your scene the best. Usually one of the medium or darker exposures will work best, depending on the subject. Here I chose the darkest exposure. Each time you click an exposure Photoshop CC will take a second or two to re-generate the main preview, showing you the results of your choice.

Figure 2 The Merge to HDR Pro window provides a couple simple options to optimize your image, before moving it into ACR.
Next, choose “32 Bit” from the mode menu (top-right portion of the window), and make sure the Complete Toning in Adobe Camera Raw option is selected. After you’ve followed these steps, click the Tone in ACR button (bottom-right portion of the window). This will open your exposure data into ACR and usually takes a few seconds to complete.
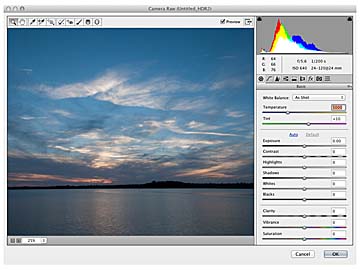
You may notice right away that some of the usual ACR controls available in single image workflows are not available here. For example, the Crop & Straighten tools are not available (see Figure 3), nor are Lens Profile Corrections. Therefore, it’s usually best to apply and sync a Crop and Lens Profile Correction (as I did in this case), prior to opening the files in Merge to HDR Pro, by using your normal ACR workflow.

Figure 3 ACR provides the full range of tonal controls, color controls, and detail controls when working in 32-bit HDR mode.