- Beginning this lesson
- Trimming clips in the Timeline
- Incorporating RED footage
- Adding transitions
- Creating effects in Adobe Premiere Pro
- Adding titles with the Adobe Premiere Pro Title tool
- Editing closed captions
- Stabilizing footage with the Warp Stabilizer
- Rendering your Timeline
- Posting to Creative Cloud for review
- Review questions
- Review answers
This chapter is from the book
This chapter is from the book
This chapter is from the book
Trimming clips in the Timeline
If you are starting at this lesson, you might want to take the opportunity to play through the whole edit to get a feel for its pacing.
There are a few edits left to perform in this sequence, and you will be applying some advanced techniques in the following exercise.
Adding a jump cut
A jump cut is an editing technique made famous by the French New Wave directors. A jump cut is an edit in which a middle portion of a shot is removed, resulting in an abrupt jump in filmic time. Often these are used in avant-garde films, TV commercials, music videos, or, in this case, documentaries about the making of music videos.
You will be applying a jump cut to one of the B-roll shots in your sequence. You will need to find that clip in your sequence. An easy way to do that is to search for that clip by name and then have Adobe Premiere Pro automatically find it for you in the sequence.
- In the search field at the top left of the Project panel, type prod_adam_onset.
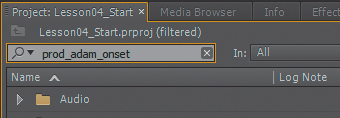
Adobe Premiere Pro will reveal prod_adam_onset.m4v in the B-Roll bin.
- Double-click the B-Roll bin to open it in its own window.
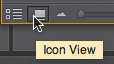
- Click the Icon View button at the bottom left if the bin.
At the bottom right of the icon for this clip, you will see a yellow filmstrip icon, indicating that this clip is used in a sequence.
- Click this filmstrip icon, and you will see a tip, showing you in what sequence(s) this clip is being used, and at what sequence timecode.
- Click the tip for Poolside_BTS_02.
The Timeline playhead will automatically jump to this clip’s In point in Poolside_BTS_02.
- Select the B-Roll bin to make it active, then press Command+W (Ctrl+W) to close it.
- Click the X icon in the Project panel search field to clear the field.
- Click the Timeline tab for Poolside_BTS_02 to make the Timeline active.
Press the equal key (=) a few times to zoom in on your Timeline.
)
)
)
)
Press the spacebar to play the sequence from here.
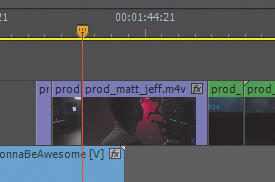
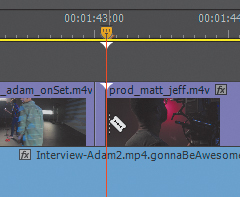
Notice that this shot is good, but it could be shortened so that we can see Adam’s face when he says “it’s gonna be awesome.” However, we don’t want to move any other clips after this one farther ahead in time.
You will trim this clip by using the Razor tool to cut out a middle section, delete the middle section, and then move the first of the two resulting parts ahead so it is adjacent to the second part. This will result in a jump cut.
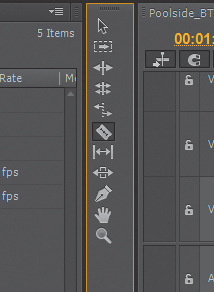
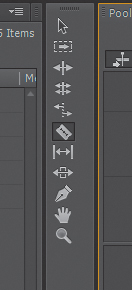
- Choose the Razor tool from the Tools panel.
- Scrub the Timeline playhead to 00:01:39:23.
- Apply the Razor tool to the clip here.
- Adjust the Timeline playhead to 00:01:42:02.
- Apply the Razor tool to the clip here.
- Press the V key to activate the Selection tool.
- Select the middle section of the clip.
- Press the Delete key to remove it from the Timeline.
- Select the first bit of the clip.
- Move it forward on track Video 2 so its Out point snaps to the In point of the other copy.
- Adjust your playhead back a few seconds. Press the spacebar to play the edit.
)
)
)
A jump cut within a shot is one way to trim it. Another way is by trimming its duration but not its content. In other words, by speeding it up.
Using Rate Stretch
In this exercise, you are going to apply the Rate Stretch tool to a couple of B-roll clips so that their middle portions play at faster-than-normal speed.
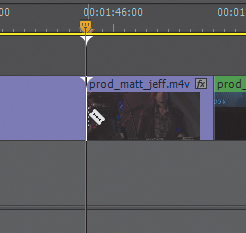
- Scrub the Timeline playhead to the In point of prod_matt_jeff.m4v, the next clip in the sequence on Video 2.
- Press the spacebar to play this clip.
Note that it’s well composed throughout, but it’s too long. You want to make it shorter overall but still see everything in the clip’s duration. But you don’t want to make the entire clip play faster. Instead, it would look cool if the clip started at normal speed, suddenly played fast, then slowed down to normal speed again.
- Choose the Razor tool from the Tools panel.
- Adjust the Timeline playhead to timecode 00:01:43:02.
- Apply the Razor tool to the clip at this frame.
- Adjust the playhead to timecode 00:01:45:19.
- Apply the Razor tool to clip here.
- Now choose the Rate Stretch tool from the Tools panel.
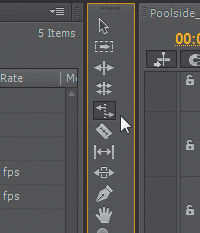
The Rate Stretch Tool allows you to adjust the playback speed of a clip by stretching its In or Out points in the Timeline. By stretching, or lengthening, the clip, it will play slower. Shortening a clip with the tool will make the clip play faster.
- Hold down Shift as you scrub the playhead, snapping it to the tail of the first portion of prod_matt_jeff.m4v in the Timeline.
Adjust your playhead ahead (to the right) by 12 frames.
With the Rate Stretch tool, grab the tail of the middle portion of the prod_matt_jeff.m4v clip until it snaps to the playhead.
- Choose the Selection tool from the Tools panel, or activate it by pressing the V key.
- Marquee-select the two prod_adam_onSet.m4v clips and the first two portions of prod_matt_jeff.m4v.
- Move these forward (to the right) in the Timeline so that the tail of the second portion of prod_matt_jeff.m4v snaps to the third portion of this clip.
- Scrub your playhead back a couple of seconds before prod_adam_onSet.m4v, and press the spacebar to play through these edits.
)
)
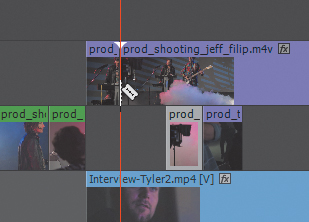
Let’s do this with another clip, prod_shooting_jeff_filip.m4v, which is a half dozen clips ahead on Video 2.
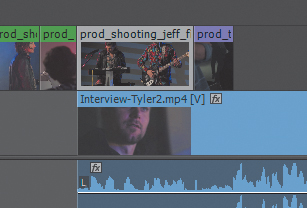
Note that this clip is a good duration in the sequence, but for a more dramatic effect, there should be more frames of the fog machine blasting fog.
- Double-click prod_shooting_jeff_filip.m4v to open it in the Source Monitor.
- Press the minus key (–) to zoom out in time, until the raw clip’s full duration is visible in the Source Monitor Timeline. Scrub the playhead through the clip’s frames. Notice that there is a lot of media to use beyond what is currently within the clip’s In and Out points.
If you tried extending the clip’s Out point in the Source Monitor, it would not work because there is a clip immediately after it in the sequence.
What you will need to do is temporarily move this clip into track Video 3, extend its Out point, make a couple of cuts in the clip, apply the Rate Stretch tool to the middle portion, close the gap, and then move all three bits of the original clip back to Video 2.
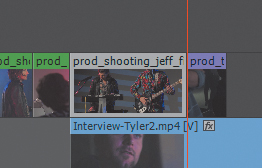
- Activate the Selection tool by pressing the V key.
- Select prod_shooting_jeff_filip.m4v and drag it up to Video 3.
- Use the Selection tool to extend the clip’s Out point as far to the right as it can go.
)
)
Now you will mark the frames that will comprise the end of the clip to be shown.
- Back in the Source Monitor, scrub the playhead to 00:00:12:17.
- Press the M key to apply a Layer Marker to mark the first of the last several frames that will be shown.
- Move the playhead ahead to 00:00:13:06.
- Press the O key to Mark Out.
Now let’s do some edits in the Timeline.
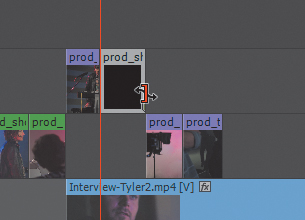
- Choose the Razor tool from the Tools panel.
- Snap the Razor to the clip at the Layer Marker and make a cut.
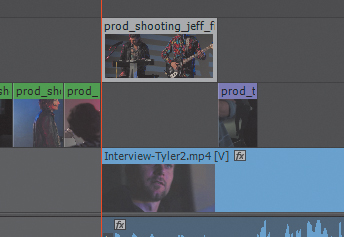
- Activate the Selection tool by pressing the V key.
- Move the second bit of prod_shooting_jeff_filip. m4v back to Video 2, so its Out point snaps to the In point of prod_tyler_dwight_reaction.m4v.
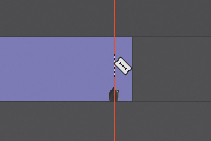
- Choose the Rate Stretch tool from the Tools panel.
- With it, extend the In point of this second portion of the prod_shooting_jeff_filip.m4v clip backward 12 frames.
)
)
By doing this, you are making the last 12 frames of the original clip play in slow motion.
The clip starts with the camera zooming out. Let the portion play back in real time.
- Adjust the Timeline playhead to 00:01:53:00.
- Activate the Razor tool by pressing the C key.
- Cut the long portion of prod_shooting_jeff_filip.m4v at the current time.
Now you will make the middle portion of prod_shooting_jeff_filip.m4v play back sped-up.
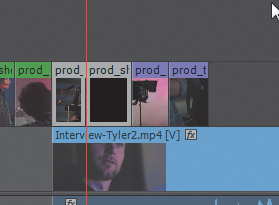
- Use the Rate Stretch tool to adjust the Out point of the clip in Video 3 to snap to the In point of its copy in Video 2.
- Activate the Selection tool by pressing the V key. Marquee-select the first two portions of prod_shooting_jeff_filip.m4v in Video 3, then drag them back down into Video 2.
- Adjust the playhead back a few seconds and then press the spacebar to play through the edit.
- Press Command+S (Ctrl+S) to save your project.
Using Dynamic Timeline Trimming
Adobe Premiere Pro CS6 introduced a new feature called Dynamic Timeline Trimming, which allows you to trim your cuts in real time as the edit is playing back. You’ll use this feature to perform additional trimming.
First, you will use Dynamic Timeline Trimming to trim a few B-roll clips in your sequence.
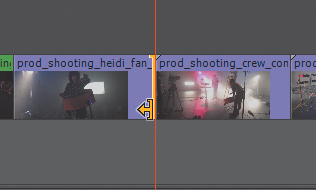
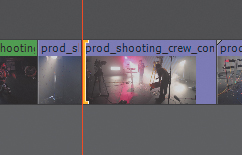
- Adjust the Timeline playhead to the edit point between prod_shooting_heidi_fan_confetti.m4v and prod_shooting_crew_confetti_fog.m4v.
Note that the end of the first clip is too long and so is the beginning of the second clip. You could just do a ripple edit on each by dragging with the Ripple Edit tool, but wouldn’t it be nice to apply a precise edit using key commands?
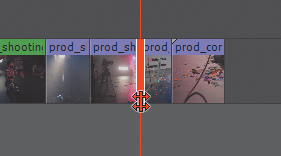
- Activate the Ripple Edit tool by pressing the B key.
- Select the tail of prod_shooting_heidi_fan_confetti.m4v.
- Press the T key to enter Trim Mode.
The playhead will automatically move to the edit point between this clip and the next clip in Video 2.
The Program Monitor will show the last frame of prod_shooting_heidi_fan_confetti.m4v and the first frame of prod_shooting_crew_confetti_fog.m4v, along with their respective source Out point timecode and source In point timecode. The numerical buttons at the bottom allow you to apply an edit, of plus or minus 1 or 5 frames, using the currently active tool, as well as apply the default transition.
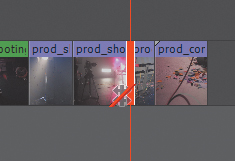
What you will do is apply a ripple edit to the tail of prod_shooting_heidi_fan_confetti.m4v with key commands.
- With the Ripple Edit tool active, press Option+Shift+left arrow (Ctrl+Shift+left arrow) fourteen times and then Option+left arrow (Ctrl+left arrow) three times, until the source Out point timecode for prod_shooting_heidi_fan_confetti.m4v shows as 00:00:04:07 in the Program Monitor.
Now you will apply an edit to the head of the next clip.
- In the Program Monitor, select the video frame on the right. This will select the head of prod_shooting_crew_confetti_fog.m4v.
- Press Option+Shift+right arrow (Ctrl+Shift+right arrow) twelve times, then Option+right arrow (Ctrl+right arrow) once, until the source In point timecode for prod_shooting_crew_confetti_fog.m4v is 00:00:02:13.
)
)
)
Next you will use Trim Mode to apply a roll edit to another pair of clips.
- Adjust the Timeline playhead to the next clip in the sequence, prod_filip_heidi_throwConfetti.m4v.
- Activate the Roll Edit tool by pressing the N key.
You will apply a roll edit between this clip and the following clip, prod_confetti_lyrics.m4v, to offset the Out point of the first clip and the In point of the second clip, each by 10 frames.
- With the Roll Edit tool, select the edit point between these clips.
- Press the T key to enter Trim Mode. The Program Monitor will show the Out point frame of the first clip and the In point frame of the second clip, along with their respective source In and Out point timecodes.
- Press Option+Shift+right arrow (Ctrl+Shift+right arrow) twice, to adjust the edit point between these clips ahead (to the right) 10 frames.
There is one small task to do. Back in your Timeline, notice that the prod_sweepingConfetti_60fps.m4v clip at the end of the edit has been moved on Video 2. That’s because the ripple edits applied to the clips in Trim Mode caused it to move.
)
)
- Activate the Selection tool by pressing the V key.
- Select the clip. Drag it to the right until its head snaps to the tail of the music clip in Audio 2.
- Press Command+S (Ctrl+S) to save your project.
Adobe Premiere Pro gives you many options for stretching and trimming your clips to make your edit workflow efficient and to manipulate time in your story.
)