Like this article? We recommend
Like this article? We recommend
Like this article? We recommend
Using Flash Buttons
Flash buttons, like Flash text, are small files that can include text and links as well as rollover effects. Flash buttons are templates that offer preset styles and visual effects.
To create a Flash button:
-
From the Document window menu bar, select Insert > Interactive Images > Flash Button.
or
On the Common category of the Objects panel, click on the Insert Flash Button button.
Either way, the Insert Flash Button dialog box appears (Figure 11).
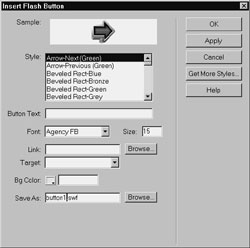
Figure 11 Choose the format and create your button
in the Insert Flash Button dialog box. -
Browse through the list of available looks for your button. You can choose from various kinds of arrows and the like (Figure 12), or you can choose a button that has room for text (Figure 13).

Figure 12 Some of the buttons are text-free arrows
and Play buttons. These buttons are the ³Control²
series.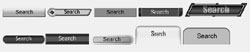
Figure 13 You can choose from a variety of looks
for text buttons. Of course, you'll probably want
your buttons to say different things, and you'll
probably want a set of them to look the same. -
To select the folder the Flash file will be stored in, click on Browse. The Select File dialog box will appear. Browse until you find the right folder. (Be sure to name your Flash file something memorable.) If you don't choose a folder before saving your Flash Button file, it will be stored in the same folder as the current page.
-
If you chose a button that has text, type the text in the Button Text text box. You may have to find out by trial and error whether your text is too long to fit on the button (Figure 14).
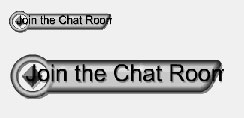
Figure 14 You've got a limited amount of space
on a button, even if you enlarge it. -
Choose a Font Face from the Font drop-down menu. The Font Size is often non-negotiable; if you enlarge the font, the words on the button may get cut off (Figure 15).
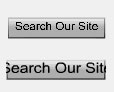
Figure 15 The top button is fine at size 12, but the bottom one's text is too big with a point size of 16.
-
Set the background color for your button; you can click the eyedropper on the background color of the page to choose that color (Figure 16).
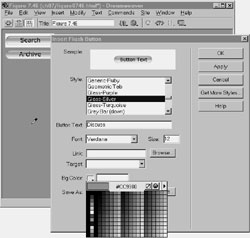
Figure 16 In the first visible button here, I didn't
choose a background color, so it defaulted to
white, which looks bad. On the second one, I
chose the background color of the page. Click
on the Background Color button, and click the
eyedropper on the page background to choose
that color. -
Type the link for the button in the Link text box, or click on Browse and choose a file from your local site.
-
If your site uses frames or additional windows, and you need to set a target for the link, select it from the Target text box.
-
To preview the way your button looks, click on Apply. You can make changes before you continue.
-
Click OK to close the dialog box and save your changes.
Tips
-
To edit your Flash text or Flash button, double-click on it, and the Insert Flash Text (or Button) dialog box will reappear.
-
To preview the rollover effects in the Document window, select the Flash object. In the Property inspector, click on Play (Figure 17). Now, when you mouse over the button, you'll see the rollover in play. When you're done, click on Stop.

Figure 17 Select the button you want to test, and click on Play in the Property inspector. This works with Flash text, too.
-
You can resize the Flash object as you would an image by selecting it and dragging its handles (Figure 18). The resizing will be done to scale; the text will grow to fit the new dimensions, but that doesn't mean that too-large text will fit on a button. See the tips under Flash Text for more on scaling.
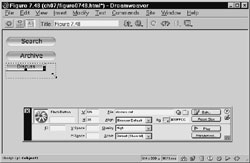
Figure 18 You can resize a button by dragging its
handles or by typing new dimensions in the H and
W text boxes on the Property inspector. To reset
the size, click on Reset Size on the Property
inspector. -
You can get additional button templates from Macromedia Exchange by clicking on Get More Styles in the Insert Flash Button dialog box. Your browser will open and take you to the Exchange, where you can download new button templates created by other users.
Duplicating Your EffortsWhen you create a Flash button, you probably want to create a whole set of buttons that look and act the same. Each button will say something different, presumably, and will link to a different page. Instead of going through the motions of selecting a button type and a background color and so on over and over, you can save your changes in a new file and then insert the new files onto your page.
Now, your new button will be displayed, but the old one will have disappeared. Don't worry. Go ahead and follow the steps above for each button in your set, taking care to provide a new filename for each one. To insert your new buttons, open the Flash panel of the Assets panel (Window > Assets) or the appropriate folder in the Site window, and drag each button in turn into its place on the page. To stack a group of buttons vertically in a table cell or elsewhere, press Shift+Enter (Shift+Return) after each button to insert a line break. |