Adding and Styling Text in Adobe Muse CC (2014 release)
- Setting up layers
- Adding text
- Formatting text
- Creating Type Styles
- Review Questions
- Review answers
Note: This excerpt does not include the lesson files. The lesson files are available with purchase of the book.

This lesson takes approximately 45 minutes to complete. To download the project files for this lesson, log in or set up an account at peachpit.com. Enter the book’s ISBN (9780133854145) or go directly to the book’s product page to register. Once on the book’s page, click the Register Your Product link. The book will show up in your list of registered products along with a link to the book’s bonus content. Click the link to access the lesson files for the book. Store the files on your computer in a convenient location, as described in the “Getting Started” section of this book. Your Account page is also where you’ll find any updates to the chapters or to the lesson files. If you are starting from scratch in this lesson, use the method described in the “Jumpstart” section in “Getting Started.”
Adobe Muse provides numerous tools for creating, editing, and formatting text, whether it’s created within the program or imported from another source.
Setting up layers
Now that you’ve set up your master pages, you can begin to design your pages. As you add content within Adobe Muse, each new object is stacked on top of the previous object in what is referred to as a stacking order. As with most design applications, Muse content has a stacking order on the page. All of the content you add to your page is stacked one object on another; the first object you create on the page is on the bottom of that stack.
To structure your page elements and make your site designs easier to edit later, you can organize content using layers in Muse. Think of layers as transparent sheets of paper stacked on top of each other that contain different content. If you are familiar with layers in Adobe InDesign or Adobe Illustrator, you’ll be able to jump right into working with layers in Muse. Each new Muse site starts with one default layer called Layer 1, which all content is on, and the layers in the Layers panel are shared across all pages (including masters) and layouts.
You don’t have to work with layers, but they can make your life easier in the future when you’re making edits or attempting to arrange your content’s stacking order. Next, you’ll begin setting up layers to more easily organize master page content and your page design content.
- Open the SPC.muse site file if it’s not still open from the previous lesson. With Plan mode showing, double-click the Home-master page thumbnail to open the page in Design mode.
- Choose Window > Reset Panels, and then choose Window > Layers to show the Layers panel.
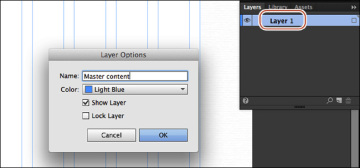
Double-click the Layer 1 name in the Layers panel and change the name to Master content in the Layer Options dialog box. This layer already contains the master page content. Leave the other options at their default settings and click OK.
Now you’ll make a new layer for the page content, like text, that you’ll start adding in this lesson.
Click the New Layer button (
 ) at the bottom of the Layers panel to add a new layer named Layer 2 above the existing layer. We’ll discuss the importance of layer ordering shortly.
Every new layer that you create, by default, will have no content on it. Also, objects on master pages appear at the bottom of each layer. Master elements can appear in front of document page objects if the master elements are placed on a higher layer, but by default they are located on the bottom of the stacking order.
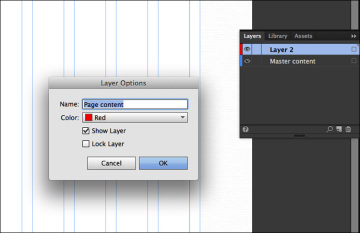
In the Layers panel, double-click the name Layer 2 (your layer name may be different) to open the Layer Options dialog box. Change the following options in the dialog box:
- Name: Page content
- Color: Red (the default setting)
- Show Layer: Selected (the default setting)
- Lock Layer: Deselected (the default setting)
Notice the other options in the Layer Options dialog box. You can assign a color to each layer. When content is selected on the pages, the color of the bounding box will match the color of the layer it’s on. You can also lock a layer and hide a layer, but that can also be done directly within the Layers panel.
Click OK.
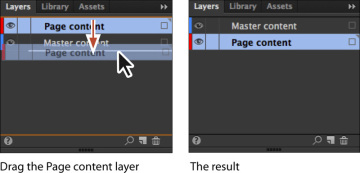
Right now, as stated previously, all content is on the Master content layer because that was the default layer. To ensure that the header and footer content appear on top of the page content for this site, you’ll change the ordering of the layers in the Layers panel.
In the Layers panel, drag the Page content layer beneath the Master content layer. When a line appears beneath the Master content layer, release the mouse button. Everything on the Master content layer will now appear above everything on the Page content layer.
With the Selection tool (
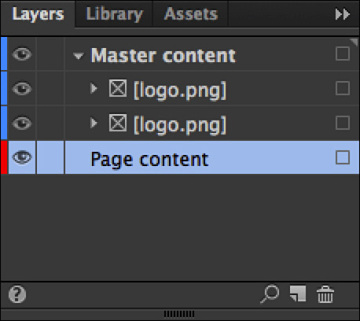
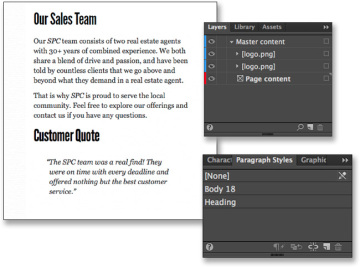
 ) selected, click the logo in the header. Click the arrow to the left of the Master content layer name in the Layers panel to show the contents of the layer. The Layers panel reveals the two logo.png images currently on the page.
Similar to layers in InDesign and Illustrator, Muse shows each object in your design in the Layers panel. Each layer that has content on it has a disclosure triangle to the left of the layer name. When collapsed, you can click the disclosure triangle to expand the contents of the layer and see the list of objects and their stacking order on that layer for the active page. Groups, widgets, and certain widget parts also have disclosure triangles that you can click to expand the set and display their contained objects. You can reorder these objects, lock and unlock them, and add or remove them from groups.
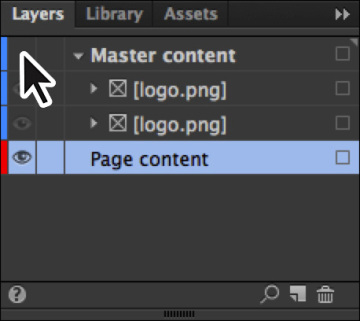
Click the eye icon to the left of the Master content layer name in the Layers panel to hide the master content (the logos).
Click the now blank area where the eye icon was to show the master content again.
As you work in Muse, it can be helpful to hide entire layers or selected content on layers to focus on or more easily select the design content at hand.
- Choose File > Close Page to return to Plan mode, and then choose File > Save Site.
As you progress through this and later lessons, you’ll continue to work with layers and discover other useful layer features.
 ), drag the layer(s) to the Delete Selected Layer button, or right-click the layer and choose Delete Layer. Deleting a layer will delete all content on the layer.