- Getting started
- Working with layers
- Creating and modifying text frames
- Creating and modifying graphics frames
- Adding metadata captions to graphics frames
- Placing and linking graphics frames
- Changing the shape of a frame
- Wrapping text around a graphic
- Modifying the shape of frames
- Transforming and aligning objects
- Selecting and modifying grouped objects
- Creating a QR code
- Finishing up
- Exploring on your own
- Review questions
- Review answers
Transforming and aligning objects
Various tools and commands in InDesign let you modify an object’s size or shape and change its orientation on the page. All transformations—rotating, scaling, shearing, and flipping—are available in the Transform and Control panels, where you can precisely specify transformations. You can also align or distribute objects horizontally or vertically along the selection, margins, page, or spread.
You’ll experiment with some of these features now.
Rotating an object
InDesign offers several methods for rotating objects. In this part of the lesson, you’ll use the Control panel to rotate one of the logos you imported earlier in the lesson.
- Use either the page box at the bottom of the document window or the Pages panel to display page 4 (the first page of the document; the back page of the newsletter). Choose View > Fit Page In Window.
- Using the Selection tool (
 ), select the “evolve” logo you imported earlier in the lesson. (Make sure you select the graphics frame and not the graphic within.)
 At the left end of the Control panel, make sure that the center point is selected on the Reference Point locator (
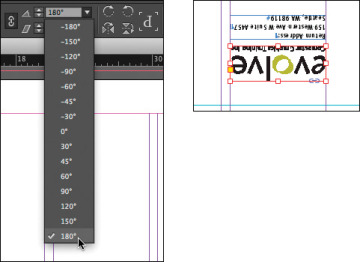
 ) so that the object rotates around its center. Choose 180° from the Rotation Angle menu in the Control panel.
Rotating an image within its frame
You can rotate the content of a graphics frame with the Selection tool.
Using the Selection tool (
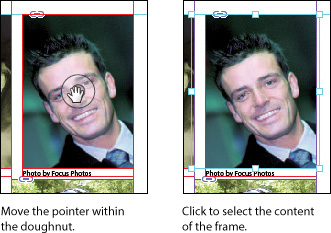
 ), select the image of Jeff G. (top right) by clicking within the content grabber. The arrow pointer changes to a hand when it’s within the doughnut shape.
- In the Control panel, make sure that the center point in the reference point locator (
 ) is selected.
 - Move the pointer slightly outside the resizing handle at the upper-right corner of the picture. The rotate pointer (
 ) is displayed.
 Click and drag clockwise to rotate the image until the head is approximately vertical (about 25°), and then release the mouse button. As you drag, the angle of rotation is displayed along with the image.
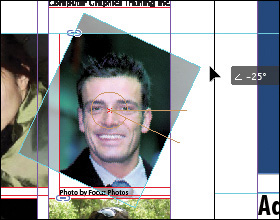
After being rotated, the image no longer fills the frame. To fix this, first make sure that the Constrain Proportions For Scaling icon (
 ) to the right of the Scale X Percentage and Scale Y Percentage boxes in the Control panel is selected, and then enter 55 in the Scale X Percentage box and press Enter or Return.
- Choose Edit > Deselect All, and then choose File > Save.
Aligning multiple objects
Precise alignment is made easy when you use the Align panel. Next, you’ll use the Align panel to horizontally center multiple objects on a page, and then you’ll align multiple images.
- Choose View > Fit Page In Window, and then choose page 2 in the page box at the bottom of the document window.
- Using the Selection tool (
 ), Shift-click the text frame at the top of the page containing the “Partial Class Calendar” text and the “evolve” logo above it. (Unlike the two logos you imported earlier, this logo was created within InDesign and is a group of objects. You’ll work with this group later in the lesson.)
 - Choose Window > Object & Layout > Align to open the Align panel.
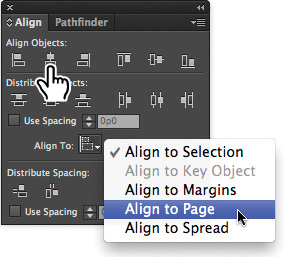
In the Align panel, choose Align To Page from the Align To menu, and then click the Align Horizontal Centers button (
 ). The objects are now aligned to the center of the page.
- Click a blank area or choose Edit > Deselect All.
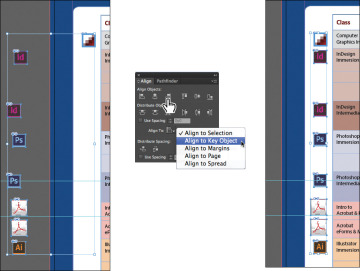
Use the scroll bar at the bottom of the document window to show more of the pasteboard on the left of page 2. You’ll see seven program icons.
- Using the Selection tool (
 ), select the graphics frame at the upper-left corner of the calendar, and then Shift-click to select the seven graphics frames.
 - In the Align panel, choose Align To Key Object from the Align To menu. Notice that the first graphics frame you selected now has a thick blue border, indicating it’s the key object.
Click the Align Right Edges button (
 ).
).- Choose Edit > Deselect All, and then choose File > Save.
Scaling multiple objects
In earlier versions of InDesign you could transform multiple objects only by using the transform tools or by first grouping the objects. You can now scale multiple selected objects without the need to select a transform tool first or group objects.
Next you’ll select two of the icons and resize both of them at once.
- Use the Zoom tool (
 ) to zoom in on the two Acrobat PDF icons on the left side of the page.
 - Using the Selection tool (
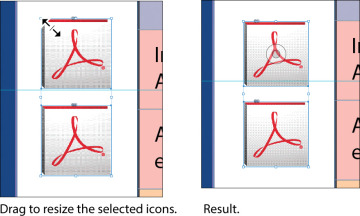
 ), Shift-click each of the two icons to select both of them.
 Press Shift+Ctrl (Windows) or Shift+Command (Mac OS), and then drag the handle at the upper-left corner down and to the right to make the two icons the same width as the Adobe Photoshop icon above the selected icons. A Smart Guide is displayed when the left edges of the selected frames align with the frame above.
- Choose Edit > Deselect All, and then choose File > Save.
