- Getting started
- Working with layers
- Creating and modifying text frames
- Creating and modifying graphics frames
- Adding metadata captions to graphics frames
- Placing and linking graphics frames
- Changing the shape of a frame
- Wrapping text around a graphic
- Modifying the shape of frames
- Transforming and aligning objects
- Selecting and modifying grouped objects
- Creating a QR code
- Finishing up
- Exploring on your own
- Review questions
- Review answers
Selecting and modifying grouped objects
Earlier you aligned the “evolve” logo at the top of page 2 to the center of the page. Now you’ll change the fill color of some of the logo’s shapes. Because they’re grouped, you can select and modify them as a unit. You’ll now change the fill color of just a few of the shapes without ungrouping or changing the other objects of the group.
The Direct Selection tool, or a set of commands in the Object menu (Object > Select), lets you select individual objects in a grouped object.
- Choose View > Fit Spread In Window.
With the Selection tool (
 ), click the “evolve” group at the top of page 2. If you want, use the Zoom tool (
 ) to magnify the area you’re working on.
Click the Select Content button (
 ) in the Control panel to select one object in the group without ungrouping.
Click the Select Previous Object button (
 ) in the Control panel six times to select the first “e” in the word “evolve.” Note that the Select Next Object button selects in the opposite direction.
- Using the Direct Selection tool (
 ), hold down the Shift key and click the “v,” “l,” “v,” and “e” letters in the logo to simultaneously select them.
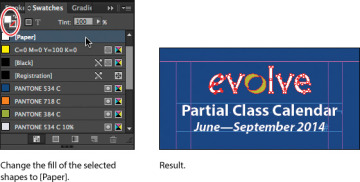
 Click the Swatches panel icon or choose Window > Color > Swatches. Click the Fill box at the top of the Swatches panel and choose [Paper] to fill the letter shapes with a white color.


