- Getting started
- Working with layers
- Creating and modifying text frames
- Creating and modifying graphics frames
- Adding metadata captions to graphics frames
- Placing and linking graphics frames
- Changing the shape of a frame
- Wrapping text around a graphic
- Modifying the shape of frames
- Transforming and aligning objects
- Selecting and modifying grouped objects
- Creating a QR code
- Finishing up
- Exploring on your own
- Review questions
- Review answers
Creating and modifying graphics frames
Now you’re ready to add the company logo and the employees’ images to the spread. In this section, you’ll focus on different techniques for creating and modifying graphics frames and their contents.
Because you’ll be working on graphics rather than text, your first step is to make sure that the graphics appear on the Graphics layer rather than on the Text layer. Isolating objects on different layers streamlines your workflow and makes it easier to find and edit elements of your design.
Drawing a new graphics frame
To begin, you’ll create a frame for the logo at the top of the cover page (the recto page in the first spread).
- If the Layers panel is not visible, click the Layers panel icon or choose Window > Layers.
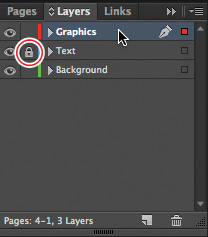
In the Layers panel, click the lock icon (
 ) to unlock the Graphics layer. Lock the Text layer by clicking the box to the left of the layer name. Select the Graphics layer by clicking the name of the layer so that the new elements are assigned to this layer.
- Choose View > Fit Spread In Window, and then use the Zoom tool (
 ) to zoom in on the upper-left corner of the front page (page 1).
 In the Tools panel, select the Rectangle Frame tool (
 ). Move the pointer to the corner where the top and left margin guides intersect and drag down until the pointer reaches the horizontal guide, and then across to the right edge of the first column.
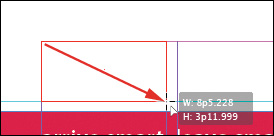
Drag to create a graphics frame.
- Switch to the Selection tool (
 ) and make sure that the graphics frame is still selected.
Placing a graphic within an existing frame
Now, you’ll place the company logo within the selected frame.
- Choose File > Place and then double-click logo_paths.ai in the Links folder in the Lesson04 folder. The image appears in the graphics frame.
To ensure that the graphic is displayed at the highest possible resolution, choose Object > Display Performance > High Quality Display.
Resizing a graphics frame to crop a graphic
The graphics frame you created isn’t quite wide enough to show the entire logo, so you’ll widen it to reveal the hidden portion.
Using the Selection tool (
 ), drag the center-right handle until the entire logo is visible. If you pause before you drag, you’ll be able to see the cropped portion of the image as you drag and easily determine when the frame edge is beyond the edge of the logo. Make sure you drag the small, white handle and not the larger, yellow one. The yellow handle lets you add corner options, and you’ll learn more about them later in this lesson.

- Choose Edit > Deselect All, and then choose File > Save.
Placing a graphic without an existing frame
The design of the newsletter uses two versions of the logo—one on the front cover and one on the back cover. You could simply use the logo you just placed and the Copy and Paste commands (Edit menu) to add the logo to the back cover, and you’ll do that later in this lesson, but instead you’ll import the logo graphic without first creating a graphics frame.
- Choose View > Fit Spread In Window, and then use the Zoom tool (
 ) to display the upper-right quarter of the back page (page 4).
 Choose File > Place and then double-click logo_paths.ai in the Links folder in the Lesson04 folder. The pointer changes to a loaded graphics icon (
 ).
).Position the loaded graphics icon (
 ) at the left edge of the rightmost column slightly below the rotated text frame that contains the return address, drag until the pointer reaches the right edge of the column, and then release the mouse button. Notice that as you drag, a rectangle is displayed. This rectangle is proportional to the logo image.
You don’t need to resize the frame as you did earlier because the frame already shows the entire image. The graphic still needs to be rotated, but you’ll do that later in the lesson.
- Choose Edit > Deselect all, and then choose File > Save.
Placing multiple graphics in a grid of frames
The back cover of the newsletter should contain six photos. You could place the photos one by one and then position each one individually, but because they will be arranged in a grid, you can place all the photos and arrange them in a grid at the same time.
- Choose View > Fit Spread In Window.
- Choose File > Place. Navigate to the Links folder in the Lesson04 folder, click the graphic file named 01JohnQ.tif to select it, and then press Shift and click the file named 06HannahB.tif to select all six photos. Click Open.
Position the loaded graphics icon (
 ) at the intersection of the horizontal ruler guide in the top half of the page and the left edge of the third column.
- Drag down and toward the right margin. As you drag, press the Up Arrow key once and the Right Arrow key twice. As you press the arrows, the proxy image changes to a grid of rectangles to indicate the layout of the grid.
Continue dragging until the pointer snaps to the intersection of the right margin guide and the lower horizontal ruler guide, and then release the mouse. A grid of six graphics frames displays the six photos you placed.
- Choose Edit > Deselect All, and then choose File > Save.
Resizing and moving images within frames
Now that you’ve placed the six photos, you need to resize and reposition them so that they fill the graphics frames and are cropped correctly.
The image and the frame for any placed graphic are separate elements. Unlike text frames, a graphics frame and its content each has its own bounding box. Resizing the image (without resizing the frame) is exactly like resizing the frame and the image together, except that you first select the image’s bounding box before resizing it.
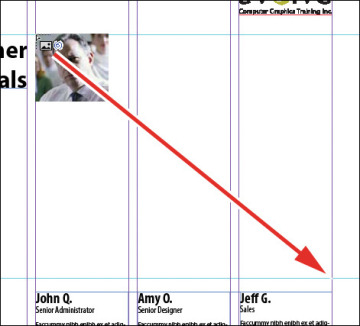
Using the Selection tool (
 ), position the pointer over the content grabber within the image of John Q. (the top-left photo). When the pointer is within the content grabber, a hand icon (
 ) is displayed. Click to select the frame’s contents (the image itself).
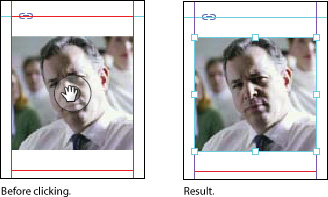

While holding down the Shift key, drag the center bottom handle to the bottom edge of the graphics frame. Do the same with the center top handle and drag it to the top edge of the frame. The Shift key maintains the proportions of the graphic so that it is not distorted. If you pause briefly before you start dragging, you’ll see a ghosted image of the cropped areas of the graphic contents, a feature called Dynamic Preview.
- Make sure that the image entirely fills the graphics frame.
Repeat steps 1–3 for the remaining two photos in the top row.
You’ll use a different method to resize the other three photos.
Select the graphic on the left of the second row. You can select either the frame or its content.
- Choose Object > Fitting > Fill Frame Proportionally. This increases the scale of the graphic so that the frame is filled. Small portions of the graphic are now cropped by the left and right edges of the frame.
Repeat steps 5 and 6 for the remaining two photos in the bottom row.
- Choose Edit > Deselect All, and then choose File > Save.
You can simultaneously resize a graphics frame and its content by selecting the frame (rather than the content) and holding down Shift+Ctrl (Windows) or Shift+Command (Mac OS) as you drag a handle of the frame. The Shift key maintains the proportions of the bounding box so that the graphic is not distorted. Using the Shift key is optional if distorting the graphic doesn’t matter to your design.
Next, you’re going to adjust the space between some of the photos to give the grid arrangement a visual tweak.
Adjusting the space between frames
The Gap tool ( ) lets you select and adjust the space between frames. You’ll use it to adjust the space between two of the photos in the top row and then two of the photos in the bottom row.
- Choose View > Fit Page In Window. Hold down the Z key to temporarily access the Zoom tool (
 ), zoom in on the two photos at the top right, and then release the Z key to return to the Selection tool.
 - Select the Gap tool (
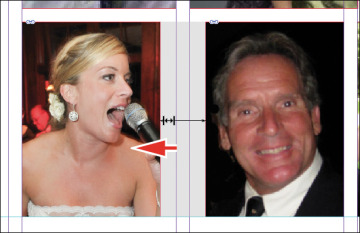
 ), and then move the pointer into the vertical gap between the two pictures. The gap is highlighted—all the way down to the bottom of the two photos below.
 Hold down the Shift key and drag the gap one gutter width to the right, making the graphics frame on the left one gutter width wider and the one on the right one gutter width narrower. (If you don’t hold Shift while dragging, you’ll move the gap between the two photos below as well.)
- Choose View > Fit Page In Window. Press Z to temporarily access the Zoom tool, and then zoom in on the two photos on the bottom left.
With the Gap tool, move the pointer to the vertical gap between the two pictures. Press Shift+Ctrl (Windows) or Shift+Command (Mac OS), and then drag to widen the gap from one gutter width to approximately three gutter widths. (You may have to drag left or right depending on which graphic you click closest to.) It’s important to release the mouse button before releasing the keys.
- Choose View > Fit Page In Window, and then choose File > Save.
You’ve completed the grid of images on the back page (page 4).

