- Getting started
- Working with layers
- Creating and modifying text frames
- Creating and modifying graphics frames
- Adding metadata captions to graphics frames
- Placing and linking graphics frames
- Changing the shape of a frame
- Wrapping text around a graphic
- Modifying the shape of frames
- Transforming and aligning objects
- Selecting and modifying grouped objects
- Creating a QR code
- Finishing up
- Exploring on your own
- Review questions
- Review answers
Placing and linking graphics frames
The two imported graphics on the cover page within the “IN THIS ISSUE” frame are used again on page 3 of the newsletter to accompany articles. Next, you’ll use the Place and Link feature to create copies of these two graphics and place them on page 3.
Unlike the Copy and Paste commands, which simply create a duplicate of the original object, the Place and Link feature creates a parent-child relationship between the original object and the copy. If you make changes to the parent object, you have the option to update the child object.
Choose View > Fit Spread In Window.
- Select the Content Collector tool (
 ). Notice that an empty Content Conveyor panel is now displayed at the bottom of the window.
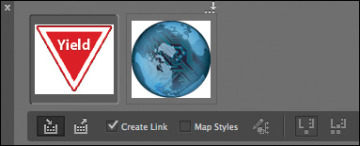
 Move the pointer over the Yield sign graphic on page 1. Notice that a heavy red border is displayed around the image, indicating that this graphics frame is on the Graphics layer. Click within the frame. The graphics frame is added to the Content Conveyor panel.
Click within the circular graphics frame below the Yield sign to add it to the Content Conveyor panel.
Open the Pages panel, and double-click page 3 to center it in the document window.
Select the Content Placer tool (
 ). (It’s paired with the Content Collector tool in the Tools panel, and it’s also available in the lower-left corner of the Content Conveyor panel.) The pointer changes to a loaded graphics icon with the Yield sign graphic active. Both graphics are loaded.
Select Create Link at the lower-left corner of the Content Conveyor panel. If you don’t select Create Link, you will simply create copies of the original objects without any parent-child relationships.
- Click the pasteboard to the right of the top article to place a copy of the Yield sign graphic, and then click the pasteboard to the right of the bottom article to place a copy of the circular graphic. The small chain in the upper-left corner of the graphics frames indicates that the frames are linked to parent objects.
- Close the Content Conveyor panel.
Modifying and updating parent-child graphics frames
Now that you’ve placed and linked the two graphics frames, you’ll see how the parent-child relationships work between the original objects and the copies.
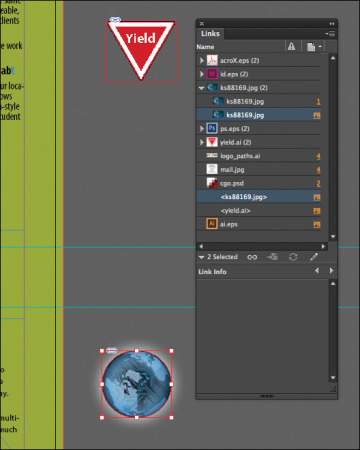
Open the Links panel and adjust the panel so that all of the filenames of the imported graphics are visible in the scroll list. The selected circular graphic (<ks88169.jpg>) is highlighted in the list. The other graphic you placed and linked (<yield.ai>) is the next filename in the list. The greater than and less than characters (<>) that bracket the filenames indicate that these graphics are linked to parent objects. Notice that these two graphic files—the parent objects—are also listed higher up in the scroll list.
Use the Selection tool (
 ) to position the circular graphics frame to the left of the “CSS Master Class” article. Align the top of the graphics frame with the top of the article’s text frame; align the right edge of the graphics frame with the column guide to the left of the article’s text frame.
- Navigate to page 1 (the front cover page), and then select the circular graphics frame.
Use the Control panel to apply a 5-point white [Paper] stroke to the frame.
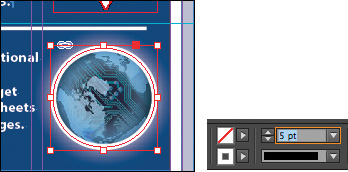
In the Links panel, notice that the status of the <ks88169.jpg> graphic on page 3 has changed to Modified (
 ). That’s because its parent object has been modified.
Navigate to page 3. Notice that the circular graphics frame no longer matches the version on the cover, and its link badge (the yellow triangle with the exclamation mark) also indicates it’s been modified. Select the circular graphics frame, and then click the Update Link button (
 ) in the Links panel. The frame now matches its parent.
Next, you’ll replace the Yield sign graphic with a newer version, and then update its child frame.
- Navigate to page 1, and then select the Yield sign graphic with the Selection tool.
Choose File > Place. Make sure Replace Selected Item is selected in the Place dialog box, and then double-click yield_new.ai in the Links folder in the Lesson04 folder.
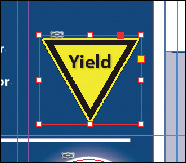
In the Links panel, notice that the status of the file named <yield_new.ai> that’s on the pasteboard of page 3 is Modified. That’s because you replaced the parent graphic on page 1.
- Select <yield_new.ai> in the scroll list, and then click the Update Link button (
 ) in the Links panel. If you want, navigate to page 3 to see the updated graphic on the pasteboard, and then return to page 1.
 - Click the pasteboard to deselect all objects, choose View > Fit Spread In Window, and then choose File > Save.


