In this chapter I share some special effects that I regularly use in my own pictures.
I’m often asked how I create these effects and whether they come from using third-party plug-ins. The great thing is that they’re all created within Photoshop, and each one is quick and easy to produce.
Over the next few pages I’ll show you techniques I use for turning day into night, creating a cartoon/painterly effect, and making your own dust, debris, snow, and rain brushes. Plus, I show a quick and easy black and white conversion technique, and how to fake the wet look.
Turning Day into Night
Techniques for turning a day scene into a night scene open up a whole new world of creative possibilities.
Here’s a really simple way to do exactly this, and how to add realistic street lighting by using the Camera Raw filter and a layer mask.
With an image file open in Photoshop (Figure 4.1), create a copy by going to Layer > New > Layer via Copy (Command/Ctrl+J). Name this layer night.
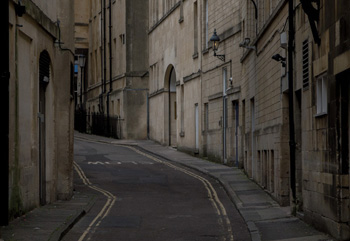
Figure 4.1
- Because we’re going to make use of a filter for this effect, we want to use it as a Smart Filter, so go to Filter > Convert for Smart Filters, and then to Filter > Camera Raw.
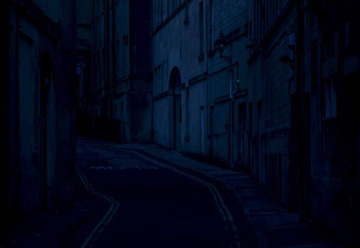
To create the nighttime look, move the Temperature slider to –55 so that we introduce much more blue into the picture. Then darken the picture by moving the Exposure slider to –3.00 (Figure 4.2), and click OK.
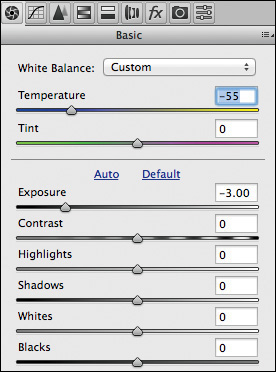
Figure 4.2
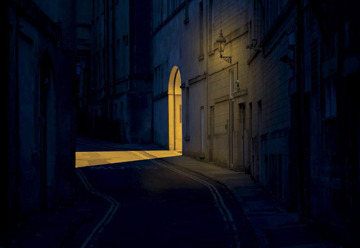
Now that we have the beginnings of our nighttime scene (Figure 4.3), we’ll move on to adding the street lighting.
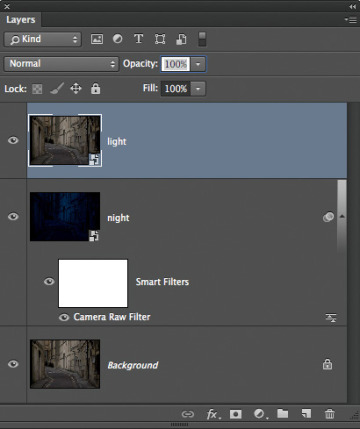
Click the original background layer at the bottom of the layer stack, and create a copy by pressing Command/Ctrl+J. Rename it light, drag it to the top of the layer stack, and go Filter > Convert for Smart Filters (Figure 4.4).
- Go to Filter > Camera Raw, increase Temperature to +100 and Vibrance to +100, and click OK.
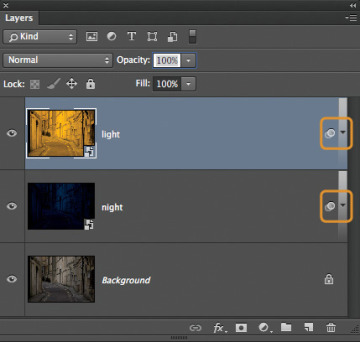
Click the triangular icon to the right of the night and light layers (Figure 4.5) to hide the layer masks that are attached to the Smart Filter, and to prevent the layer stack from becoming too long.
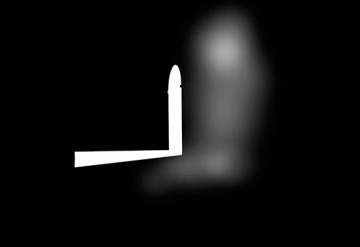
- Click the uppermost layer (light), and Option/Alt-click the layer mask icon at the bottom of the Layers panel. This adds a black mask and hides the contents of the light layer.
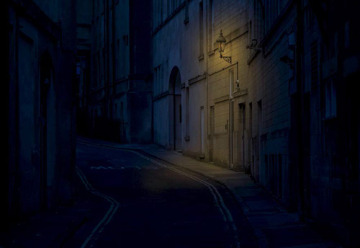
Press D to set the foreground and background colors to their default, and then with a white foreground color and a normal soft-edged brush at 25% opacity, paint around the wall light and down to the ground and pavement (Figure 4.6).
Let’s take this a step further and make it appear as though there’s a light inside the doorway that is spilling out onto the road surface. With the same white brush, change the hardness to 90% and, with the layer mask selected in the Layers panel, paint inside the doorway and onto the road (Figure 4.7).
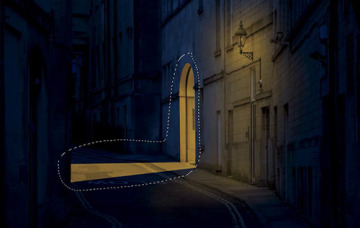
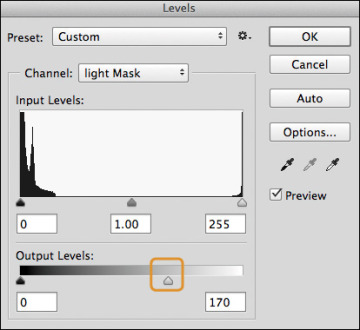
Option/Alt-click the layer mask to go back to the picture. Use the Lasso tool to make a rough selection around the doorway and the light on the road surface (Figure 4.9). Then go to Image > Adjustments > Levels and drag the White Output Levels mark to 170 (Figure 4.10). Click OK, and then choose Select > Deselect (Command/Ctrl+D). This makes the light in the doorway and on the road surface not quite so bright.


