Getting in Gear: An After Effects 5 Tutorial
- Getting in Gear: An After Effects 5 Tutorial
- Part Two: Grouping Layers Using Parenting
- Part Three: Exporting a Movie as an SWF File
Getting in Gear: An After Effects 5 Tutorial
|
Click on the image to see the final product. |
Look at the back cover of Adobe After Effects 5: QuickPro Guide, and it will remind you that the book you're holding--like all QuickStart and QuickPro guides--takes a "visual, task-based approach, "and that it "works like a reference book." The book never strays from this proven method--until you peek behind the back cover to find a CD tucked into a little plastic pocket. While the book provides concise explanations and ample illustrations, the CD contains numerous in-depth demonstrations. Go ahead: Put it in your computer's CD tray. Not only will you find demo software, but also a number of After Effects projects, complete with source files.
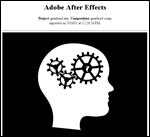
The following tutorial takes one of those samples, Gearhead, and walks you through it step-by-step. Gearhead puts several of After Effects 5's most exciting new features to work: the powerful Expressions feature, which lets you link layer properties; Parenting, which allows you to create hierarchical relationships between layers; and SWF export, which simplifies delivery to the Web using the popular Shockwave Flash format. Don't think of the CD demos and samples as a departure from the QuickPro traditions, but as an illuminating side trip. Consult the book as your map and guide; throughout the Gearhead project, I've included references to chapters and pages, where appropriate. Now, on with the tutorial. Gearhead depicts the workings of interlocking gears, which appear inside the profile of a human head. Zooming in reveals that the gears are driven by the familiar Visual QuickStart Rabbit. Simple Expressions link the Rotation property of the smaller gears with the Rotation of the larger gear. This way, animating just the large gear makes all the gears work. The Parenting feature links the Transform properties of all the elements, so that you can zoom into all the layers as a group by scaling the "parent" layer. This is much easier than keyframing all the layers, or nesting them into another composition. Because all the elements are vector-based, the animation is well-suited for export in the SWF format and Web delivery.
Part One: Linking Properties Using Expressions
1. Create a new project and import footage, including the rabbit.ai image sequence. Double-click in an empty area of the Project window to open an Import File dialog box. In the Import File dialog box, select the first file in the sequence, rabbit01.ai. Check Generic EPS Sequence to import the entire sequence as a single footage item. Import the other files as regular footage items. (See Chapter 2 of the Adobe After Effects 5: QuickPro Guide to learn more about importing.)
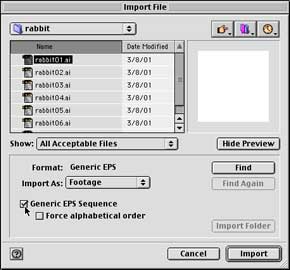
Figure 1 Use the Import File dialog box to import footage into a new file.
2. Loop the image sequence. Select the rabbit[1-7].ai footage item in the Project window. Press Command-F (Mac) or Control-F (Windows) to open the Interpret Footage dialog box. For Loop, enter 130 to loop the image sequence 130 times. See page 59 of the book to learn more about looping footage.
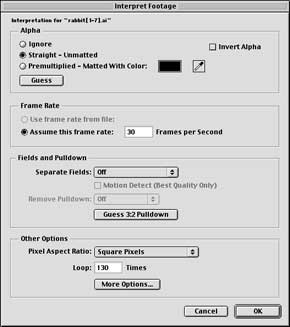
Figure 2 Set the number of times you want your clip to loop in the Interpret Footage dialog box.
3. Create a composition. In the Project window, press the Create Comp button to open a Composition Settings dialog box. Call the new comp "Gearhead comp," and set its duration to 30 seconds (though we'll trim the comp's duration later). The sample project uses the NTSC DV composition preset, to optimize it for DV output (though we'll also export it to the Web). If you want, you can choose other dimensions to suit your output goal. The medium 320x240 preset is a good option for presentation on computers only. See Chapter 4 for more about compositions.
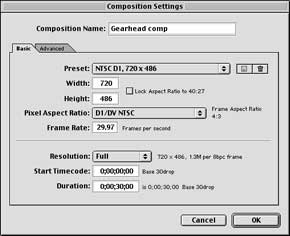
Figure 3 The Composition Settings dialog box is the place to name your new comp, set its duration, and choose its dimensions.
4. Add layers. Drag the layers so that the profile.ai is the lowest layer in the comp, and the rabbit is the highest layer. Drag the gear_sm.ai to the comp twice. Set their durations to match that of the composition, 30 seconds. See pages 132-136 for more about adding footage items as layers in a composition.
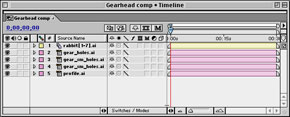
Figure 4 Add layers by dragging them onto the Gearhead comp.
5. Adjust the layers. Using a comp with DV resolution, scale the profile.ai layer to about 85% and the other layers to about 35%. (If your composition is 320x240, then scale the layers to about 42% and 17%, respectively.) Make sure you scale all the gears equally, so that their relative sizes remain constant; this will make them easier to animate. Drag the layers so that the gears interlock inside the profile image. Position the rabbit in the center of the largest gear. Consult Figure 5 for the proper arrangement. See pages 192-208 for more about adjusting these layer properties.
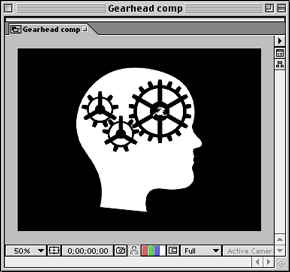
Figure 5 Adjust the layers by dragging them so that the smaller gears interlock with the large one.
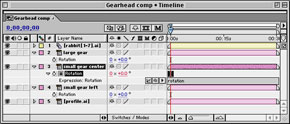
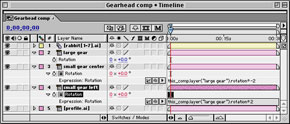
6. Add an Expression to a small gear's Rotation. In the Timeline, select the three gear layers and press R to reveal their Rotation properties. Select the Rotation property of the small gear that is interlocked with the large gear. Press Shift-Option-equals (Mac) or Shift-Alt-equals to add an expression to the rotation property. The default Expression script, rotation, appears in the time ruler for the layer.
Figure 6 Add an Expression to a small gear's Rotation in the Timeline. Click on the image for a larger view.
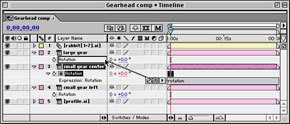
7. Link the small gear's Rotation property to the large gear's Rotation. In the Switches panel across from the Rotation property, drag the Expressions Pickwhip to the Rotation property of the large gear. The expression this_comp.layer("gear_holes.ai").rotation appears in the time ruler for the small gear.
Figure 7 Link the small gear's Rotation property to the large gear's Rotation. Click on the image for a larger view.
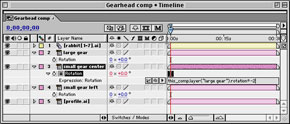
8. Modify the Expression to make the small gear rotate relative to the large gear. Double-click at the end of the expression so that an insertion cursor appears. Type *-2 and press Return (Mac) or Enter (Windows). The expression now sets the small gear's rotation by multiplying the large gear's rotation property by negative 2. This way, the gear--which is half the size of the large gear--rotates twice as fast, and in the opposite direction.
Figure 8 Modify the Expression to make the small gear rotate relative to the large gear. Click on the image for a larger view.
9. Repeat steps 6-8 for the other small gear. This time, however, modify the expression by adding *2, so that the gear rotates twice as fast as the large gear, but in the same direction. (See pages 493-503 for more about using Expressions.)
Figure 9 Repeat steps 6-8 for the other small gear. Click on the image for a larger view.
10. Keyframe the large gear's rotation. Set the current time to the beginning of the comp. For the large gear's Rotation property, click the stopwatch to initiate the keyframing process and create the first keyframe at the current time. With the layer selected, press O to cue the current time to the layer's Out point. For the layer's Rotation property, enter 10 rotations. This sets the second keyframe. Consult pages 213-222 to find out more about the basics of keyframing.
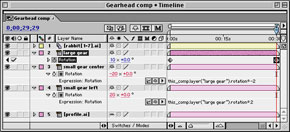
Figure 10 Keyframe the large gear's rotation.
11. Preview the animation. Set the current time to where you want the preview to begin, and press B to set the beginning of the Work Area. Set the current time to the point you want the preview to end, and press N to set the end of the Work Area. Press the RAM Preview button in the Time Controls palette, or press 0 in the numeric keypad. A green bar appears over the area of the time ruler as frames are rendered. When the RAM preview plays back, the gears should all rotate in a realistic relationship. See Chapter 8 to learn all about playback and previews.
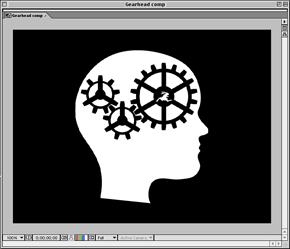
Figure 11 When the RAM preview plays back, the gears should rotate in realistic fashion.
12. If you want to, add motion blur. To make the motion of the gears blur, check the Motion Blur switch for each gear layer, and select the Motion Blur button to enable the effect. Motion Blur works best when outputting the animation as a movie file. However, such effects are not native to the SWF file format. When exporting the file as a SWF file, you can choose to either ignore or rasterize the motion blur (see steps 17-21).

Figure 12 If you want to, add motion blur.
