- Getting started
- Working with layers
- Creating and modifying text frames
- Creating and modifying graphics frames
- Adding metadata captions to graphics frames
- Placing and linking graphics frames
- Changing the shape of a frame
- Wrapping text around a graphic
- Modifying the shape of frames
- Transforming and aligning objects
- Selecting and modifying grouped objects
- Creating a QR code
- Finishing up
- Exploring on your own
- Review questions
- Review answers
This chapter is from the book
This chapter is from the book
This chapter is from the book
Creating a QR code
InDesign lets you quickly generate and edit high-quality quick response (QR) code graphics. QR codes are machine-readable printed representations of data for various industry uses and have become common in consumer advertising. A consumer with a smartphone can install a QR-code scanner app that can read and decode the URL information and redirect the phone’s browser to a company website. After scanning QR codes, users may receive text, add a business card contact to their devices, open a web hyperlink, or compose an e-mail or text message.
The QR code generated in InDesign is a high-fidelity graphic object that behaves exactly like other InDesign objects. You can easily scale the object and fill it with color, apply transparency effects, or copy and paste the object as a vector graphic into a standard graphics editor tool such as Adobe Illustrator.
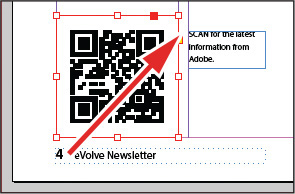
Next, you’ll add a QR code to the back page of the newsletter and configure it to open a web page.
- Navigate to page 4 of the document (the back cover), and then choose View > Fit Page In Window to center the page.
Choose Object > Generate QR Code.
- Choose each of the options in the Type menu to view the associated controls, and then choose Web Hyperlink.
In the URL field, enter http://www.adobe.com (or the complete URL for any website you want).
- Click OK to close the dialog box.
Click the intersection of the margin guides at the lower-left corner of the page, and then drag upward until the edge of the frame aligns with the first column guide.
)