
This chapter is from the book
This chapter is from the book
This chapter is from the book
Working with bins
Bins allow you to organize clips by dividing them into groups.
Just as with folders on your hard drive, you can have multiple bins inside other bins, creating a hierarchical structure as complex as your project requires.
There’s an important difference between bins and the folders on your storage drive, however: Bins exist only in your Premiere Pro project file to help organize clips. You won’t find individual folders representing project bins on your storage drive.
Creating bins
Let’s create a bin.
Click the New Bin button
 at the bottom of the Project panel.
Premiere Pro creates a new bin and automatically highlights the name, ready for you to rename it. It’s a good habit to name bins as soon as you create them.
You have already imported some clips from a short film, so let’s give them a bin. Name the new bin Theft Unexpected, and press Return (macOS) or Enter (Windows).
You can also create a bin using the File menu. Let’s do this now: Make sure the Project panel is active, and deselect the bin you just created. (If a bin is selected when you create a new bin, the new bin is placed inside the selected bin.) Choose File > New > Bin.
Name the new bin Graphics, and press Return/Enter.
You can also make a new bin by right-clicking a blank area in the Project panel and choosing New Bin. Try this now.
Name the new bin Illustrator Files, and press Return/Enter.
One of the quickest and easiest ways to create a new bin for clips you already have in your project is to drag and drop the clips onto the New Bin button at the bottom of the Project panel.
Drag and drop the clip Seattle_Skyline.mov onto the New Bin button.
Name the newly created bin City Views, and press Return/Enter.
Make sure the Project panel is active, but no existing bins are selected. Press the keyboard shortcut Command+B (macOS) or Ctrl+B (Windows) to make another bin.
Name the bin Sequences, and press Return/Enter.
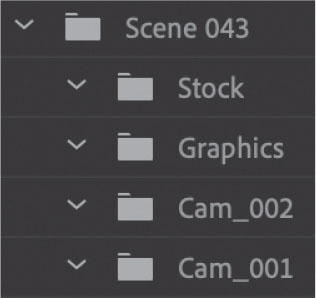
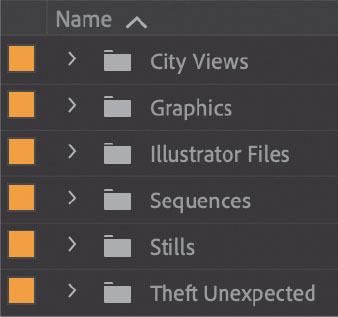
If your Project panel is set to List view, with the Name heading selected for sorting at the top of the panel, bins are displayed in alphabetical order among the clips. Newly created bins in List view are automatically expanded, with their disclosure triangles set open.
)
Managing media in bins
Now that you have some bins, let’s put them to use. As you move clips into bins, use the disclosure triangles to hide their contents and tidy up the view.
Drag the clip Brightlove_film_logo.ai onto the Illustrator Files bin icon. This will move the clip into the bin.
Drag Theft_Unexpected.png into the Graphics bin.
Drag the bin called Theft_Unexpected_Layered (created automatically when you imported the layered PSD file as individual layers) into the Graphics bin.
Drag the clip Under Basket.mov into the City Views bin. You may need to resize the panel or switch it to full-screen to see both the clip and the bin.
Drag the sequence called First Sequence into the Sequences bin.
Drag all the remaining clips into the Theft Unexpected bin.
You should now have a nicely organized Project panel, with each kind of clip in its own bin.
You can also copy and paste clips to make extra copies if this helps you stay organized. In the Graphics bin, you have a PNG file that might be useful for the Theft Unexpected content. Let’s make an extra copy.
Click the disclosure triangle for the Graphics bin to display the contents.
Right-click the Theft_Unexpected.png clip and choose Copy.
Click the disclosure triangle for the Theft Unexpected bin to display the contents.
Right-click the Theft Unexpected bin and choose Paste.
A copy of the clip is added to the Theft Unexpected bin.
Finding your media files
If you would like to know where a media file is on your hard drive, you can right-click the clip in the Project panel and choose Reveal In Finder (macOS) or Explorer (Windows).
The folder in your storage drive that contains the media file will open. This can be useful if you are working with media files stored on multiple hard drives or if you have renamed your clips in Premiere Pro.
If you moved all the remaining clips into the Theft Unexpected bin, you should have an Audio 1.wav clip in that bin now, which is the voice-over you recorded in an earlier exercise. If you tried recording voice-over multiple times, you may have more than one audio clip, each with a different number. Let’s remove the clip but keep the audio:
Right-click that voice-over clip and choose Reveal In Finder (macOS) or Explorer (Windows).
Switch back to Premiere Pro. Click the icon for the Audio 1.wav clip to select it, and press Backspace (macOS) or Delete (Windows) to remove it.
Premiere Pro displays a warning message to remind you that the clip is currently used in a sequence. Clicking Yes will remove the clip from the Project panel and any sequence that contains the clip.
Click Yes to remove the clip.
Switch back to the folder containing the file in your storage. It’s still there!
Removing a clip in Premiere Pro does not remove it from your storage.

Changing bin views
Although there is a distinction between the Project panel and the bins inside it, they have the same controls and viewing options. For all intents and purposes, you can treat the Project panel as a bin; many Premiere Pro editors use the terms bin and Project panel interchangeably.
Bins have three views. You choose between them by clicking the List View button  , Icon View button
  , or Freeform View button
  at the bottom left of the Project panel.
List view: This view displays your clips and bins as a list, with a significant amount of metadata displayed. You can scroll through the metadata and use it to sort clips by clicking column headers.
Icon view: This view displays your clips and bins as thumbnails you can rearrange and use to preview clip contents.
Freeform view: This view displays clips and bins as thumbnails that you can assign different sizes, group together, and place freely in a large area. More information on this view is coming up later in this lesson in “Freeform view.”
The Project panel has a zoom control, next to the List View, Icon, and Freeform View buttons, which changes the size of the clip icons or thumbnails.
Double-click the Theft Unexpected bin to open it in its own panel (the option to open bins in a new panel when double-clicking can be changed in the General preferences).
Click the Icon View button on the Theft Unexpected bin to display thumbnails for the clips. You may want to resize the Project panel to view more thumbnails.
Try adjusting the zoom control.
Premiere Pro can display large thumbnails to make browsing and selecting your clips easier.
You can also apply various kinds of sorting to clip thumbnails in Icon view by clicking the Sort Icons menu
 .
.Switch to List view.
When you’re in List view, it doesn’t help that much to zoom, unless you turn on the display of thumbnails in this view.
Open the panel menu, and choose Thumbnails.
Premiere Pro now displays thumbnails in List view, as well as in Icon view.
Drag the Zoom control to the right to increase the size of thumbnails.
The clip thumbnails show the first frame of the media. In some clips, the first frame will not be particularly useful. Look at the clip HS Suit, for example. The thumbnail shows the clapperboard, but it would be useful to see the character.
Notice the numbers in the clip names. These are the original media file names that were retained when adding descriptive names. For these lessons, we’ll only refer to the descriptive clip names and omit the numbers from the original media.
Switch to Icon view.
In this view, you can hover the pointer over clip thumbnails to preview clips.
Hover your pointer over the HS Suit clip. Move the pointer until you find a frame that better represents the shot.
While the frame you have chosen is displayed, press the I key.
The I key is the keyboard shortcut for Mark In, a command that sets the beginning of a selection when choosing part of a clip that you intend to add to a sequence. The same selection also sets the visible frame, called the poster frame, for a clip in a bin.
Switch to List view.
Premiere Pro shows your newly selected frame as the thumbnail for this clip.
Choose Thumbnails from the panel menu to turn off thumbnails in List view.
)
)
)
)
)
)
CREATING SEARCH BINS
When using the Search field to display specific clips, you have the option to create a special kind of virtual bin, called a Search bin.
After typing in the Search field, click the Create New Search Bin From Query button  .
.
A new search bin appears in the Project panel. Search bins display the results of a search performed when using the Search field. You can rename search bins and place them in other bins.
)
The contents of a Search bin will update dynamically, so if you add new clips to a project that meet the search criteria, they’ll appear in the Search bin automatically. This can be a fantastic time-saver when working with documentary material that changes over time as you obtain new footage.
Assigning labels
Every item in the Project panel has a label color. In List view, the Label column shows the label color for every clip. When you add clips to a sequence, they are displayed in the Timeline panel with this label color.
Let’s change the label color for a title.
In the Theft Unexpected bin, right-click Theft_Unexpected.png and choose Label > Forest.
You can change label colors for multiple clips in a single step by selecting them and then right-clicking them to choose another label color.
Press Command+Z (macOS) or Ctrl+Z (Windows) to change the Theft_Unexpected.png label color back to Lavender.
When you add a clip to a sequence, Premiere Pro creates a new instance, or copy, of that clip. You’ll have one copy in the Project panel and one copy in the sequence. Both link to the same media file.
When you change the label color for a clip in the Project panel or rename a clip, it may or may not update copies of the clip in sequences.
You can set this by choosing File > Project Settings > General and enabling or disabling the option to display the project item name and label color for all instances.
)
Changing names
Because clips in your project are separate from the media files they link to, you can rename items in Premiere Pro and the names of your original media files on the hard drive are left untouched. This makes it safe to rename clips—and it can be helpful when organizing a complex project.
If you opened the Theft Unexpected bin by double-clicking it, it will have opened as a new panel in the same group as the Project panel. Let’s begin by navigating between bins.
At the top left of the Theft Unexpected bin, you’ll see a button to navigate up  . This button appears whenever you are viewing the contents of a bin by opening it. Just as Finder (macOS) or Explorer (Windows) have navigation buttons, you can use this button to browse “up” to the container of the current bin. In this case, it’s the Project panel, but it could just as easily be another bin.
Click to navigate up to the Project panel.
The Project panel comes to the front and becomes the active panel. The Theft Unexpected bin is still open.
Whenever you navigate between bins that are already open, the existing open instance is displayed. This way, you won’t have multiple instances of the same bin taking up space on-screen.
Open the Graphics bin.
Right-click the clip Theft_Unexpected.png and choose Rename.
Change the name to TU Title BW (that is, Theft Unexpected Title Black and White). After typing the new name, click the background of the Project panel to apply it.
Right-click the newly renamed clip, TU Title BW, and choose Reveal In Finder (macOS) or Reveal In Explorer (Windows).
)
)
The original media file is displayed in its current location. Notice that the original filename has not changed. Earlier you deleted a clip in this project and the original media file renamed—in a sense this is similar to renaming a clip in a project. Changing the clip does not change the media file.
It’s helpful to be clear about the relationship between your original media files and the clips inside the Premiere Pro project because it explains much of the way the application works.
Customizing bins
When set to List view, the Project panel displays a number of columns of information about each clip. Depending on the clips you have and the types of metadata you are working with, you might want to change the columns that are displayed.
In the Project panel group, select the Theft Unexpected bin tab to bring it to the front of the group.
Open the panel menu, and choose Metadata Display.
The Metadata Display dialog box allows you to choose any kind of metadata to display in the List view of the Project panel (and any bins). All you have to do is select the checkbox for the kind of information you would like to be included.
Click the disclosure triangle for Premiere Pro Project Metadata to show those options.
Select the Media Type option.
Click OK.
)
)
)
Media Type is now added as a heading for the Theft Unexpected bin only. You can apply the change to every bin in one step by using the panel menu in the Project panel to access the Metadata Display dialog box, rather than in an individual bin.
Some columns provide information only, while others can be edited directly in the bin. The Scene column, for example, allows you to add a scene number for each clip, while the Media Type column gives information about the original media and cannot be edited directly.
If you add information and press the Return (macOS) or Enter (Windows) key, Premiere Pro activates the same box for the next clip down. This way, you can use the keyboard to quickly enter information about several clips, jumping from one box to the next without using your pointer. You can also use the Tab key to move between boxes toward the right, and you can press Shift+Tab to move between boxes toward the left. This way, you can switch to a faster keyboard workflow for metadata entry (it also leaves a hand free to hold a cup of coffee…).
Having multiple bins open at once
Every bin panel behaves in the same way, with the same options, buttons, and settings. By default, when you double-click a bin, it opens in a new panel, in the same panel group.
)
You can change this in Preferences by choosing Premiere Pro > Preferences > General (macOS) or Edit > Preferences > General (Windows).
The options in the Bins area of the General preferences allow you to choose what will happen when you double-click; Command-double-click (mac OS) or Ctrl-double-click (Windows); or Option-double-click (macOS) or Alt-double-click (Windows).
)
Once you are familiar and comfortable with navigating between bins, you may want to change these options to match the way Finder (macOS) or Explorer (Windows) open folders, with bins opening in place when you double-click, for example. The settings shown here are a good match.