Publishers of technology books, eBooks, and videos for creative people

Home > Articles

This chapter is from the book

Reviewing footage

The greater part of video editing is spent watching or listening to clips and making creative choices about them.

Premiere Pro has multiple ways to perform common tasks, such as playing video clips. You can use the keyboard, click buttons with your pointer, or use an external device like a jog/shuttle controller.

  1. Continue working in the Theft Unexpected bin.

  2. Click the Icon View button at the lower-left corner of the bin, and use the Zoom control to set the thumbnails to a size you are happy with.

  3. Hover your pointer over any of the images in the bin.

    Premiere Pro displays the contents of the clip as you move your pointer. The left edge of the thumbnail represents the beginning of the clip, and the right edge represents the end. In this way, the width of the thumbnail represents the whole clip.

    This is called hover scrubbing.

  4. Select a clip by clicking it once (be careful not to double-click or the clip will open in the Source Monitor). Now, hover scrubbing is turned off.

    While hover scrubbing, a tiny navigator appeared at the bottom of the thumbnail. When the clip is selected, this navigator gets larger, and a small gray playhead appears. Try dragging through the clip using the playhead.

    When a clip is selected, you can use the J, K, and L keys on your keyboard to perform playback, just as you can in the Media Browser.

    • J: Play backward

    • K: Pause

    • L: Play forward

  5. Select a clip, and use the J, K, and L keys to play the video in the thumbnail.

    When you double-click a clip, Premiere Pro displays the clip in the Source Monitor and also adds it to a list of recent clips.

  6. Double-click four or five clips from the Theft Unexpected bin to open them in the Source Monitor.

  7. Open the Source Monitor panel menu to browse your recent clips.

  8. Open the Zoom Level menu at the bottom left of the Source Monitor.

    f0097-01.jpg

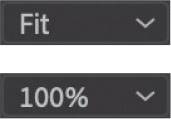
    By default, this is set to Fit, which means Premiere Pro will display the whole frame, regardless of the original size. Change the setting to 100%.

    Your clips will often be higher resolution than the monitors.

    It’s likely scroll bars have appeared at the bottom and on the right of your Source Monitor so you can view different parts of the image. However, if you are working on a very high-resolution screen, it’s possible the image got smaller.

    The benefit of viewing with Zoom set to 100% is that you see every pixel of the original video, which is useful for checking the quality.

  9. Choose Fit from the Zoom Level menu.

Using essential playback controls

Let’s look at the Source Monitor playback controls.

  1. Double-click the shot Excuse Me (not Excuse Me Tilted) in the Theft Unexpected bin to open it in the Source Monitor.

  2. At the bottom of the Source Monitor, you’ll find a blue playhead marker. Drag it along the bottom of the panel to view different parts of the clip. You can also click wherever you want the playhead to go, and it will jump to that spot.

  3. Below the time ruler and its playhead, there’s a scroll bar that doubles as a Zoom control. Drag one end of this scroll bar to zoom in on the time ruler. This will make it easier to navigate longer clips.

  4. Click the Play/Stop button to play the clip. Click it again to stop playback. You can also use the spacebar to start and stop playback.

  5. Click the Step Back 1 Frame and Step Forward 1 Frame buttons to move through the clip one frame at a time. You can also use the Left Arrow and Right Arrow keys on your keyboard.

  6. Try using the J, K, and L keys to play your clip.

  7. Try holding K while you press and release the J or L key. The playhead will move one frame and play associated audio, making it useful when seeking a precise moment in dialogue.

Lowering the playback resolution

If you have an older or slower computer processor or are working with RAW media with large frame sizes, such as Ultra High-Definition (UHD, 4K, 8K, or above), your computer may struggle to play all the frames of your video clips. Clips will play with the correct timing (so 10 seconds of video will still take 10 seconds), but some frames may not be displayed.

To work with a wide variety of computer hardware configurations, from powerful desktop workstations to lightweight portable laptops, Premiere Pro can lower the playback resolution to make playback smoother.

f0098-02.jpg

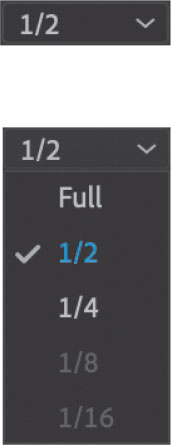
There are separate menus in the Source Monitor and Program Monitor to set the playback resolution. The default resolution is 1/2.

You can switch the playback resolution as often as you like, using the Select Playback Resolution menu on the Source Monitor and Program Monitor panels.

Some lower resolutions are available only when working with particular media types. For other media types, the work of converting the image to lower resolution might be more than the work saved by not playing full resolution because not all codecs can be played back at a lower resolution efficiently. In that case, some resolutions will be dimmed and unavailable.

Getting timecode information

At the bottom left of the Source Monitor, a timecode display in blue shows the current position of the playhead in hours, minutes, seconds, and frames (00:00:00:00), according to the clip’s timecode. For example, 01:54:08:05 is 1 hour, 54 minutes, 8 seconds, and 5 frames.

f0099-01.jpg

Clip timecode will rarely begin at 00:00:00:00, so you should not count on this number to assess the duration of a clip.

f0099-02.jpg

At the bottom right of the Source Monitor, a timecode display in light gray shows the duration of your clip.

By default, this shows the whole clip duration, but later you’ll add special In and Out marks to make a partial selection. When you do, that duration shown will change accordingly.

In and Out marks are simple to use: Click the Mark In button f0099-03.jpg to set the beginning of the part of a clip you want to use, and click the Mark Out button f0099-04.jpg to set the end of the part of a clip you want. You’ll learn more about this in Lesson 5, “Mastering the Essentials of Video Editing.”

Displaying safe margins

Television monitors often crop the edges of the picture to achieve a clean edge. Open the Settings menu at the bottom of the Source Monitor f0099-05.jpg, and choose Safe Margins to display useful white outlines over the image.

The outer box is the action-safe zone. Aim to keep important action inside this box so that when the picture is displayed, edge cropping does not hide what’s going on.

The inner box is the title-safe zone. Keep titles and graphics inside this box so that even on a badly adjusted display, your audience will be able to read the words.

Premiere Pro also has advanced overlay options that can be configured to display useful information in the Source Monitor and Program Monitor. To enable or disable overlays, open the monitor’s Settings menu f0100-01.jpg and choose Overlays.

You can access the specific settings for overlays and safe margins by clicking the monitor’s Settings menu and choosing Overlay Settings > Settings.

You can disable Safe Margins or Overlays by choosing them from the Source Monitor or Program Monitor’s Settings menu again. Do so now so you can see the image clearly.

Customizing the monitors

To customize the way a monitor displays video, open each monitor’s Settings menu f0100-02.jpg.

The Source Monitor and Program Monitor have similar options. In the Source Monitor, you can view the waveform of the audio in the clip, which shows amplitude over time (useful if you are searching for a particular sound or the start of a word).

Make sure Composite Video is chosen from the Source Monitor and Program Monitor Settings menus for now.

You can quickly switch between viewing the clip audio waveform and the video by clicking Drag Video Only f0100-03.jpg or Drag Audio Only f0100-04.jpg, just under the video display.

These icons are mainly used to drag only the video or only the audio part of a clip into a sequence, but they also provide this useful shortcut to view the audio waveform.

You can add, move, or remove buttons at the bottom of the Source Monitor and Program Monitor. Note that any customizations you make to the buttons on one of the monitor panels are applied only to that panel.

  1. Click the Button Editor f0100-05.jpg at the bottom right of the Source Monitor.

    The complete set of available buttons appears on a floating panel.

  2. Drag the Loop Playback button f0101-01.jpg from the floating panel to a spot to the right of the Play button on the Source Monitor (the other buttons will automatically make space for it), and click OK to close the Button Editor.

  3. Double-click the Excuse Me clip in the Theft Unexpected bin to open it in the Source Monitor if it isn’t open already.

  4. Click the Loop Playback button you added to enable it.

  5. Click the Play button to play the clip. Play the video using the spacebar or the Play button on the Source Monitor. Stop the playback when you’ve seen the video start again.

    With Loop turned on, Premiere Pro continuously repeats playback of a clip or sequence. If there are In and Out marks set, playback loops between them. This is a great way to review a section of a clip.

  6. Click the Step Back 1 Frame f0101-03.jpg and Step Forward 1 Frame f0101-04.jpg buttons to move through the clip one frame at a time. You can also use the Left Arrow and Right Arrow keys on your keyboard.

Peachpit Promotional Mailings & Special Offers

I would like to receive exclusive offers and hear about products from Peachpit and its family of brands. I can unsubscribe at any time.

Overview


Pearson Education, Inc., 221 River Street, Hoboken, New Jersey 07030, (Pearson) presents this site to provide information about Peachpit products and services that can be purchased through this site.

This privacy notice provides an overview of our commitment to privacy and describes how we collect, protect, use and share personal information collected through this site. Please note that other Pearson websites and online products and services have their own separate privacy policies.

Collection and Use of Information


To conduct business and deliver products and services, Pearson collects and uses personal information in several ways in connection with this site, including:

Questions and Inquiries

For inquiries and questions, we collect the inquiry or question, together with name, contact details (email address, phone number and mailing address) and any other additional information voluntarily submitted to us through a Contact Us form or an email. We use this information to address the inquiry and respond to the question.

Online Store

For orders and purchases placed through our online store on this site, we collect order details, name, institution name and address (if applicable), email address, phone number, shipping and billing addresses, credit/debit card information, shipping options and any instructions. We use this information to complete transactions, fulfill orders, communicate with individuals placing orders or visiting the online store, and for related purposes.

Surveys

Pearson may offer opportunities to provide feedback or participate in surveys, including surveys evaluating Pearson products, services or sites. Participation is voluntary. Pearson collects information requested in the survey questions and uses the information to evaluate, support, maintain and improve products, services or sites; develop new products and services; conduct educational research; and for other purposes specified in the survey.

Contests and Drawings

Occasionally, we may sponsor a contest or drawing. Participation is optional. Pearson collects name, contact information and other information specified on the entry form for the contest or drawing to conduct the contest or drawing. Pearson may collect additional personal information from the winners of a contest or drawing in order to award the prize and for tax reporting purposes, as required by law.

Newsletters

If you have elected to receive email newsletters or promotional mailings and special offers but want to unsubscribe, simply email ask@peachpit.com.

Service Announcements

On rare occasions it is necessary to send out a strictly service related announcement. For instance, if our service is temporarily suspended for maintenance we might send users an email. Generally, users may not opt-out of these communications, though they can deactivate their account information. However, these communications are not promotional in nature.

Customer Service

We communicate with users on a regular basis to provide requested services and in regard to issues relating to their account we reply via email or phone in accordance with the users' wishes when a user submits their information through our Contact Us form.

Other Collection and Use of Information


Application and System Logs

Pearson automatically collects log data to help ensure the delivery, availability and security of this site. Log data may include technical information about how a user or visitor connected to this site, such as browser type, type of computer/device, operating system, internet service provider and IP address. We use this information for support purposes and to monitor the health of the site, identify problems, improve service, detect unauthorized access and fraudulent activity, prevent and respond to security incidents and appropriately scale computing resources.

Web Analytics

Pearson may use third party web trend analytical services, including Google Analytics, to collect visitor information, such as IP addresses, browser types, referring pages, pages visited and time spent on a particular site. While these analytical services collect and report information on an anonymous basis, they may use cookies to gather web trend information. The information gathered may enable Pearson (but not the third party web trend services) to link information with application and system log data. Pearson uses this information for system administration and to identify problems, improve service, detect unauthorized access and fraudulent activity, prevent and respond to security incidents, appropriately scale computing resources and otherwise support and deliver this site and its services.

Cookies and Related Technologies

This site uses cookies and similar technologies to personalize content, measure traffic patterns, control security, track use and access of information on this site, and provide interest-based messages and advertising. Users can manage and block the use of cookies through their browser. Disabling or blocking certain cookies may limit the functionality of this site.

Do Not Track

This site currently does not respond to Do Not Track signals.

Security


Pearson uses appropriate physical, administrative and technical security measures to protect personal information from unauthorized access, use and disclosure.

Children


This site is not directed to children under the age of 13.

Marketing


Pearson may send or direct marketing communications to users, provided that

  • Pearson will not use personal information collected or processed as a K-12 school service provider for the purpose of directed or targeted advertising.
  • Such marketing is consistent with applicable law and Pearson's legal obligations.
  • Pearson will not knowingly direct or send marketing communications to an individual who has expressed a preference not to receive marketing.
  • Where required by applicable law, express or implied consent to marketing exists and has not been withdrawn.

Pearson may provide personal information to a third party service provider on a restricted basis to provide marketing solely on behalf of Pearson or an affiliate or customer for whom Pearson is a service provider. Marketing preferences may be changed at any time.

Correcting/Updating Personal Information


If a user's personally identifiable information changes (such as your postal address or email address), we provide a way to correct or update that user's personal data provided to us. This can be done on the Account page. If a user no longer desires our service and desires to delete his or her account, please contact us at customer-service@informit.com and we will process the deletion of a user's account.

Choice/Opt-out


Users can always make an informed choice as to whether they should proceed with certain services offered by Adobe Press. If you choose to remove yourself from our mailing list(s) simply visit the following page and uncheck any communication you no longer want to receive: www.peachpit.com/u.aspx.

Sale of Personal Information


Pearson does not rent or sell personal information in exchange for any payment of money.

While Pearson does not sell personal information, as defined in Nevada law, Nevada residents may email a request for no sale of their personal information to NevadaDesignatedRequest@pearson.com.

Supplemental Privacy Statement for California Residents


California residents should read our Supplemental privacy statement for California residents in conjunction with this Privacy Notice. The Supplemental privacy statement for California residents explains Pearson's commitment to comply with California law and applies to personal information of California residents collected in connection with this site and the Services.

Sharing and Disclosure


Pearson may disclose personal information, as follows:

  • As required by law.
  • With the consent of the individual (or their parent, if the individual is a minor)
  • In response to a subpoena, court order or legal process, to the extent permitted or required by law
  • To protect the security and safety of individuals, data, assets and systems, consistent with applicable law
  • In connection the sale, joint venture or other transfer of some or all of its company or assets, subject to the provisions of this Privacy Notice
  • To investigate or address actual or suspected fraud or other illegal activities
  • To exercise its legal rights, including enforcement of the Terms of Use for this site or another contract
  • To affiliated Pearson companies and other companies and organizations who perform work for Pearson and are obligated to protect the privacy of personal information consistent with this Privacy Notice
  • To a school, organization, company or government agency, where Pearson collects or processes the personal information in a school setting or on behalf of such organization, company or government agency.

Links


This web site contains links to other sites. Please be aware that we are not responsible for the privacy practices of such other sites. We encourage our users to be aware when they leave our site and to read the privacy statements of each and every web site that collects Personal Information. This privacy statement applies solely to information collected by this web site.

Requests and Contact


Please contact us about this Privacy Notice or if you have any requests or questions relating to the privacy of your personal information.

Changes to this Privacy Notice


We may revise this Privacy Notice through an updated posting. We will identify the effective date of the revision in the posting. Often, updates are made to provide greater clarity or to comply with changes in regulatory requirements. If the updates involve material changes to the collection, protection, use or disclosure of Personal Information, Pearson will provide notice of the change through a conspicuous notice on this site or other appropriate way. Continued use of the site after the effective date of a posted revision evidences acceptance. Please contact us if you have questions or concerns about the Privacy Notice or any objection to any revisions.

Last Update: November 17, 2020