- Chapter Objectives
- EXERCISE 3-1 Drawing a Rectangular Conference Room, Including Furniture
- Making a Drawing Template
- Polyline
- OFFSET
- EXPLODE
- ID Point
- TRIM
- Rectangle
- CHAMFER
- FILLET
- COPY and Osnap-Midpoint
- ROTATE
- POINT
- DIVIDE
- MEASURE
- OSNAP
- MIRROR
- Osnap Modes That Snap to Specific Drawing Features
- Running Osnap Modes
- Osnap Settings: Marker, Aperture, Magnet, Tooltip
- EXERCISE 3-2 Drawing a Rectangular Lecture Room, Including Furniture
- Making Solid Walls Using Polyline and Solid Hatch
- From
- BREAK
- Polyline Edit
- HATCH
- ARRAY
- ARRAYEDIT
- Distance
- Exercise 3-3 Drawing a Curved Conference Room, Including Furniture
- Polyline
- POLYGON
- Grips—Add Vertex
- Grips—Convert to Arc
- ARRAY
- Exercise 3-4 Drawing a Conference Room Using Polar Tracking
- Polar Tracking
- Polyline Edit
- Specifying Points with Tracking
- Drawing the Chairs around the Conference Table
- Completing the Conference Room
- Using Command Preview
- Choosing Selection Options
This chapter is from the book
This chapter is from the book
This chapter is from the book
MIRROR
The MIRROR command allows you to mirror about an axis any entity or group of entities. The axis can be at any angle.
MIRROR |
|
|---|---|
Ribbon/Panel |
Home/Modify
|
Draw Toolbar: |
|
Menu Bar: |
Modify/Mirror |
Type a Command: |
MIRROR |
Command Alias: |
MI |


Step 36. Draw the chairs on the right side of conference table using the MIRROR command (Figure 3-20), as described next:
Prompt
Response
Type a command:
MIRROR (or type MI <Enter>)
Select objects:
P1→
Specify opposite corner:
P2→ (window the chairs on the left side of the conference table)
68 found
Select objects: <Enter>
Specify first point of mirror line:
Type MID <Enter>
mid of
P3→
Specify second point of mirror line:
Type MID <Enter>
mid of
P4→
Erase source objects? [Yes No] <N>:
<Enter>
Step 37. Add the chairs on each side of the credenza as shown in Figure 3-20.
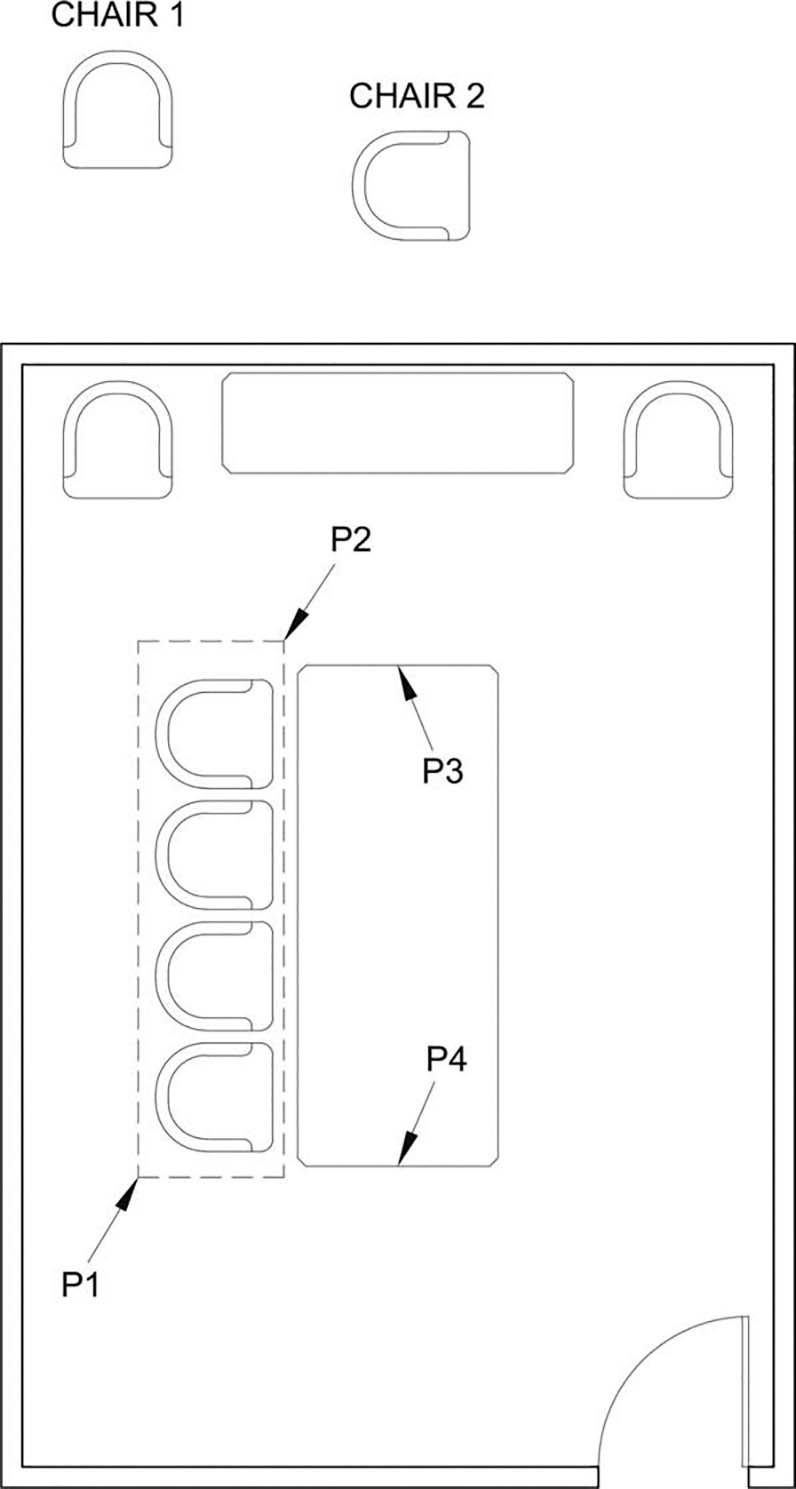
Figure 3-20 Use the MIRROR command to copy the four chairs on the left side to the right side, and then copy CHAIR 1 to both sides of the credenza
Step 38. Set layer i-eqpm-ovhd current.
Step 39. Add the 72″ × 3″ recessed projection screen and the 24″ × 24″ ceiling-mounted projector to the plan as shown in Figure 3-21. Let’s use the From option of the OSNAP menu to do this.
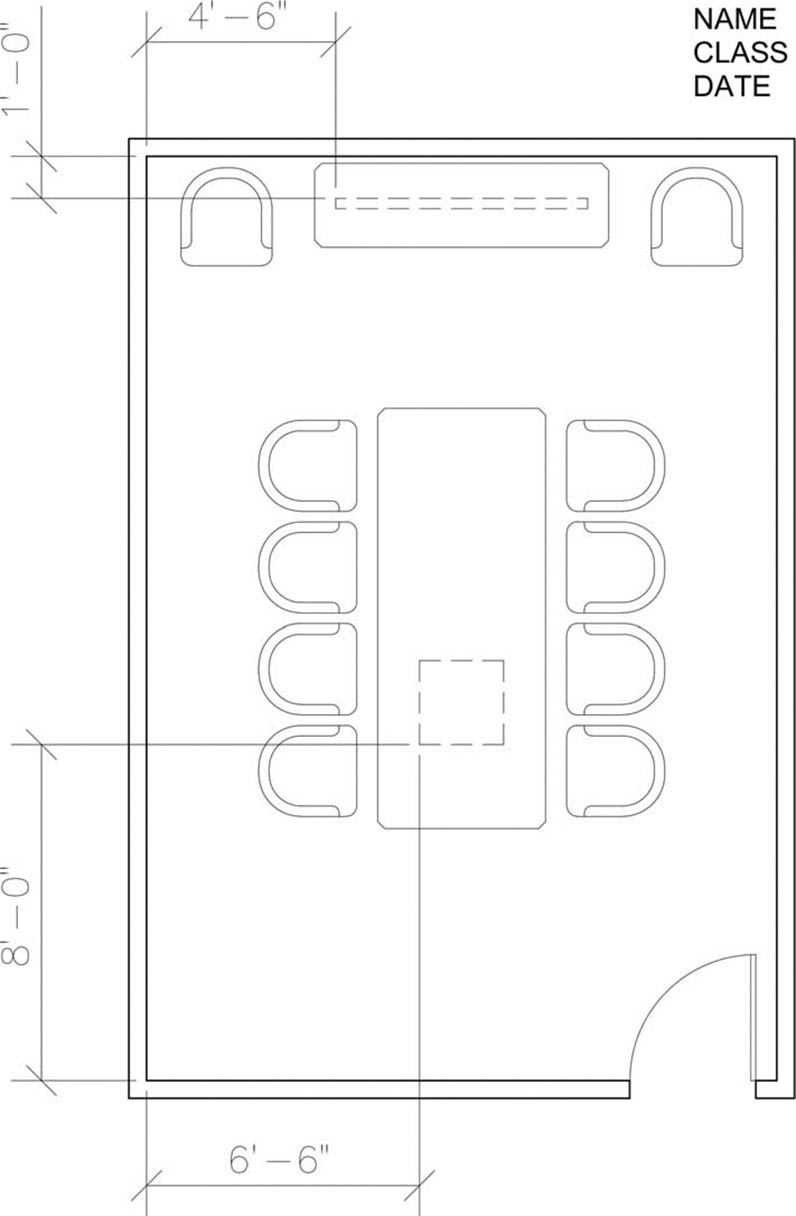
Figure 3-21 Add the projection screen and projector
Start the Rectangle command, <Shift> and right-click to open the OSNAP menu, select From, and then show the inner upper-left corner of the room as the reference point. You will be prompted to define the x- and y-offsets: 4′6″ and −1′, respectively. 72″ and 3″. This fixes one corner of the rectangle for the recessed projection screen. The second corner is fixed by typing in @72,-3 and pressing <Enter>. As for the ceiling-mounted projector, use the inner lower-left corner of the room as the reference, 6′6″ and 8′0″ as the x- and y-offsets to fix the lower-left corner of the rectangle and @24,24 to fix the second point of the rectangle.
Step 40. Erase the chairs you have drawn outside the conference room walls.
Step 41. Set layer a-anno-text current.
Step 42. Use the Single Line Text command (type DT <Enter>) to type your name, class number, and date, 6″ high in the upper-right corner. When plotted to a scale of 1/4″ = 1′-0″, the 6″-high text will be 1/8″ high.
Step 43. When you have completed Exercise 3-1 (Figure 3-22), save your work in at least two places.
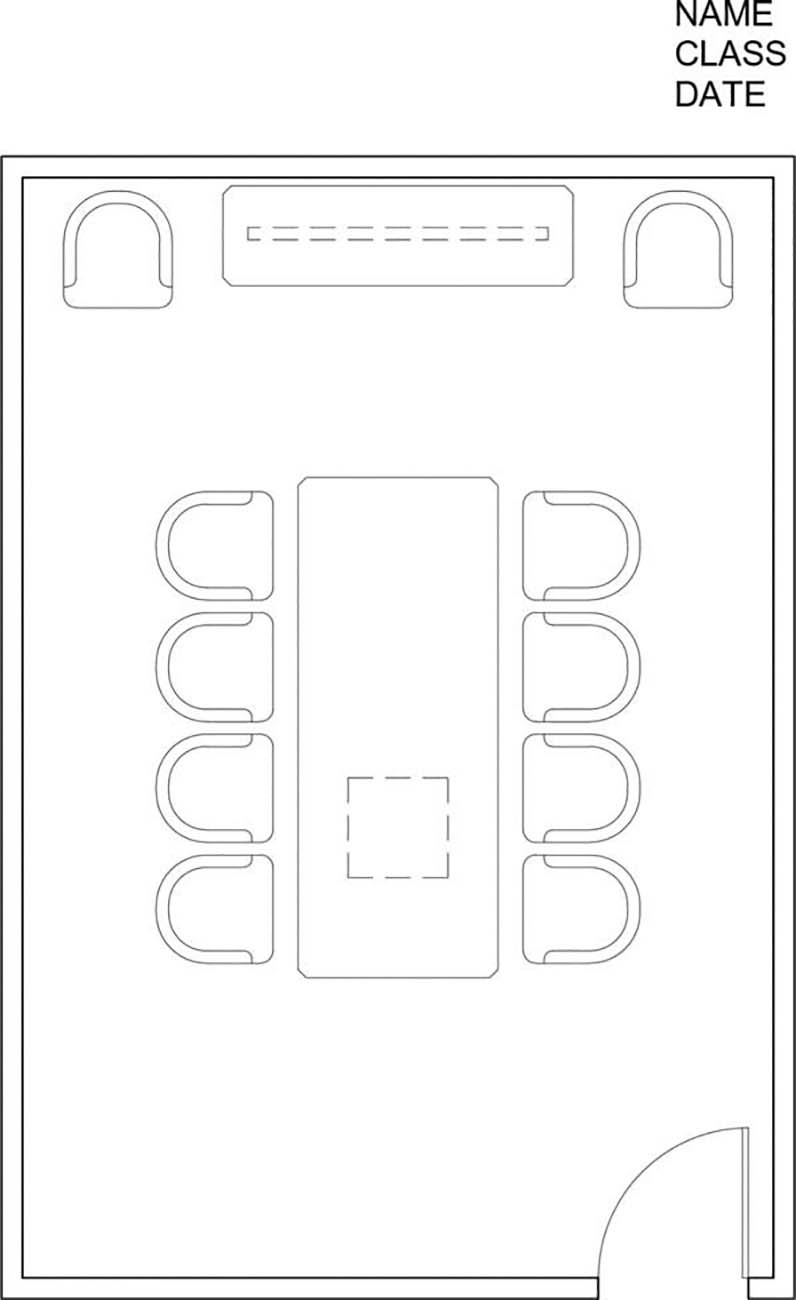
Figure 3-22 Exercise 3-1 complete
Step 44. Print your drawing from the Model tab at a scale of 1/4″ = 1′-0″.
)
)
)