- Chapter Objectives
- EXERCISE 3-1 Drawing a Rectangular Conference Room, Including Furniture
- Making a Drawing Template
- Polyline
- OFFSET
- EXPLODE
- ID Point
- TRIM
- Rectangle
- CHAMFER
- FILLET
- COPY and Osnap-Midpoint
- ROTATE
- POINT
- DIVIDE
- MEASURE
- OSNAP
- MIRROR
- Osnap Modes That Snap to Specific Drawing Features
- Running Osnap Modes
- Osnap Settings: Marker, Aperture, Magnet, Tooltip
- EXERCISE 3-2 Drawing a Rectangular Lecture Room, Including Furniture
- Making Solid Walls Using Polyline and Solid Hatch
- From
- BREAK
- Polyline Edit
- HATCH
- ARRAY
- ARRAYEDIT
- Distance
- Exercise 3-3 Drawing a Curved Conference Room, Including Furniture
- Polyline
- POLYGON
- Grips—Add Vertex
- Grips—Convert to Arc
- ARRAY
- Exercise 3-4 Drawing a Conference Room Using Polar Tracking
- Polar Tracking
- Polyline Edit
- Specifying Points with Tracking
- Drawing the Chairs around the Conference Table
- Completing the Conference Room
- Using Command Preview
- Choosing Selection Options
This chapter is from the book
This chapter is from the book
This chapter is from the book
Distance
You can use the Distance command to determine measurements.
DISTANCE |
|
|---|---|
Ribbon/Panel |
Home/Utilities
|
Inquiry Toolbar: |
|
Menu Bar: |
Tools/Inquiry/Distance |
Type a Command: |
Distance |
Command Alias: |
DI |


Step 24. Use the Distance command to measure a specified distance (Figure 3-32), as described next:
Prompt
Response
Type a command:
Distance (or type DI <Enter>)
Specify first point:
Osnap-Intersection
int of
P3→ (Figure 3-32)
Specify second point or [Multiple points]:
Osnap-Intersection
int of
P4→ (Figure 3-32)
Distance = 3′8″, Angle in XY Plane = 0, Angle from XY Plane = 0, Delta X = 3′-8″, Delta Y = 0′-0″, Delta Z = 0′-0″
Step 25. Draw the 24″ × 20″ lectern as shown in Figure 3-34.
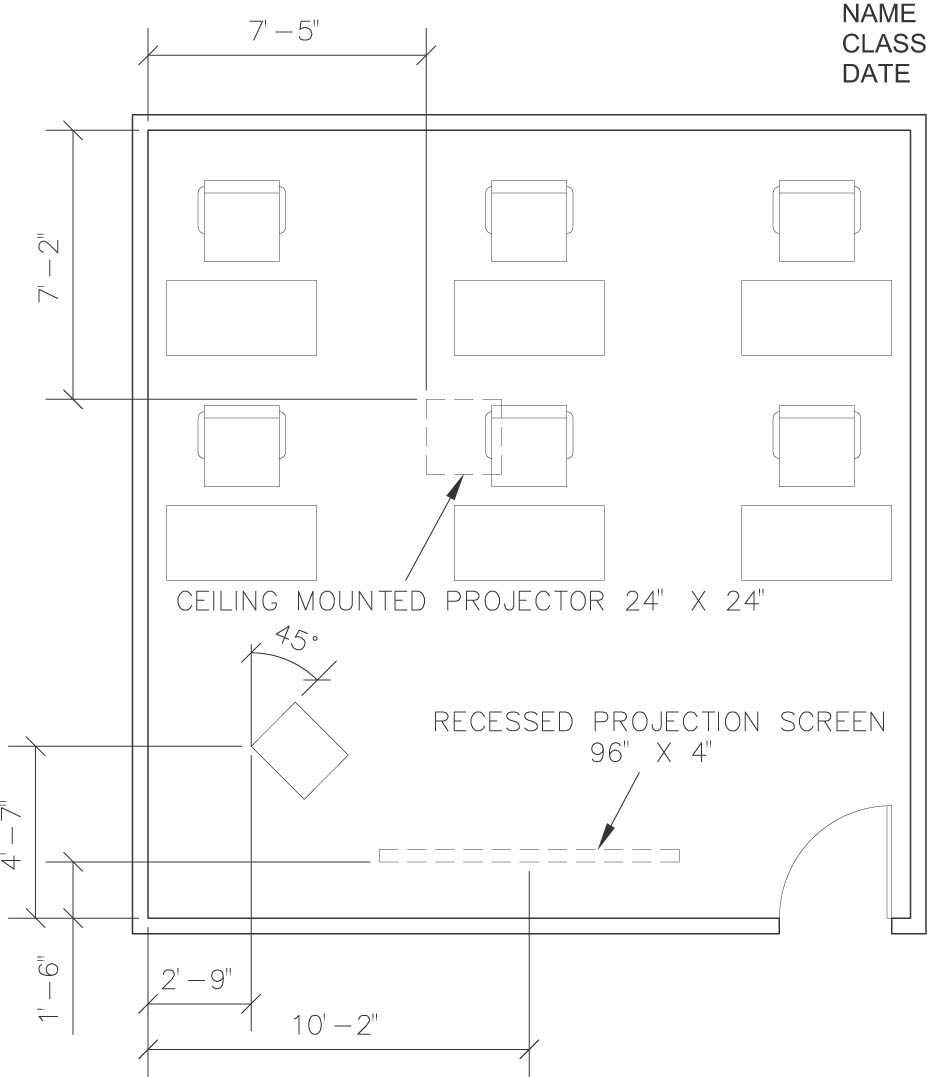
Figure 3-34 Draw the 24″ × 20″ lectern, the 24″ × 24″ ceiling projector, and the 96″ × 4″ recessed projection screen
Step 26. Set layer i-eqpm-ovhd current.
Step 27. Draw the 24″ × 24″ ceiling-mounted projector and the 96″ × 4″ recessed projection screen as shown in Figure 3-34.
Step 28. Set layer a-anno-text current.
Step 29. Use the Single Line Text command (type DT <Enter>) to type your name, class number, and date, 6″ high in the upper-right corner.
Step 30. When you have completed Exercise 3-2 (Figure 3-35), save your work in at least two places.
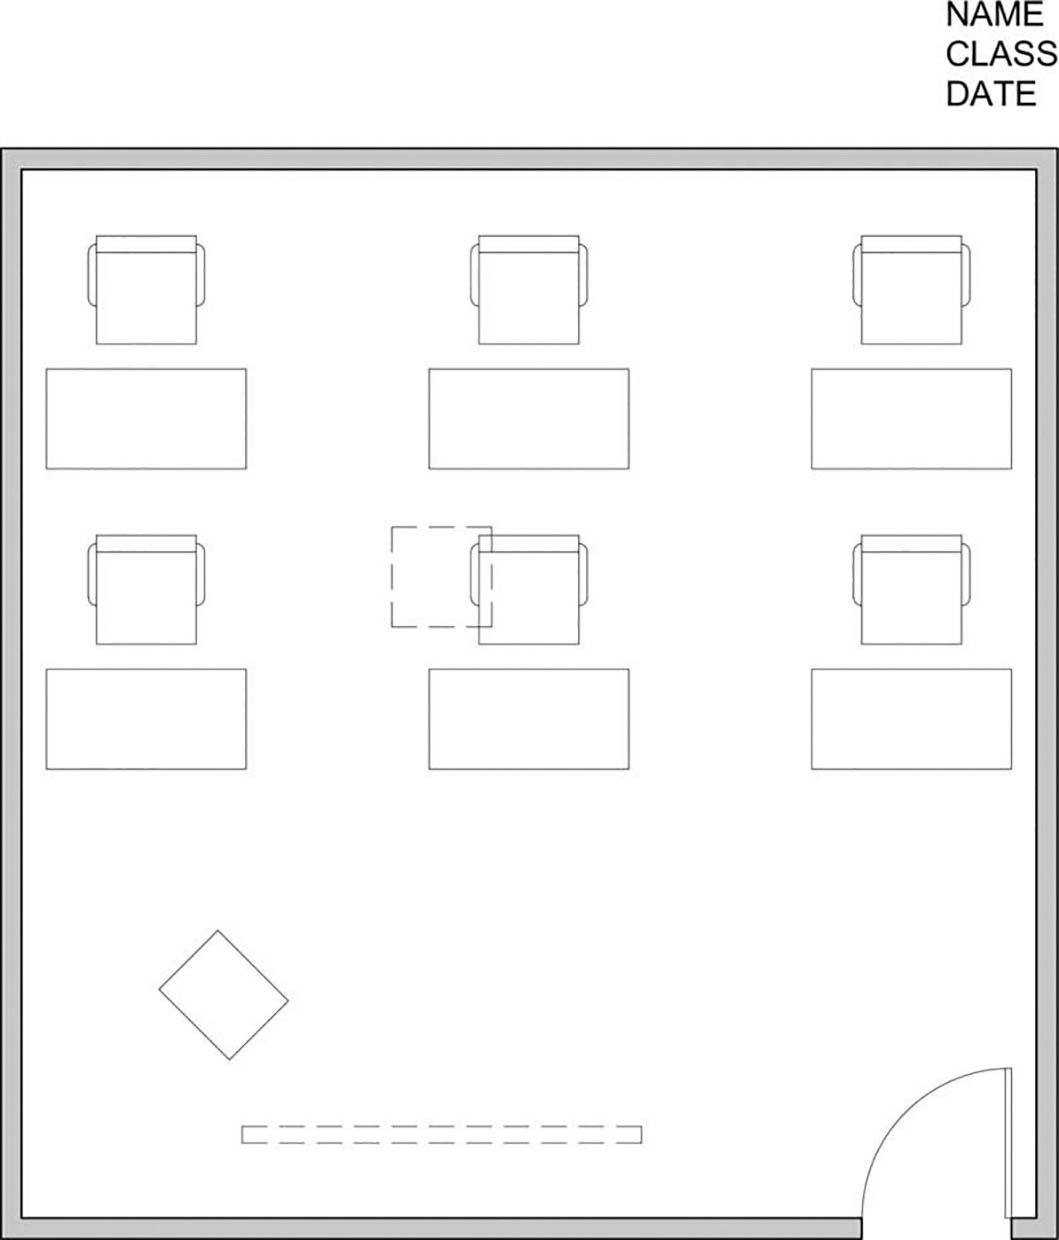
Figure 3-35 Exercise 3-2 complete
As for the dimensions and other annotations shown in Figure 3-34, dimension and multi-leader tools are needed and will be discussed in future exercises.
Step 31. Print your drawing from the Model tab at a scale of 1/4″ = 1′-0″.
)
)
)