1-10 Drawing Problem
Set up a drawing that uses millimeter dimensions and the following parameters:
Sheet size = 297,420 (A3)
Grid = 10 spacing
Snap = 5 spacing
Whole-number precision
Specifying the Drawing Units
Click the Application Menu button in the upper-left corner of the drawing screen and then select New, then Drawing.
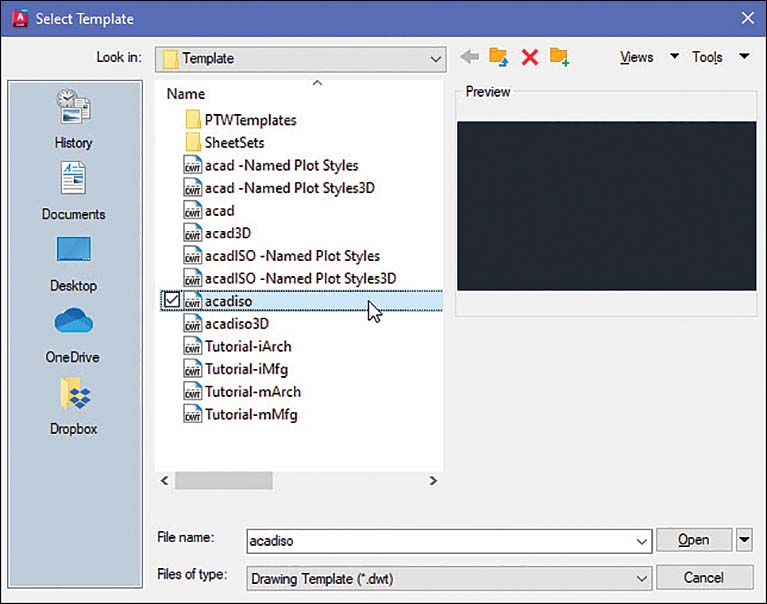
The Select Template dialog box appears (Figure 1-29).
Select the acadiso template and click Open.
Defining the Units Precision
Click the Application Menu button in the upper-left corner of the drawing screen and then select Drawing Utilities, then Units.
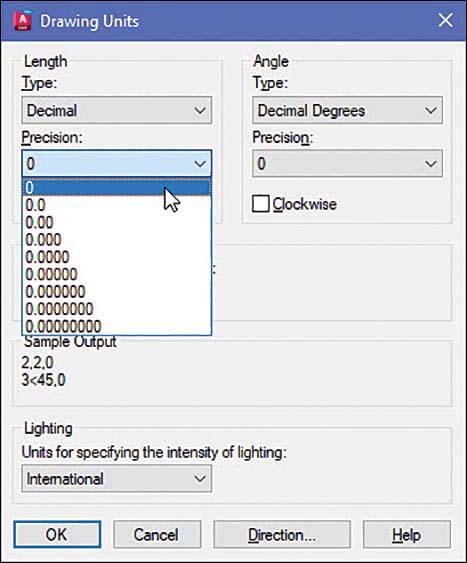
The Drawing Units dialog box appears (Figure 1-30). In this example, only whole numbers will be used, so the 0 option is selected.
Select the 0 precision and click OK.
Setting the Sheet Size
The default values for an acadiso template are 210 × 297, but this drawing problem calls for 297 × 420, an A3 sheet size.
Open the Application menu and select Print, then Page Setup.
The Page Setup Manager dialog box appears.
Click Modify.
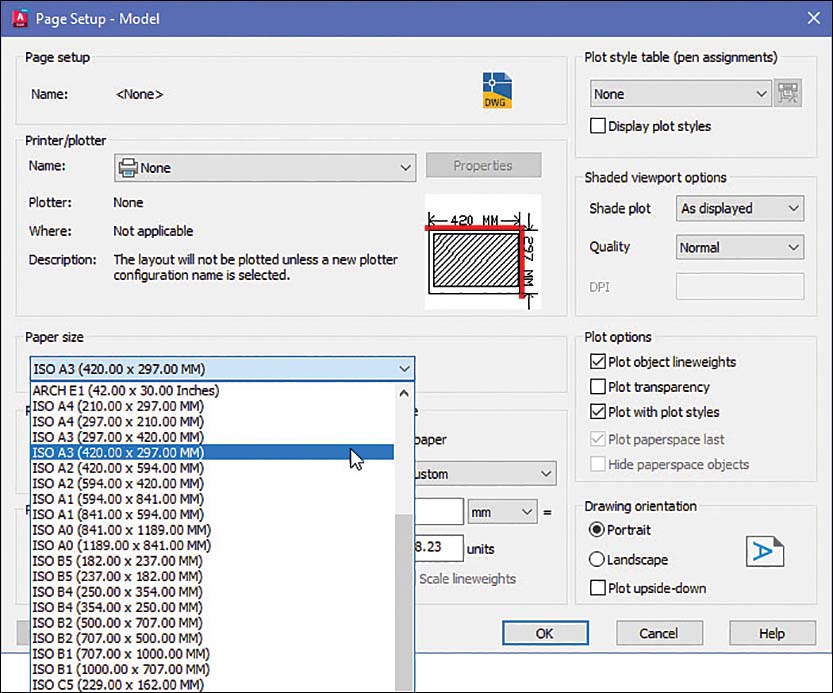
The Page Setup - Model dialog box appears (Figure 1-31).
Scroll down the available Paper size options and select the ISO A3 (420.00 x 297.00) option.
Click OK.
Setting Grid and Snap Values
Right-click the Grid button at the bottom of the screen.
Click Grid Settings.
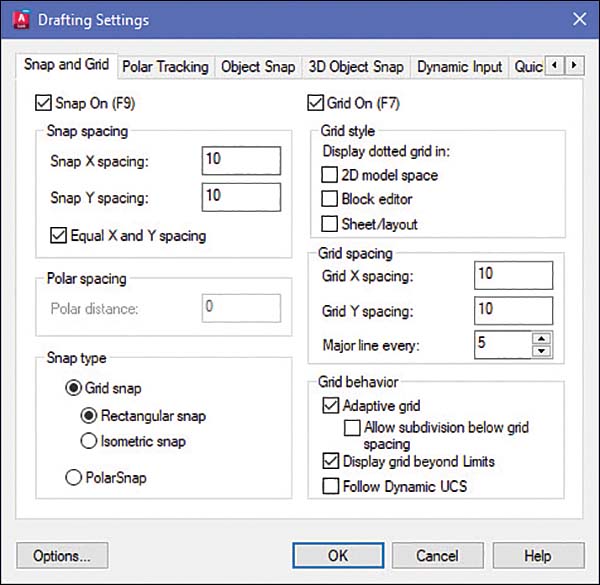
The Drafting Settings dialog box appears (Figure 1-32).
Select Grid On and Snap On and set the snap spacing to 5 and the grid spacing to 10.
Enter Zoom at the command prompt, type A, and press Enter.
The screen is now ready for starting a drawing using millimeter values.


