- Setting Selection Preferences
- Selecting Lines with the Selection Tool
- Selecting Fills with the Selection Tool
- Using a Selection Rectangle
- Using the Lasso Tool
- Deselecting Elements
- Repositioning Elements Manually
- Repositioning Elements Numerically
- Basic Editing Tasks: Cut, Copy, Paste
- Editing Existing Elements with Assistance
- Moving End Points with the Selection Tool
- Moving Points with the Subselection Tool
- Reshaping Curves with the Selection Tool
- Reshaping Curves with the Subselection Tool
- Converting, Removing, and Adding Points
- Reshaping Fills
- Changing the Size of Graphic Elements
- Reorienting Graphic Elements
- Distorting Graphic Elements
- Changing the Envelope of Selected Elements
- Modifying Strokes
- Using the Eraser Tool in Normal Mode
- Using the Faucet Modifier
- Modifying Fill Colors
- Creating Solid Colors: Color Mixer Panel
- Creating New Gradients
- Creating Color Sets
- Putting Gradients to Work
- Modifying Applied Gradients
- Applying Attributes of One Graphic Element to Another
- Converting Lines to Fills
Selecting Lines with the Selection Tool
Using the selection tool to select lines and outline shapes may be a bit confusing at first. What you think of as being a single element—say, a swooping squiggly line or a square—may actually be several connected segments. Flash divides lines that you draw with the pencil tool into curves and segments that it defines as vectors. This means you may need to make multiple selections to select a single item with the selection tool.
Flash covers selections with a pattern of tiny dots. Make sure that all the parts of the line or outline you intend to select display this pattern.
To select a single line segment:
- In the Toolbar, select the selection tool, or press V on the keyboard.
Move the pointer over a portion of the line (Figure 3.2).

Figure 3.2 As you prepare to select a line, Flash indicates what kind of point lies beneath the pointer.
Flash appends a little arc or a little right-angle icon to the selection tool. These icons indicate that the tool is over a point in a line segment and show what type of point it is: a curve or a corner point. (For more information about points, see the sidebar, "About Curve and Corner Points" later in this chapter).
Click to select the line.
Flash highlights the selected segment (Figure 3.3).

Figure 3.3 When you click a line to select it, Flash highlights that line segment (top). If you have the Property Inspector open, you can see information about your selected line, such as its color, thickness, and position on the Stage (bottom).
To select multiple line segments:
- In the Toolbar, select the selection tool.
- To select the segments you want to include, do one of the following:
- If you are using Flash's default selection style (Shift Select), Shift-click each segment you want to select. Flash adds each new segment to the highlighted selection (Figure 3.4).

Figure 3.4 This graphic element consists of three segments. To select the entire element, you can Shift-click (or click, depending on your Preferences setting) each segment. Note that the line segments need not be connected, as they are in this example; they can be anywhere on the Stage.
- If you turned off the Shift Select option in the Preferences dialog, click each segment you want to include. Flash adds each new segment to the highlighted selection.
- If you are using Flash's default selection style (Shift Select), Shift-click each segment you want to select. Flash adds each new segment to the highlighted selection (Figure 3.4).
To select multiple connected line segments as a unit:
- In the Toolbar, select the selection tool.
Double-click any segment in the series of connected line segments.
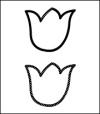
Flash highlights all the segments (Figure 3.5).

Figure 3.5 After single-clicking (top), you select one segment of this outline. After double-clicking (bottom), you select the entire shape.
 (Mac) or Ctrl (Windows). The selection tool remains in effect as long as you hold down the modifier key.