- Setting up layers
- Adding text
- Formatting text
- Creating Type Styles
- Review Questions
- Review answers
This chapter is from the book
This chapter is from the book
This chapter is from the book
Creating Type Styles
Using styles in Muse, you can quickly apply consistent formatting to text and make global changes across multiple pages in your site. After you create a style, you can update all of the text throughout your site that uses that particular style simply by editing the saved style. This is very similar to how styles in InDesign and Illustrator work. You can access Paragraph Styles in the Paragraph Styles panel (Window > Paragraph Styles) of Design mode.
When you publish your site for the world to see, Muse automatically converts your styles to CSS (Cascading Style Sheets) rules and applies them throughout your website.
Muse supports two types of styles:
- Paragraph styles retain text and paragraph attributes; apply them to an entire paragraph.
- Character styles retain text attributes only; apply them to selected text, such as a single character or word.
In addition, when you create a new site in Muse, a style named [None] appears by default in the Paragraph Styles panel. You can use this style to remove formatting from text to which you applied a paragraph style. As a best practice, apply text formatting using paragraph and character styles; doing so requires less effort in Muse and also makes a site that has the potential to download faster on the web. Also, text styles are shared between layouts and can be very useful when you’re editing layouts for smartphones and/or tablets. You’ll learn more about phone and tablet layouts in Lesson 10, “Designing for Mobile Devices.”
Creating and applying paragraph styles
Paragraph styles apply formatting to an entire paragraph and encompass all of the formatting options found in the Text panel, including font size, alignments, indents, and more.
Next, you’ll create a paragraph style to save the formatting for the heading text and another style for the main body text on the Team page so that you can apply that formatting elsewhere easily. Remember, after you create a style, it appears in the Paragraph Styles panel, no matter which page of the site is open.
- Choose Window > Reset Panels.
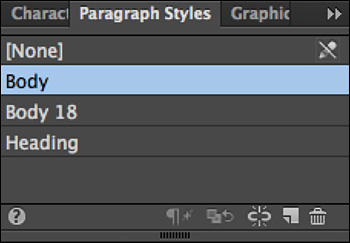
Choose Window > Paragraph Styles to open the Paragraph Styles panel.
Take a minute to become familiar with the options in the Paragraph Styles panel. As you progress through this exercise, you’ll learn about each of these options.
With the Text tool, click three times in the first paragraph that begins with “Our SPC team consists of two ...” to select it.
Click the Create A New Style button (
 ) at the bottom of the Paragraph Styles panel.
Muse saves the formatting from the selected text as a paragraph style and adds it to the Paragraph Styles panel. By default, Muse names the new style Paragraph Style, but you can, and should, rename it.
In the Paragraph Styles panel, double-click the style named Paragraph Style to open the Paragraph Style Options dialog box.
Change the Style Name to Body.
In the Paragraph Style Options dialog box, notice that the formatting options that were saved from the paragraph text appear. Also, you’ll see the Paragraph Tag menu. To learn more about the Paragraph Tag menu, see the paragraph_tags.pdf file in the Lesson04 folder.
Click OK.
When you create a new style from selected text, Muse does not automatically apply the style to that text; edits to the style would not affect the paragraph on which you originally based the style. To apply the new style to its paragraph of origin, you must apply the style after you make it. Double-clicking to name the style does that for you as well as lets you assign a more meaningful name to the style.
You can always tell which style is applied to text by selecting that text or inserting the cursor in it and looking in the Paragraph Styles panel where the applied style’s name will be highlighted.
Position the cursor over the Body style in the list. A yellow tooltip appears, listing the style settings, which can help you to differentiate between styles with similar names.
With the Text tool selected, select the header text “Our Sales Team.” Repeat steps 3 to 5, creating a new paragraph style named Heading. Make sure that in the Paragraph Style Options dialog box you choose <h1> Headline from the Paragraph Tag menu.
Choosing <h1> Headline from the Paragraph Tag menu means that in the HTML code that Muse generates, the HTML tag for the text with the Heading style applied will be an <h1> tag (called a heading 1). That can be very useful for search engine optimization because an <h1> tag carries more importance than a <p> (paragraph) tag, which is set by default. It can also be useful for organizing your page content to make it easier for screen readers and other assistive devices to navigate the content. You are not required to choose <h1> Headline to make your site work.
Insert the cursor into the paragraph that begins “That is why SPC is proud...” In the Paragraph Styles panel, click the Body style to apply it to the text.
You can either simply insert the cursor in text or select the entire paragraph (or more) to apply paragraph styles.
Insert the cursor into the paragraph that contains the “Customer Quote” text. In the Paragraph Styles panel, click the Heading style to apply it to the text.
)
)
)
)
)
)
)
After you create a paragraph style and begin working in your pages, you may change your mind later on and want to change the settings in the style. In Muse, when you change style settings, every paragraph that has that paragraph style applied will update.
Editing paragraph styles
In Muse, in order to change a paragraph style you need to redefine the style. To redefine a style, you edit the formatting for text that has the paragraph style applied. Then you redefine the style based on the changes. This makes the paragraph style match the new settings, and all other paragraphs with that style applied automatically update to match.
With the Text tool, select the heading text “Our Sales Team.” In the Control panel, change the Font Size to 48.
Look in the Paragraph Styles panel. You can tell that the style named Heading is applied because it is highlighted, but you’ll also now see a plus (+) to the right of the name. The plus indicates local formatting on the selected text. Local formatting means that there is formatting on the selected text that is different from the paragraph style applied to it.
Position the pointer over Heading+ in the Paragraph Styles panel. A yellow tooltip appears displaying the style settings, a dashed line (-----), and then size: 48. Settings listed below the dashed line indicate formatting on the selected text that is not a part of the applied paragraph style.
Click the Clear Style Overrides button (
 ) at the bottom of the Paragraph Styles panel to remove the font size applied to the heading text.
This strips the formatting from the selected text and reapplies the currently applied paragraph style. The plus (+) sign that was displayed to the right of the paragraph style’s name disappears once you click the Clear Style Overrides button.
With the Text tool, select the entire first paragraph that starts with the text “Our SPC team consists of two ...” and ends with the text “...what they demand in a real estate agent.” In the Text panel, change the Font Size to 16 and the Space After to 14.
Look in the Paragraph Styles panel and you’ll see a plus appear next to the style named Body. Instead of clearing the overrides (removing the extra formatting), you’ll change the style to match the formatting of the selected paragraph.
Click the Redefine Selected Style button (
 ) at the bottom of the Paragraph Styles panel.
Notice that the plus is gone from the right of the Body style name and that the paragraph below the selected paragraph has updated to reflect the new formatting. The last paragraph, below the “Customer Quote” heading, will not change, though. It doesn’t have the paragraph style applied and that’s okay.
- Choose File > Save Site and leave the first paragraph selected for the next section.
)
)
)
Duplicating and deleting paragraph styles
In Muse, you may wind up creating multiple paragraph styles that are very similar to each other. For instance, you may want to create two versions of the Body style with the only difference being the font size for different layouts. In that case, instead of creating a whole new style to closely match another, you can duplicate an existing style and adjust the formatting as necessary.
- In the Paragraph Styles panel, right-click the style named Body, and choose Duplicate Style to create an exact copy of the style. Muse names it, not surprisingly, “Body copy.”
Right-click the new style (Body copy) and choose Rename Style. Change the name of the style to Body 18, and press Return (Enter).
Renaming a style this way does not apply the new style to any selected text.
To change the Body 18 style, you’ll redefine the style. First, you need to apply the style to some text.
- Click Body 18 in the Paragraph Styles panel to apply it to the selected first paragraph. The paragraph will not change in appearance because the style is just a duplicate with the same attributes.
- Change the Font Size in the Control panel to 18 by typing 18 and pressing Return (Enter).
Click the Redefine Selected Style button at the bottom of the Paragraph Styles panel to update the Body 18 style to match the selected text.
Now you’ll use the new Body 18 style in place of the Body style. To do so, you can simply apply the new style to selected text and keep the original Body style, or you can delete the original Body style (if you no longer need it), and Muse allows you to choose a style to replace it with. You will do the latter.
- Choose Edit > Deselect All in preparation for deleting the style.
In the Paragraph Styles panel, select the Body style. Click the Delete The Selected Style button (
 ) at the bottom of the panel.
In the dialog box that appears, choose Body 18 and click Replace.
The Body style is now gone and the first two paragraphs have the Body 18 style applied. Notice that the text now displays using the specified font size.
- Choose View > Hide Guides to temporarily hide the guides and get a better sense of what the text looks like on the page.
- Choose View > Show Guides to show the guides again.
)
TIP
You can also unlink a paragraph style by selecting text that has a paragraph style applied and then clicking the Unlink Style From Selection button ( ) at the bottom of the Paragraph Styles panel. Unlinking a style from text can be helpful when you want to apply the styling to the text but later don’t want the text to update if the style updates, for example.
Creating and applying a character style
Paragraph styles apply attributes to an entire paragraph, but you can only apply character styles to selected text. Character styles can include only the following formatting options: font, font size, color, styles (italic, bold, underline), and tracking. You access character styles from the Character Styles panel (Window > Character Styles).
Next, you’ll format the company name, SPC, and apply that formatting throughout the page using a character style. As with paragraph styles, once you create character styles, they appear in the Character Styles panel if any page in any layout in the site is open.
- Click the Character Styles panel tab on the right side of the workspace (or choose Window > Character Styles).
- With the Text tool selected, select the text “SPC” in the first paragraph that begins with “Our SPC team consists of....”
Click the Italic button (
 ), and then click the Underline button (
 ) in the Control panel.
With the text “SPC” still selected, click the Create A New Style button (
) at the bottom of the Character Styles panel.Position the pointer over the new style named Character Style, and you’ll see the saved formatting appear in a yellow tooltip, just like in a paragraph style.
Double-click the new style named Character Style. In the Style Options dialog box, change the Style Name to proper name and click OK.
As with a paragraph style, by double-clicking the name of the new character style right away, you also apply it to the selected text from which the style was made.
- Select the text “SPC” in the next paragraph.
- Click the style named “proper name” in the Character Styles panel to apply that formatting to the text.
- Choose File > Save Site, and leave the SPC text selected.
)
)
Editing a character style
Editing a character style and the rest of the options in the Character Styles panel work identically to the Paragraph Styles panel.
- With the “SPC” text still selected, remove the underline on the text by clicking the Underline button () in the Control panel.
Click the Redefine Selected Style button (
) at the bottom of the panel.Notice that the plus is gone from the right of the proper name style name and that the other SPC text has updated to reflect the new formatting.
With the Selection tool, drag the larger text frame up so that it is closer to the Our Sales Team heading above it. See the figure for placement help.
- Click the Preview mode link to see the page in Preview mode.
- Click the Design mode link to return to the page.
- Choose File > Save Site and leave the Team page open for the final section of this lesson.
)
)
Working with the spell checker
Muse comes with the ability to check spelling, which is enabled by default. Words that are not recognized by the default dictionaries display a red underline. Muse comes with two main dictionaries: a Global dictionary and a language-based dictionary. Next, you’ll explore spell check using the Team page text.
With the Team page still open in Design mode, choose Edit > Spelling and make sure that Dynamic Spelling has a check mark next to it, indicating that it’s on.
You should see that several words on the page have red underlines, which means they are not recognized by the Muse dictionary, as mentioned earlier.
With the Text tool, right-click the red underlined word “combinned” in the first paragraph of text. (You may need to insert the cursor in the word first.) A context menu appears that shows replacement suggestions as well as options to add the word to one of two dictionaries. Choose “combined” to correct the spelling.
The word should now be spelled correctly and the red underline should disappear.
Now you’ll add “SPC” to the Global dictionary so that Muse will recognize it in the future. As mentioned at the beginning of this section, Muse includes a Global and a language-based dictionary. The Global dictionary applies to all content across all sites you create regardless of language.
In the first sentence in the first paragraph, right-click the “SPC” text with the red underline and choose Add “SPC” To Global Dictionary.
Once the word is added to the Global dictionary, the red underlines should disappear from all occurrences of the word SPC.
Words added to either the Global or language dictionaries can be manually added or even removed from the dictionary using several methods.
- Right-click the “SPC” text and in the context menu you’ll see Remove “SPC” From Global Dictionary.” Don’t choose it.
Choose Edit > Spelling > User Dictionary. The default language dictionary will appear in the top menu. Choose [Global] from that same menu to see the “SPC” word added to the dictionary.
In the User Dictionary dialog box, you can add or remove words to dictionaries by typing in the word and clicking Add, or selecting a word in the list and clicking Remove.
Click Done.
You can change the dictionary language (which in turn sets the language dictionary) for the program, for an entire site, and for individual text frames. So, suppose that most of the content within a site is English, but you have some content in another language. You can set the main dictionary language in the Site Properties to English, and then select the text frame(s) that the other language appears in and set a different dictionary language for those.
- Choose Adobe Muse CC > Preferences (Edit > Preferences). In the Preferences dialog box, you’ll see a setting for Language. This is the dictionary language that sets the language for all new Adobe Muse sites. Click Cancel.
Choose File > Site Properties. In the Site Properties dialog box, click the Content tab, and you’ll see another Language option. This dictionary language setting controls the dictionary for the active site only. Click Cancel.
You can also set the language for a text frame.
Right-click the text frame that contains “SPC.” If you wanted to use a different language dictionary for the text frame, you could choose Language > (choose a language). Only that text frame will use the selected dictionary.
The last step you will take is to edit the margins on the master page. Looking at the text, it seems too close to the edge of the page.
- Click the Plan mode link to return to Plan mode.
- Right-click the Home-master page and choose Page Properties. In the Page Properties dialog box, change the Margin for Top, Bottom, Left, and Right to 50. Click OK.
- Click the Team document tab at the top of the Document window.
With the Selection tool, Shift-click the text frames on the page to select them both and drag them so that they snap into the reposition margin guides (see the figure).
- Choose File > Save, and then choose File > Close Page to return to Plan mode.
)
)
)
)
In the next lesson, you’ll explore how to create and edit shapes as well as create and edit color in Muse.