Building Basic Web Pages in Dreamweaver MX
- Creating New Files
- Getting a Head Start
- Turning off the New Document Dialog Box
- Opening Files
- Creating Content
- Page Properties
- Modifying the Page Color and Background
- Saving Your Work
- Saving a Copy of a File
- Previewing in a Browser
- Printing from the Browser Window
- Colors and Web Pages
- Colors and Windows
- Colors for the Mac
This chapter is from the book
This chapter is from the book
This chapter is from the book
In the first chapter, we got acquainted with the Dreamweaver interface. In the second chapter, we learned how to set up a local site to keep track of all our files. This chapter describes how to use the Document window to create and save Web pages (Figures 3.1 and 3.2).
) Figure 3.1 The McSweeney's Web site
(http://www.mcsweeneys.net)
uses mostly text, but it still looks snappy.
Figure 3.1 The McSweeney's Web site
(http://www.mcsweeneys.net)
uses mostly text, but it still looks snappy.
) Figure 3.2 Gravity7
(http://www.gravity.com) is
the home of designer Adrian Chan.
Figure 3.2 Gravity7
(http://www.gravity.com) is
the home of designer Adrian Chan.
To start with, I'll walk you through creating a simple Web page that uses tables, links, images, and text. We'll also learn how to adjust the properties of a page, including the title and the page background.
In this chapter, we'll learn how to:
- Open a page
- Create a new page
- Add content to a page
- Set the page title
- Adjust the page properties
- Save your work
- Save a copy of your page
- Preview the page in a browser
- Print the page from the browser
- Close the file
This chapter also describes how to select and use colors in Dreamweaver. I'll refer to this material throughout the book.
Creating New Files
Creating and opening files in Dreamweaver is about the same as in any other program, but with a few more options.
The new Standard toolbar
Dreamweaver MX now includes a Standard toolbar you can use to perform simple functions.
To display the Standard toolbar:
From the menu bar, select View > Toolbars > Standard (Figure 3.3). The Standard toolbar will appear (Figure 3.4).
 Figure 3.3 Select View > Toolbars > Standard from the menu
bar.
Figure 3.3 Select View > Toolbars > Standard from the menu
bar.
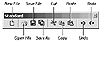 Figure 3.4 The Standard toolbar lets you perform common file and editing
functions.
Figure 3.4 The Standard toolbar lets you perform common file and editing
functions.
) Figure 3.3
Figure 3.3) Figure 3.4
Figure 3.4Creating New Files
When you start Dreamweaver, a new, blank page will appear in the Document window. You can create a new file at any time.
To create a new file:
From the Document window menu bar, select File > New, or press Ctrl+N (Command+N). The New Document dialog box will appear (Figure 3.5).
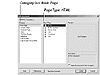 Figure 3.5 The New File dialog box presents a daunting array of choices.
For a basic page, select Basic Page, HTML.
Figure 3.5 The New File dialog box presents a daunting array of choices.
For a basic page, select Basic Page, HTML. To create a regular HTML file, click on Basic Page in the General category list and HTML in the Basic Page list.
Click Create. A new, blank document will appear.
) Figure 3.5
Figure 3.5What are all those other file types?
Besides HTML, you can create and edit many other types of files in Dreamweaver (Figure 3.6). If you're not working with a database, you'll probably stick to HTML. If you need to create another type of file, such as ASP, you can edit the page as you would any other. If you're working on a dynamic site, consult your database team to find out what other settings to use.
) Figure 3.6 These other page types are used with databases, dynamic
content, CGI scripts, and other server-side technologies.
Figure 3.6 These other page types are used with databases, dynamic
content, CGI scripts, and other server-side technologies.