This chapter is from the book
This chapter is from the book
This chapter is from the book
Setting Keyframes Manually
In addition to recording keyframes, you can manually set keyframes, whether or not recording is enabled. Manually setting keyframes is a great solution when you want to lock in an existing value at the current frame. (Recording requires you to change the value to create a keyframe.)
In this exercise, you’d like the curtains to stay closed for the first second. In other words, you want the rotation of the Cog1 layer to remain at 0 degrees from 0:00 to 1:00, and then start to change. So, let’s delete the current keyframe at 0:00 and create a new one at 1:00.
- In the Keyframe Editor, select the keyframe at 0:00. Then press Delete to remove it.
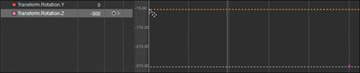
Only the keyframe at 5:00 remains, and the flat dotted line indicates that there is no animation because only one keyframe exists, and at least two keyframes with different values are required to create animation. The Rotation value at the keyframe of −300 is the same for the entire layer, and the curtains remain open. You want them to be closed at 1:00.
- In the timing display, type 1. (1 period), and press Return to move the playhead to 1:00.
- In the Keyframe Editor, from the Animation pop-up menu, choose Add Keyframe. When adding keyframes manually, you must first add the keyframe, and then change the value. If you change the value first, you change the value of the parameter for the full duration of the layer, not just at the playhead.
- Double-click the value field for Transform.Rotation.Z, type 0, and press Return.
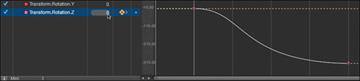
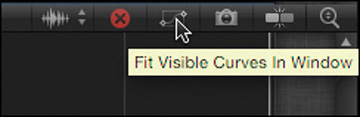
- If necessary, at the top right of the Keyframe Editor, click the “Fit Visible Curves in Window” button to see the full curve.
- Play the project. The curtains stay closed for the first second, and then they animate open from 1:00 to 5:00.
- You can adjust the Bezier handles on each keyframe to suit yourself. You can also add and adjust keyframes directly on a curve.
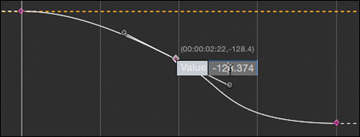
- Double-click anywhere along the curve to add a keyframe.
- Drag the keyframe up or down to change its value. Shift-drag up or down to constrain the pointer to vertical movement and avoid dragging left or right, which would change the keyframe’s timing. As you drag, the numbers that appear in parentheses indicate the timecode of the keyframe location and the value of the keyframe, in that order.
- Double-click the keyframe to enter a specific value for the parameter at this frame. Play the project.
By adding keyframes, you can radically alter the animation. For this project, two keyframes will suffice.
- Stop playback, delete any extra keyframes, save your work, and close the project.
You’ve now explored the basics of creating keyframes by recording them or setting them manually for a single parameter on a single layer. Next, you’ll explore techniques for applying and adjusting the keyframes of multiple parameters on multiple layers.
)
)
)
)