- Reference 4.1 Understanding a Project
- Reference 4.2 Defining the Primary Storyline
- Reference 4.3 Modifying Clips in the Primary Storyline
- Reference 4.4 Timing the Primary Storyline
- Reference 4.5 Editing Above the Primary Storyline
- Reference 4.6 Creating a Connected Storyline
- Reference 4.7 Editing Below the Primary Storyline
- Reference 4.8 Finessing the Rough Cut
- Reference 4.9 Sharing Your Progress
- Lesson Review
This chapter is from the book
This chapter is from the book
This chapter is from the book
Reference 4.5 Editing Above the Primary Storyline
The primary storyline has established the content foundation, timing, and pacing for the project. It's time to see what those sound bites are discussing. At this stage, you'll edit B-roll clips into the project by placing them above the primary storyline, and connected to it.
With these B-roll edits, your editing approach changes to a "lane" above the primary storyline. Clips in a lane outside the primary storyline are vertically connected back to the primary storyline, thereby establishing a synchronized relationship in this project between the sound bite and the B-roll. When Mitch says "helicopter," your audience sees a helicopter.
These connections keep clips synchronized even when a ripple edit occurs in the primary storyline. An upstream ripple that shifts a sound bite's timing in the project will also shift the B-roll clips connected to that sound bite. The connection ensures that the sync is maintained by shifting the connected clips the same amount. You first establish the connection and then Final Cut Pro maintains it so your focus may be on the rest of the story edit.
In the following exercises, you will connect B-roll clips to the sound bite—driven primary storyline you've already edited. Then, you will trim these connected clips and observe their unique trimming behaviors.
Exercise 4.5.1 Adding and Trimming Connected B-roll
B-roll is the editor's friend. Sometimes referred to as cutaways, B-roll clips allow you to smooth discontinuity in your primary storyline, and in this project they will help you hide the jump cuts and soften the audio edits made to the sound bites. Furthermore, good B-roll content may also include great natural sound audio, or nats. An editor can use the nats to cover a tight audio edit, such as the one you now have with the word "filming."
Let's start by reseting the interface and searching those keywords you applied earlier to quickly locate B-roll of a hangar door opening.
In the Browser, click the Show Libraries button.

In the Lifted library, select the Hangar Keyword Collection.
To ensure that you are seeing all the available clips, double-check the Browser's sorting and filtering options.
In the Browser, from the pop-up menu, choose Hide Rejected; and then ensure that the search field is clear of any criteria.

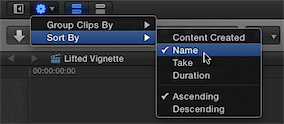
From the Action pop-up menu in the Browser, set Group Clips By to None and Sort By to Name.
- If necessary, drag the toolbar up to open more vertical room in the Timeline.
In the Browser, adjust the Zoom control to All.

With the environment properly set up, you will search for the first clip of the hangar door opening.
In the Lifted library, verify the Hangar Keyword Collection is selected.
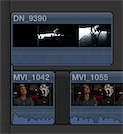
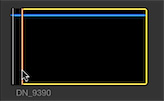
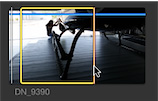
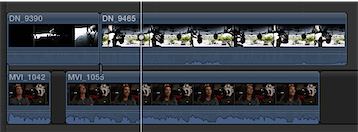
The Browser updates to display the clips you previously tagged with the Hangar keyword. The first clip you want is DN_9390.
Skim the clip to refamiliarize yourself with its contents.
This clip starts in the dark before the hangar door opens. Mitch walks in from the left, crossing to center to preflight the helicopter. The clip is currently 13 seconds long. Let's trim the clip down before connecting it to the primary storyline.
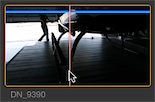
In DN_9390, mark a start point when you first hear the hangar door motor.
Mark an end point when Mitch drops down to inspect the camera.
The clip is ready to edit into the project.
In the Lifted Vignette project, cue the playhead to the beginning of the Timeline.
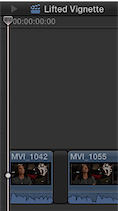
Cueing the playhead tells Final Cut Pro where the hangar clip belongs time-wise in the Timeline. In this case, locating that point is easy because it will be the first shot in the project.
You will edit this clip into the project so that we hear Mitch speaking while watching the hangar clip. You can do this by connecting the video clip in a higher lane.
In the toolbar, click the Connect button, or press Q.

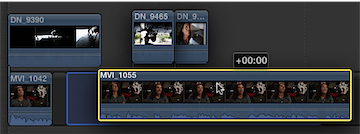
The hangar clip is stacked into a lane above the first sound bite. Let's review the edit to see the results.

Cue the playhead to the beginning of the project, and play the Timeline.
You see the hangar and hear the hangar motor while also hearing Mitch's sound bite. The video hierarchy rule makes the video in a higher lane visible, while mixing and playing all the audio content in the clips.
)
Connecting the Second B-roll Clip
As you can see, the DN_9390 clip extends over the second sound bite. That's OK for now, so let's look at the next B-roll clip to add to the project.
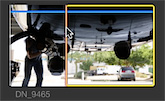
In the Browser, skim DN_9465.
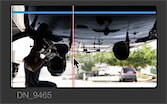
In this clip, Mitch enters the hangar from the right side, approaches the helicopter, and then kneels to inspect the camera. Although Mitch enters from the opposite side of the hangar, you can set a start point as he's kneeling to inspect the camera. With a little finessing, this clip can be made to match the previous shot of Mitch approaching the helicopter.
In the Browser, mark a start point when Mitch has already started to kneel to inspect the camera.
Now you need to locate the Timeline point at which this clip can be matched to the previous edit.
Cue the project playhead over DN_9390 where Mitch has started to kneel at the helicopter's camera.

Click the Connect button, or press Q, to make a connect edit.
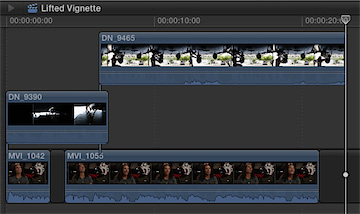
The second B-roll clip stacks into a higher lane above the previous edit. When two connected clips will impact one another, Final Cut Pro automatically avoids a "clip collision" by moving one of the clips to a different lane. The edit still cuts to the second B-roll clip at the connection point.
Review the edit to see the results.
Does the action of Mitch kneeling flow from one clip to the other? If not, this situation is easily corrected.
Place the mouse pointer over the center of the DN_9465 clip and drag it to the left or right until the action of Mitch kneeling appears to be one smooth movement.
Once DN_9465 is in place, you can ripple trim the end of DN_9390 to lower DN_9465 into the same lane.
Ensure that snapping is turned on (the Snapping button in the Timeline is blue).

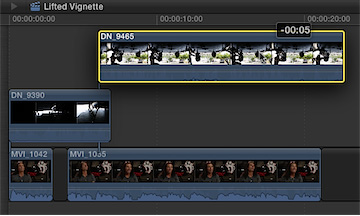
Drag the end point of DN_9390 to the left until DN_9465 drops into the same lane.
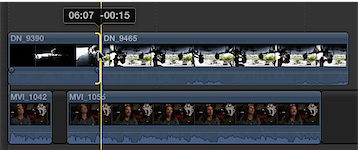
With snapping turned on, the end point of DN_9390 will snap to the start point of DN_9465.
Notice that DN_9465 extends down the Timeline. We'll trim that clip after connecting a third B-roll clip.
Connecting the Third B-roll Clip
Let's connect one more B-roll clip before analyzing what you've created.
In the project, cue the playhead over clip MVI_1055 when Mitch says "nobody."
You're telling Final Cut Pro to make a precise start edit based upon the contents of the primary storyline. Now let's find a clip for that edit.
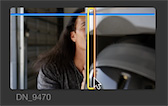
- In the Browser, locate clip DN_9470, a close-up of Mitch inspecting the camera.
Mark a start point about halfway through the clip as Mitch turns the camera counterclockwise.
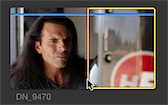
Set an end point as Mitch's face moves halfway behind the camera.
Press Q to connect this clip to the primary storyline at the playhead.
Although the edit cuts nicely to the close-up, in your Timeline, DN_9465 resumes playing after the close-up ends.
Trim the end point of DN_9465 to the start of DN_9470 so that the two B-roll clips are sequential.

Now DN_9465 doesn't give an encore performance.
Exercise 4.5.2 Understanding Connected Clip Sync and Trimming Behaviors
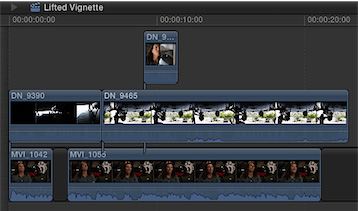
Each of the three B-roll clips has a vertical connection point that synchronizes it to the primary storyline. These vertical relationships remain intact even when you alter the primary storyline. Let's see how this works.
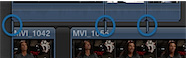
In the project, notice the vertical spikes that extend from the B-roll clips to the sound bites in the primary storyline. Those are the connections you established by making a connect edit.
If a sound bite moves within the Timeline, that movement will also be applied to any connected clips.
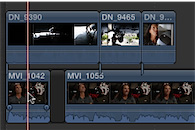
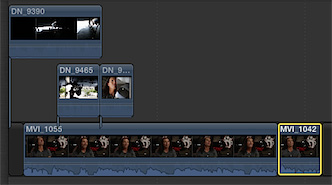
Drag the middle of MVI_1042 to the right until the clip is located after MVI_1055.
Notice that DN_9390 was relocated with the sound bite, and the other two B-roll clips also slid to the left to remain synchronized with their connected sound bite.
Press Command-Z to undo the previous edit.
Connected clips are still independent clips that can be moved away from their synchronized, primary storyline clip.
Drag the middle of DN_9465 to the right until it connects after DN_9470.

DN_9465 establishes a new connection with the primary storyline.
Press Command-Z to undo the edit.
Final Cut Pro will maintain the synchronization of connected clips until you change the connection point or tell Final Cut Pro to ignore the connection.
Overriding the Connection
After connecting your B-roll clips, you may realize that you need to move a sound bite elsewhere in the primary storyline, but also need to leave the connected B-roll clips in place. The B-roll story you've created works great, but you've discovered your project is running too long. Or, you may want to experiment with a different arrangement of the sound bites without disturbing the B-roll order. You can temporarily suspend a connected clip's sync point while adjusting the primary storyline clip.
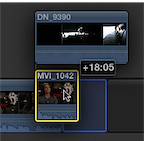
In the project, position the mouse pointer over MVI_1042.
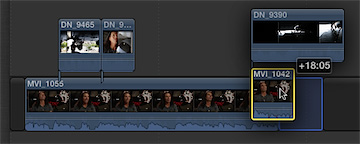
Hold down the ` (grave accent) key, and drag MVI_1042 after MVI_1055.
When you press the grave key, the pointer becomes a crossed-out connection symbol. Dragging a clip while holding down the grave key tells Final Cut Pro to ignore any connected clips during that edit.
The DN_9390 B-roll clip remains in place while the sound bite is moved later in the primary storyline. When the move is completed, the MVI_1055 sound bite slides to the left along with its two connected B-roll clips. Final Cut Pro automatically bumps DN_9390 to a higher lane to avoid a collision with the two oncoming B-roll clips. Rather than canceling the edit due to a potential clip collision, Final Cut Pro maintains sync and shifts the clips vertically out of the way of one another.
Press Command-Z to undo the edit.
Connected clips help your editing by maintaining the sync between clips you established when initially making the edit. Final Cut Pro lets you change your mind while maintaining that sync, or will sync to a different clip if you desire.
Trimming Connected Clips
Unlike the sound bites in the primary storyline, connected clips are independent of other connected clips and do not have a horizontal relationship with them. As a result, performing a trim edit on a connected clip produces results different from applying a trim edit to a clip in the primary storyline.
Place the Select tool over the end point of DN_9390.
Notice that a filmstrip does not appear on the trim icon as it would when trimming a clip in the primary storyline. You cannot ripple trim connected clips because no horizontal relationship exists between them.
Drag the end point to the left to trim the clip.
Only DN_9390 was affected by this trim edit.
Press Command-Z to undo the edit.
This default behavior of Final Cut Pro is not necessarily a bad thing because you may want connected clips to remain independent of other connected clips. However, when it is desirable, you can establish a horizontal relationship between connected clips.
)
)