- Starting the lesson
- Graphics and Adobe XD
- Creating and editing shapes
- Drawing with the Pen tool
- Working with UI Kits
- Review questions
- Review answers
Creating and editing shapes
Creating vector artwork in Adobe XD is easy thanks to the array of drawing tools available. If you’re coming from other Adobe applications, you’ll find the drawing tools in Adobe XD to be streamlined and efficient, with a few differences. For more complex vector content, you can use Illustrator and easily bring the vector artwork into XD.
Choose File > Open From Your Computer (macOS), or click the menu icon (
 ) in the upper-left corner of the application window and choose Open From Your Computer (Windows). Open the Travel_Design.xd document in the Lessons folder (or where you saved it).
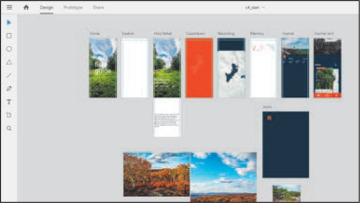
Press Command+0 (macOS) or Ctrl+0 (Windows) to see all of the content.
Click the artboard name “Home” in the document window to select that artboard. Press Command+3 (macOS) or Ctrl+3 (Windows) to zoom in.
Select the Select tool (
 ) and click away from the artboards to deselect all.
Creating rectangles
In this section, using the Rectangle tool, you’ll create a rectangle that will be used as a button on the home screen.
Select the Rectangle tool (
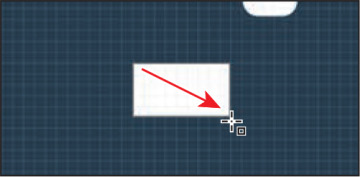
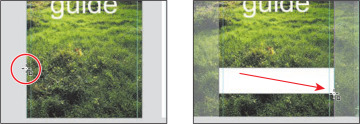
 ) in the toolbar. Near the bottom of the Home artboard, move the pointer over the left edge of the artboard until that edge of the artboard turns aqua. This change in color indicates that the shape will snap or align to the edge of the artboard. Drag down and to the right to draw a rectangle, stopping on the right edge of the artboard. When alignment guides appear on the right, release the mouse button. Don’t worry about the height for now.
Alignment guides are always on and can be very helpful for aligning, snapping, and spacing content you create or transform.
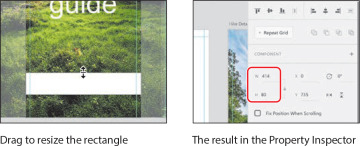
With the rectangle selected, drag the top-middle point of the shape up or down until you see a Height value of approximately 80 in the Property Inspector.
Similar to editing artboards, as you draw or edit shapes the Width and Height values in the Property Inspector change to reflect the current sizing of the selected content.
Creating ellipses
Another drawing tool you can use is the Ellipse tool. In this section, you’ll create several circles that will be used as a button in the app footer.
Press Command+Shift+A (macOS) or Ctrl+Shift+A (Windows) to deselect all so that you will be able to see all of the artboards in the Layers panel.
Click the Layers panel button (
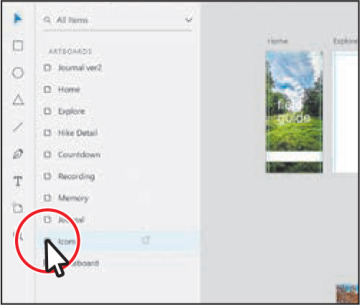
 ) in the lower-left corner (or press Command+Y [macOS] or Ctrl+Y [Windows]) to open the Layers panel, if it isn’t already open. Double-click the artboard icon (
 ) to the left of the artboard name “Icons” in the Layers panel to fit the artboard in the document window.
As you make your way through the lessons, you’ll see that there are a lot of ways to navigate between artboards. The Layers panel is a method that you learned about in Lesson 1, “An Introduction to Adobe XD.”
Choose Square from the Grid menu in the Property Inspector to turn it on. Click the Use Default button to apply the default square grid you set up previously.
Next you’ll create a record button that will be used on the Recording artboard.
Select the Ellipse tool (
 ) in the toolbar (or press the E key to select the Ellipse tool). Hold down the Shift key and drag to create a circle on the artboard. As you drag, pay attention to Width and Height in the Property Inspector. When you see a width of 152 and height of 152, release the mouse button and then the key.
You may notice that as you drag, the Width and Height values are changing by multiples of 8. That’s due to the square grid setting of 8.
Right-click the circle and choose Copy. Then right-click and choose Paste to paste a copy directly on top of the original.
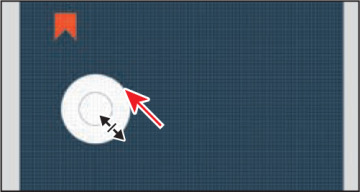
To make the new circle half its size, drag a corner toward the center. As you drag, hold down Option+Shift (macOS) or Alt+Shift (Windows) to resize it from the center and maintain its proportions. Release the mouse button and then the keys.
Creating polygons
The last type of shape you’ll explore is the polygon. Using the Polygon tool, you’ll create a triangle shape that will be used on the Memory artboard.
Press Command+Shift+A (macOS) or Ctrl+Shift+A (Windows) to deselect all so that you can see all of the artboards in the Layers panel.
In the Layers panel, double-click the artboard icon (
 ) to the left of the artboard name “Memory” to fit the artboard in the document window.
To turn off the square grid, deselect the Square option in the Grid section of the Properties panel. This allows you to draw without snapping to the square grid.
Select the Polygon tool (
 ) in the toolbar.
Move the pointer in an empty area of the artboard. By default, the Polygon tool creates a triangle (a three-sided shape), but you’ll edit the shape as you draw it. Drag down and to the right to begin drawing a polygon, but don’t release the mouse button yet. Press the up arrow key twice to increase the number of sides on the polygon to five, and don’t release the mouse button yet. Hold down the Shift key to straighten and constrain the shape. Release the mouse button and then the key. Leave the shape selected.
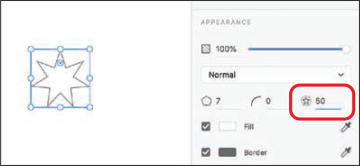
In the Properties panel, you will now see a Corner Count option (
 ), the Corner Radius option (
 ), and the Star Ratio (
 ). The corner count is used to change the number of sides on the shape after you’ve created it, and the star ratio is used to turn the polygon into a star shape.
Change the Corner Count option to 3 and press Return or Enter. Leave the triangle selected.
Changing fill and border
Now that you have a few shapes in your design, you’ll start to change appearance properties for them. You’ll start by sampling color with the Eyedropper.
Press Command+0 (macOS) or Ctrl+0 (Windows) to see all of the content.
Select the Select tool (
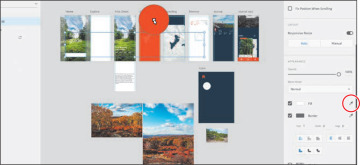
 ) in the toolbar. Shift-click the rectangle you drew toward the bottom of the Home artboard to select it and the triangle.
Press the I key to select the fill Eyedropper so you can sample a color and apply it to the fill of selected content. Move the pointer over the orange-red color in the Countdown artboard and click to sample the color.
To save the orange-red color, click the Fill color in the Property Inspector and click the plus (+) at the bottom of the Color Picker. Press the Esc key to hide the panel.
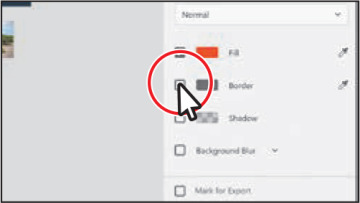
Deselect the Border option to turn the border off for the selected shapes.
Click the larger circle you drew on the Icons artboard to select it. Press Command+3 (macOS) or Ctrl+3 (Windows) to zoom in to it.
Deselect the Fill option in the Property Inspector to remove the fill.
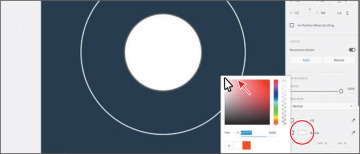
Click the Border color to show the Color Picker. Change the border color to white by dragging in the Saturation/Brightness field.
Click the plus (+) at the bottom of the color picker to save the white color.
Fill and border colors you create can be saved in this way. The colors you save using this method appear in the color picker for this document only. You can’t give names to these saved colors.
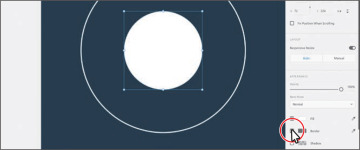
Click to select the smaller circle and deselect the Border option to turn it off.
Drag across both circles to select them, and choose Object > Group (macOS) or right-click and choose Group to keep them together as a group.
Press Command+S (macOS) or Ctrl+S (Windows) to save the file.
Working with border options
Now, you’ll create a simple magnifying glass search icon from a circle and path. You’ll explore border alignment and changing the line cap to get the final look.
Press Command and – (macOS) or Ctrl and – (Windows) a few times to zoom out.
Press the spacebar and drag to the left to see more of the Icons artboard to the right of the circles. You can also drag on a trackpad with two fingers to pan in the document window.
Select the Ellipse tool (
 ) in the toolbar. Shift-drag to create a circle on the artboard. As you drag, pay attention to Width and Height in the Property Inspector. When you see an approximate width of 20 and height of 20, release the mouse button and then the key.
Deselect the Fill option in the Property Inspector to remove the fill.
Click the Border color to show the Color Picker. Click the white color you saved previously to apply it to the border. Press the Esc key to hide the panel.
Change Border Size to 4 and press Return or Enter.
Click the Outer Stroke button (
 ) to align the border to the outside of the shape.
By default, borders are aligned to the inside of paths in Adobe XD. Next you’ll draw the handle of the search icon.
Press Command+Shift+A (macOS) or Ctrl+Shift+A (Windows) to deselect.
Select the Line tool (
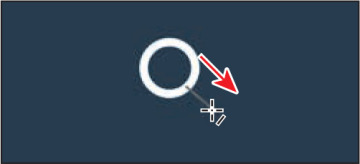
 ) in the toolbar on the left and Shift-drag to make a small angled line, as you see in the figure. This will be the handle of the magnifying glass.
Change the border color to white, change the border size to 4, and press Return or Enter. Click the Round Cap button (
 ) to round the ends of the line.
Select the Select tool and drag across both objects and press Command+G (macOS) or Ctrl+G (Windows) to group them.
Rounding corners
When it comes to rectangles, you can easily round all of the corners of a rectangle at once or each individually. In this next section, you’ll create a rounded-corner rectangle that will become part of an icon.
With the Select tool (
 ) selected, zoom out by pressing Command and – (macOS) or Ctrl and – (Windows).
To zoom in or out you can also pinch using a trackpad or Option-scroll/Alt-scroll using a mouse.
Select the Rectangle tool (
 ) in the toolbar and Shift-drag to create a square next to the search icon you just created. Release the mouse button and then the key when it shows an approximate width of 30 and height of 30 in the Property Inspector.
Deselect the Border option in the Property Inspector to remove the border.
For the next step, you may need to zoom in to see the corner radius widgets.
Drag any one of the corner radius widgets (
 ) toward the center of the shape to round all of the corners at once. Drag as far as you can to make a circle.
Next, you’ll round corners independently on a shape.
To duplicate the circle, press Command+D (macOS) or Ctrl+D (Windows). A copy is placed on top of the original.
Press the letter V to select the Select tool and drag the new circle straight down, away from the original, making sure they still overlap a little.
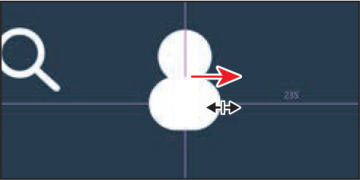
Option-drag (macOS) or Alt-drag (Windows) the middle point on the right side of the shape to the right to make the shape wider from both sides at the same time.
Change the Corner Radius value in the Property Inspector to 0 to remove the rounded corners from the copy.
Option-drag (macOS) or Alt-drag (Windows) the upper-left corner radius widget (
 ) toward the center of the shape. Drag until you see a Top Left Corner Radius value of approximately 30 in the Property Inspector.
Dragging with the Option/Alt key held down allows you to change one of the corner radii. When you change a single corner radius by dragging with the Option/Alt key, the Different Radius For Each Corner option (
 ) becomes selected in the Property Inspector, allowing you to change each corner radius independently. If you find that you can’t change the radius value to 30—maybe you can only change it to 26, for instance—it may be that the rectangle is smaller than it is in the figure. That’s okay.
Change the Corner Radius values in the Property Inspector to 50, 50, 30, and 30 (or similar values) and press Return or Enter to accept the values. Leave the shape selected.
With the Select tool selected, drag across both objects and press Command+G (macOS) or Ctrl+G (Windows) to group them.
Editing shapes
If you’ve ever edited shapes in other Adobe programs, like Illustrator, you’re likely used to switching tools to accomplish shape editing tasks. In Adobe XD, shape editing is easily accomplished with a single tool, the Select tool. In this section, you’ll create and edit shapes for a map icon.
Choose View > Show Square Grid (macOS), or right-click the Icons artboard and choose Show Square Grid (Windows).
Select the Rectangle tool (
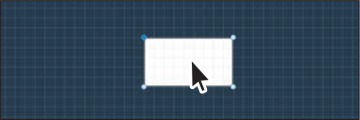
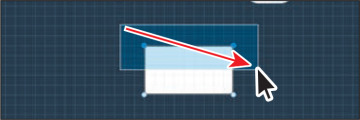
 ) in the toolbar and, starting on the square grid, drag to create a rectangle that is wider than it is tall. Make sure to snap the right edge of the rectangle to the square grid. See the figure. The rectangle in the figure has a height of 40 and a width of 72.
In this case, the square grid can be a useful way to create shapes because it ensures whole-number values for width and height. Every shape you create has a bounding box around it when selected. This is used for transforming the shape in different ways.
Select the Select tool (
 ) and double-click the selected rectangle.
Double-clicking an object enters Path Edit mode, which allows you to edit the anchor points of the object. At this point, you could select existing anchor points and edit or delete them and add new anchor points, but you can’t move or transform the entire shape.
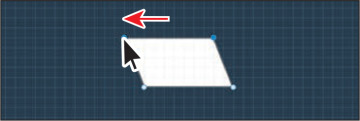
Drag across the top two anchor points to select them both. You could have also pressed the Shift key and clicked both anchor points to select them.
Drag one of the anchor points to the left, keeping it in line with the original position of the anchor points. Snap the anchor point you are dragging to the square grid.
Press the Esc key to exit Path Edit mode. The bounding box is now showing again, and the anchor points are hidden.
With the shape still selected, move the pointer just off one of the corners. When the pointer changes (
 ), Shift-drag clockwise to rotate the shape. When you see 90 in the Rotation field of the Property Inspector, release the mouse button and then the Shift key.
With the Select tool (
 ) and the shape still selected, press Command+D (macOS) or Ctrl+D (Windows) to paste a copy right on top of the original.
Next, you’ll flip the shape copy.
Click the Flip Horizontally button (
 ) in the Property Inspector to flip the shape.
Drag the shape you just flipped to the right. When there is a gap of 3 pixels between the shapes, stop dragging and release the mouse button. Aqua alignment guides appear, indicating it is still aligned horizontally with the original shape.
Option-drag (macOS) or Alt-drag (Windows) the shape on the left to the right to make a copy. When it looks like the figure, release the mouse button and then the key.
Drag across all three shapes and press Command+G (macOS) or Ctrl+G (Windows) to group them together and make a map icon.
Deselect the Border option in the Property Inspector to remove the border.
Combining shapes
Like many other drawing applications, Adobe XD offers several Boolean operations for combining shapes in different ways. There are four Boolean operations you can choose from: Add, Subtract, Intersect, and Exclude Overlap. Using Boolean operations can be very useful for creating more complex artwork from simpler shapes. To me, the best part of combining shapes using Boolean operations in Adobe XD is the ability to edit each individual shape, even after multiple shapes have been combined. Next, you’ll combine shapes to create a map pin icon.
Zoom out a bit by pressing Command and – (macOS) or Ctrl and – (Windows) a few times.
Select the Ellipse tool (
 ) in the toolbar. In a blank area of the artboard, Shift-drag to create a circle. Don’t worry about the size for now. Just make it large enough to work with. Release the mouse button and then the key.
With the Select tool (
 ) and the shape still selected, press Command+D (macOS) or Ctrl+D (Windows) to paste a copy right on top of the original.
Option+Shift-drag (macOS) or Alt+Shift-drag (Windows) a corner to make the circle smaller.
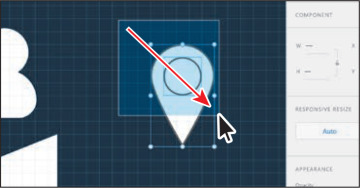
Click the larger circle to select it. Double-click the shape to enter Path Edit mode and see the anchor points. See the first part of the following figure.
Click the anchor point on the bottom of the circle to select it. You should see little direction handles appear on either side of the point. These control the curve of the path on either side of the anchor point.
For the next step, if you don’t see the aqua alignment guide, you may need to zoom in.
Drag the bottom anchor point down to reshape the circle. As you drag, a vertical aqua alignment guide should appear when the point is aligned with the anchor point at the top of the shape. Drag down until it looks good to you.
Double-click the same point to convert it to a corner point (not a curve).
In Adobe XD, you can easily edit existing shapes without having to switch tools from the Select tool. Later in this lesson, in the section “Drawing with the Pen tool,” you’ll learn about creating and editing paths with the Pen tool and the Select tool.
Press the Esc key to exit Path Edit mode. You should see the bounding box around the shape, not the anchor points on the shape. Drag across both shapes to select them.
Click the Subtract button (
 ) in the Property Inspector to subtract the smaller circle from the shape under it.
Look in the Property Inspector and notice that the Subtract option is on. The Boolean operations, such as Subtract, can be toggled off later, returning the shapes to two separate shapes.
Deselect the Border option in the Property Inspector to remove the border.
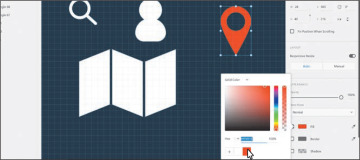
Click the Fill color box in the Property Inspector to show the Color Picker. Select the orange-red color you saved, at the bottom of the panel, to apply it.
Press the Esc key to hide the color picker.
Editing combined shapes
No matter which of the operations you use for combining shapes, you can always edit the underlying shapes you started with. Next, you’ll edit shapes from the map pin icon you just created.
Double-click the newly combined pin icon to enter editing mode for the selected shapes.
Click in the smaller circle in the center to select it, if it’s not already selected.
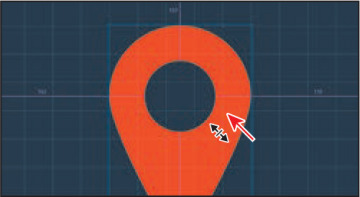
Notice the blue outline around the entire pin icon. When you double-click combined shapes, the outline appears, indicating the combined shapes that you are editing. You can see the outline in the following figure.
Zoom in to the pin icon.
Option+Shift-drag (macOS) or Alt+Shift-drag (Windows) a corner to make the circle even smaller. Release the mouse button and then the keys.
Press the Esc key to stop editing the individual shapes, and select the entire combined pin icon.
Choose Object > Path > Convert To Path (macOS) or, on Windows, right-click and choose Path > Convert To Path.
The Convert To Path command is useful if you want to make the path combination permanent (you can no longer edit the individual paths) and also to be able to edit the anchor points of the combined path.
Press Command+S (macOS) or Ctrl+S (Windows) to save the file.
Aligning content to the pixel grid
When you’re creating vector content in Adobe XD or bringing in vector content from other sources, it’s important that the images you export later look sharp. To create pixel-accurate designs, you can align artwork to the pixel grid using the Align To Pixel Grid option. The pixel grid is an invisible grid of 72 squares per inch. Align To Pixel Grid is an object-level property that enables an object to have its vertical and horizontal paths aligned to the pixel grid. Next you’ll draw an arrow icon and align it to the pixel grid.
Choose View > Hide Square Grid (macOS) or, on Windows, right-click the artboard and choose Hide Square Grid.
With the square grid off, content you create will no longer be aligned to the grid.
Press the spacebar and drag to the left to see more of the Icons artboard to the right of the other icons. You can also drag on a trackpad with two fingers to pan in the document window.
Select the Line tool (
 ) in the toolbar and Shift-drag to make a horizontal line, as you see in the figure. Release the mouse button and then the key.
Press Command+3 (macOS) or Ctrl+3 (Windows) to zoom in to the line.
To deselect the line, press the Esc key.
Now you’ll draw the arrowhead.
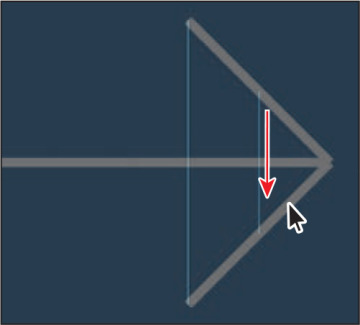
With the Line tool selected, starting on the right end of the path you drew, Shift-drag up and to the left to make a line that is angled at 45 degrees.
Press Command+D (macOS) or Ctrl+D (Windows) to duplicate the line in place. Click the Flip Horizontally button (
 ) in the Property Inspector.
Select the Select tool and drag the flipped line straight down. Aqua alignment guides will appear to help you align it.
Drag across all of the paths and then right- click them and choose Group.
In the Property Inspector, change the border color to white, change the border size to 4, and press Return or Enter. Click the Round Cap button (
 ) to round the ends of the line.
Shift-drag a corner to make it smaller. Drag until you see a width of around 24 in the Property Inspector. Release the mouse button and then the key.
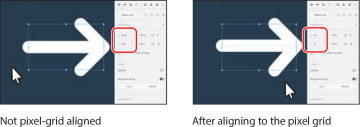
Looking in the Property Inspector, you may see that the Width and Height values are not whole numbers. Next, you’ll align the artwork in the group to the pixel grid, and those values will become whole numbers.
Choose Object > Align To Pixel Grid (macOS) or right-click the selected artwork and choose Align to Pixel Grid.
You probably noticed the subtle shift in the shapes as the paths were aligned to the pixel grid. To give you an idea of what just happened, take a look at the following figure. On the left is artwork that I didn’t align to the pixel grid before I exported it as a PNG; on the right is artwork that is aligned to the pixel grid.
You can clearly see the difference on the horizontal and vertical paths.
Press Command+0 (macOS) or Ctrl+0 (Windows) to see all of the artboards.
Click in a blank area of the gray pasteboard to deselect all.
Press Command+S (macOS) or Ctrl+S (Windows) to save the file.













 ).
).