This chapter is from the book
This chapter is from the book
This chapter is from the book
Simulating Blurred Objects with Widgets
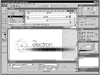
You've decided that you'd like to bring the text into your logo, one line at a time. You could dutifully make each word into a symbol, and then create a motion tween for each word. This works, but gets kind of boring after a while, largely because you are limited to moving the text no faster than your frame rate. The radial gradient blur widget you've just created is about to change all that.
Open the Library panel and select the symbols for the words the, electronic, and conservancy. Open the Library panel popup menu and choose Move To New Folder from the menu. Call your new folder Logo Text.
This simply isolates the text element symbols to help keep your library organized.
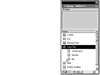
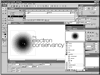
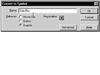
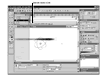
Open the movie clip called TEC-logo and select the three text objects the, electron, and conservancy. Convert them to a symbol (Insert > Convert to Symbol), and call it Ani-text. In the Library panel, double-click on the Ani-text icon to open its timeline for editing. Select all three objects on the stage, then go to Modify > Distribute to Layers. Drag the Radial Gradient symbol to the original (now empty) layer. Rename that layer blurs. Create two more layers, naming one scripts and the other markers.
For those of you who've used Flash before, the Distribute to Layers command (new to Flash MX) is going to be a dream come true. Not only does it automagically put each object you select on an individual layer, but it renames the new layers using the name of the associated symbol. The beauty of using multiple layers in the timeline is that you can isolate related content (or individual symbols) to a unique layer. This makes it much easier to work with objects in Flash. It's a good idea to create a single layer just for frame markers and another for timeline scripts.
Now you'll stagger the words as they appear on the stage. The words themselves will not move at all; we'll simulate their movement with the widget.
Move the starting point of the word the to frame 5, electron to frame 30, and conservancy to frame 60. On the markers layer, create blank keyframes on frames 5, 30, and 60. In the Properties panel, replace the grayed text <Frame Label> in frame 5 with the. Use electron to name frame 30, and conservancy to name frame 60. Move the Radial Gradient symbol from the Library to directly over the word the.
Markers are your friends. Use them to keep track of significant events in the timeline. Later, you'll learn how to use ActionScript commands to jump from marker to marker within a timeline.
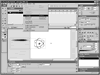
Use the free transform tool or the transform panel to scale the vertical measurement so that it is roughly the height of the word itself. Do not change the width of the blur.
Because we are going to make it appear that the first two words are flying in, we need to make it appear that the motion blur is moving to one side. To do this, you'll use two copies of the blur.
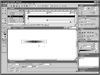
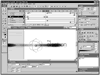
Click on the blur, and press Ctrl+D (Windows) or Command+D (Macintosh) to duplicate it. Scale the horizontal size of the duplicated blur to 50%. Move it so that it is centered horizontally and aligned towards the left edge of the first instance of the blur widget. Select both widgets, press F8 (Insert > New Symbol), and call the new graphic symbol Side Blur.
You can now use the side blur widget to make the text appear as if it is moving in quickly from the side.
On the blurs layer, create a keyframe at frame 4. Select frame 5 and choose Insert > Blank Keyframe (or press F7) to keep the widget from displaying in the rest of the movie. Click on the widget layer in frame 1 in the timeline. Holding down the Shift key to constrain the object, move the widget so that approximately 75% of the object falls off the right edge of the stage. Create a motion tween to move the widget from off the stage to a position just before where it would align with the word the. You may need to adjust the position of the widget at frame 4 so that it doesn't overshoot the word it blurs into.
TIP
A good way to check the motion is to use the onion skin mode (activated by clicking the second of five icons in the row at the bottom of the timeline). Check your work by sliding the red marker on the frame counter back and forth. In animation, this process is called scrubbing the track.
Play this timeline now (press Ctrl+Enter or Command+Return). Because of a combination of persistence of vision and the fact that objects can move faster than the eye can comprehend them, this animation makes it appear that the word the is moving in quickly from the right side of the screen.
NOTE
The reason that animation works in the first place is because of what scientists refer to as persistence of vision, the ability of the human eye to retain one image while the next one is displayed. Computer monitors, televisions, and movie screens all display images. As the image changes, your eye retains the old image just long enough for it to make a smooth transition to the next image, providing the illusion of movement. Animation works just like the old flipbooks you had in grade school—a series of drawings that change gradually are placed on a stack of pages. As the pages are flipped, the image on the page appears to move, or even come to life. Without persistence of vision, there would be no movies, no television, and no computer animation.
Repeat the same process for the word electron.
Because of the difference in the width and height of these two words, you will need to scale the blur widget to correspond to that difference. The electron blur widget should begin at frame 25 and end at frame 29.
Now we'll use the blur widget to create a different effect.
On the blurs layer, press F7 at frame 55 to create a blank keyframe. Click on frame 55, and then drag the original radial blur symbol from the Library panel onto the stage. Center it over the word conservancy, scaling it vertically so that it roughly forms an ellipse around the word. Repeat the process for creating a motion tween, as above.
This time, as you create the motion tween, instead of moving the object in from the side, you'll start with a smaller version and make it zoom in.
Select the scripts layer. On the last frame of the movie, add a keyframe, open the Actions panel, click on the Add button, and select the Stop( ) command.

This creates an ActionScript command to keep this sequence from playing more than once.
Go to the Control menu and select Test Movie to see the final result.
You have now created your first animated logo. Don't forget to save your file! And remember, if you want to compare your results to mine, take a look at Lesson02\ Complete\TEC-logo-FINAL.fla from the CD.
)
)
)
)
)
)
)
)
)