This chapter is from the book
This chapter is from the book
This chapter is from the book
Essential File Management
Now it's time to address the most common things you do with files—renaming, deleting, copying, and moving them. Virtually all these activities can now be accessed directly from the activity center pane in any Windows folder.
Renaming Files and Folders
Naming your files and folders in a way that somehow describes their contents is a good idea. Sometimes, however, you may need to change the name of a file or folder. Fortunately, it's relatively easy to rename an item.
To rename a file or folder, just follow these steps:
- Select the file or folder you want to rename.
- Click Rename This File from the File Tasks list (or Rename This Folder from the Folder Tasks list).
- The filename is now highlighted. Type a new name for your folder (which overwrites the current name) and press Enter.
Deleting Files and Folders
Because disk space is a resource you don't want to waste, you should delete files and folders you no longer need.
- Select the file or folder you want to delete.
- Click Delete This File from the File Tasks list (or Delete This Folder from the Folder Tasks list).
Restoring Deleted Files
If you delete a file and later decide you made a mistake, you're in luck. For a short period of time, Windows XP stores deleted files in a special file called the Recycle Bin. If you've recently deleted a file, it should still be in the Recycle Bin.
This is how you can restore a deleted file:
- Open the Recycle Bin by clicking its icon on the desktop.
- When the Recycle Bin opens (see
Figure 3.16
), select the file or folder you want to restore.
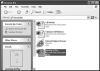
Figure 3.16 Bring a deleted file back to life from the Recycle Bin.
- Click Restore This Item from the Recycle Bin Tasks list.
)
Managing the Recycle Bin
The Recycle Bin is where deleted files are stored after you delete them. Files do not stay in the Recycle Bin indefinitely, however.
By default, the deleted files in the Recycle Bin can occupy 10 percent of your hard disk space. When you've deleted enough files to exceed this 10 percent, the oldest files in the Recycle Bin are automatically and permanently deleted from your hard disk.
If you want to manually remove files from the Recycle Bin, follow these steps:
- Click the Recycle Bin icon on your desktop.
- When the Recycle Bin opens, select Empty the Recycle Bin from the Recycle Bin Tasks list.
- When the Confirm File Delete dialog box appears, click Yes to completely erase the files, or click No to continue storing the files in the Recycle Bin.
Copying Files and Folders
Copying a file or folder is how you place a copy of it at another location, while still keeping the original where it is.
Copying is different than moving. When you copy an item, the original remains. When you move an item, the original is no longer present in the original location.
This is how you copy a file or folder with Windows XP:
- Select the file or folder you want to copy.
- Click Copy This File from the File Tasks list (or Copy This Folder from the Folder Tasks list).
- When the Copy Items dialog box appears, navigate to and select the new location for the item, and then click the Copy button. (If you want to copy the item to a new folder, click the New Folder button first.)
Moving Files and Folders
Moving a file or folder is different than copying it. Moving cuts the item from its previous location and places it in a new location. Copying leaves the original item where it was and creates a copy of the item elsewhere.
In other words, when you copy something you end up with two of it. When you move something, you only have the one thing.
To move a file or folder, follow these steps:
- Select the file or folder you want to move.
- Click Move This File from the File Tasks list (or Move This Folder from the Folder Tasks list).
- When the Move Items dialog box appears, navigate to and select the new location for the item, and then click the Move button. (If you want to move the item to a new folder, click the New Folder button first.)
Unprotecting Read-Only Files
If you have a file that you want to edit or delete but you can't, chances are the file is designated as read-only.
Read-only files can't be changed or deleted. You can read these files, but you can't touch them.
If you need to edit or delete a read-only file, you need to change that file's attributes—such as whether it's hidden, or read-only. Follow these steps:
- Select the file or folder you want to change and select File, Properties.
- When the Properties dialog box appears (see
Figure 3.17
), select the General tab and then check or uncheck the desired attributes. For example, to make a read-only file editable, uncheck the Read-only check box.
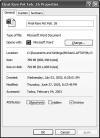
Figure 3.17 You can change the attributes of a file from the Properties dialog box.
- After you've made the desired changes, click OK.
)
You can change the following file attributes in the Properties dialog box:
- Read-only files are files you can read but not edit or delete.
- Hidden files are files—typically sensitive system files—that you normally can't view from My Computer.
- Archive files are files that have changed since last backed up.